OpenAI、Pinecone、Airbyte、Langchain を活用したデータとの対話方法
LangChain と Airbyte の連携により、LLM を活用したデータ分析や QA ボット構築の複雑な前処理プロセスが大幅に簡素化され、実用性が向上しました。
キーポイント
Airbyte ベクトルデータベース統合の発表
Airbyte が新たにベクトルデータベース宛先(destination)をサポートし、LangChain を介したデータ抽出と埋め込み処理を自動化可能にしました。
手動オーケストレーションの不要化
従来のチャンク分割や埋め込み計算を手動で実装する必要がなくなり、ソースから直接ベクトルデータベースへデータを流せるようになりました。
多様なデータソースと統合機能
Airbyte の数百種類のデータソースと LangChain の 50 以上の埋め込み・ベクトルストアプロバイダーを組み合わせ、柔軟な RAG アーキテクチャが構築できます。
重要な引用
Their new vector database destination makes it really easy for data to retrieve relevant context for question answering use cases via Langchain.
removes the need to orchestrate chunking and embedding manually
combines the hundreds of sources in AirByte with their robust scheduling and orchestration framework
影響分析・編集コメントを表示
影響分析
この連携により、企業は複雑なデータ前処理コードを書かずに、既存の非構造化データを即座に LLM が理解可能な形式で利用できるようになります。これにより、RAG(検索拡張生成)システムの開発期間が短縮され、より多くのチームが実用的な AI アプリケーションを迅速にプロトタイプ化・展開できる環境が整います。
編集コメント
データエンジニアリングと LLM アプリ開発の境界を曖昧にする重要な連携であり、RAG システムの実装コストを劇的に下げる画期的なアップデートです。
*エディターズノート:このブログ記事は Airbyte との共同執筆です。彼らの新しいベクトルデータベース宛先 new vector database destination により、LangChain を介して質問応答ユースケースで関連するコンテキストをデータが取得することが非常に容易になりました。私たちは、多様なデータソースを統合し、かつ自動的に最新の状態を維持する方法を求めるチームが増えているのを目にしています。これはそれを達成するための素晴らしい方法です!*
*ここで強調された特定のユースケース以外にも、この統合については非常に興奮しています。これは AirByte の数百ものソースと、その堅牢なスケジューリングおよびオーケストレーションフレームワークを組み合わせ、LangChain の高度な変換ロジックを活用するとともに、LangChain の 50 以上の埋め込みプロバイダー統合(embedding provider integrations)および 50 以上のベクトルストア統合(vectorstore integrations)を利用するものです。*
*すべての API、オープンな機能リクエスト、過去の Slack 会話に精通した Slack 向けのコネクタ開発サポートボットを構築する方法を学びましょう*
前回の記事では、Dagster と Airbyte を活用して LLM(大規模言語モデル)をサポートするユースケースをどのように実現できるかについて解説しました。新たに導入された ベクトルデータベース宛先 により、このプロセスはさらに容易になりました。これは、チャンキング(データの分割)や埋め込み(エンベディング)を手動でオーケストレーションする必要がなくなるためです。代わりに、ソースを Airbyte コネクションを通じて直接ベクトルデータベースに接続することができます。
本チュートリアルでは、構造化されていないデータを理解するためにベクトルデータベースと LLM をどのように活用するかという、実世界のユースケースを実践的に解説します。このチュートリアルの終了後には、以下のことができるようになります:
- Airbyte を使用して多様なソースから構造化されていないデータを抽出する方法
- 効率的にデータをベクトルデータベースへロードし、その過程で LLM での利用に適したデータ準備を行う方法(Airbyte の活用)
- ベクトルデータベースを LLM に統合し、独自のデータに関する質問に答えることができるようにする方法

構築するもの
これが実際にどのように見えるかをより明確に示すために、Airbyte 自体に関連する事例を使用しましょう。
Airbyte は、ユーザーが独自のコネクタを開発して、あらゆる API や内部システムからデータを抽出することを可能にする、非常に拡張性の高いシステムです。コネクタ開発者にとって有益な情報は、以下の異なる場所で確認できます:
- 公式のコネクタ開発ドキュメントウェブサイト
- 既存の機能リクエスト、既知の不具合、進行中の作業を文書化した Github のイシュー
- コミュニティ Slack のヘルプチャンネル
この記事では、これら多様な情報源をすべて統合し、コネクタ開発に関する情報にアクセスするための単一のチャットインターフェースを提供する方法について説明します。これは、コードベースやドキュメントについての質問に自然な英語で回答し、過去の会話も参照できるボットです:

**これらの例では、ドキュメントウェブサイトおよび既存の Github イシューからの情報が、単一の回答に統合されています。
前提条件
このプロセス全体を遂行するには、以下のアカウントが必要です。ただし、独自のソースを使用し、OpenAI のアカウント以外を回避するためにローカルベクトルストアを利用することも可能です:
- ソース固有のアカウント
- Apify アカウント
- Github アカウント
- Slack アカウント
- デスティネーション固有のアカウント
- OpenAI アカウント
- Pinecone アカウント
- Airbyte インスタンス(ローカルまたはクラウド)
ステップ 1 - GitHub イシューの取得
Airbyte の機能追跡およびバグ追跡は、Airbyte オープンソースリポジトリの GitHub イシュートラッカー で行われています。これらのイシューには、人々が定期的に参照する必要がある重要な情報が含まれています。
GitHub イシューを取得するには、Github コネクタを使用して新しいソースを作成してください。

Airbyte Cloud をご利用の場合は、「GitHub アカウントの認証」を使用して簡単に認証できます。それ以外の場合は、右側のドキュメントにある パーソナルアクセストークン の設定方法に関する手順に従ってください。
次に、イシューのカットオフ日付を設定し、同期するリポジトリを指定します。ここでは、Airbyte メインリポジトリからの最新のイシューを同期するために「2023-07-01T00:00:00Z」と「airbytehq/airbyte」を使用します。

ステップ 2 - ベクトルデータベースへの読み込み
これで最初のデータソースは準備整いましたが、Airbyte はまだデータをどこに配置すべきかを知りません。次のステップは宛先を設定することです。そのためには、「Pinecone」コネクタを選択してください。Airbyte がデータのベクトル化を可能にするために、いくつかの前処理を自動で行います:
- テキストフィールドとメタデータフィールドを分離し、レコードを複数のドキュメントに分割して、各ドキュメントが単一のトピックに焦点を当てたものとし、質問応答に使用される大規模言語モデル(LLM)のコンテキストウィンドウ内にテキストが収まるようにします。
- 設定された埋め込みサービスを使用して、すべてのドキュメントのテキストを埋め込み、ベクトルに変換して類似度検索を行えるようにします。
- ドキュメントをベクトルデータベースにインデックス付け(アップロード)します。これは、埋め込みサービスから取得したベクトルとメタデータオブジェクトを一緒にアップロードする処理です。
Pinecone 以外にも、Airbyte は Weaviate、Milvus、Qdrant、Chroma へのデータ読み込みをサポートしています。
Pinecone を使用する場合は、無料トライアルアカウント にサインアップし、スターターポッドを使用してインデックスを作成してください。OpenAI の埋め込みベクトルのサイズが 1536 であるため、次元数は 1536** に設定します。

インデックスが準備できたら、Airbyte 内でベクトルデータベースの宛先を設定してください:
- チャンクサイズを1000に設定してください(サイズは文字数ではなくトークンの数を指すため、これは約4KBのテキストに相当します。最適なチャンキングは、取り扱うデータによって異なります)
- 埋め込み対象となるフィールドとしてテキストフィールドとして扱われるレコードフィールドを設定してください。それ以外のフィールドはメタデータとして処理されます。今回は、Githubソースのイシューストリームにおいて関連する「title」と「body」をこれに設定してください
- 埋め込みサービスを実行するためのOpenAI APIキーを設定してください。APIキーは platform.openai.com/account ページの「API keys」セクションで確認できます
- インデックス作成ステップでは、Pinecone UIからインデックス名、環境、およびAPIキーをコピーしてください。APIキーと環境情報は、UI内の「API Keys」セクションで見つけることができます
ステップ 3 - コネクションの作成
宛先が正常に設定されたら、Github ソースからベクトルデータベース宛先へのコネクションを設定します。構成フローでは、既存のソースと宛先を選択してください。コネクションを構成する際は、「issues」ストリームのみを使用するように注意してください。これが私たちが関心を持っている対象です。
補足:Airbyte を使用すると、本番環境でのこの同期をより効率的に行うことができます。
- メタデータを焦点に保つために、ストリームの名前をクリックして同期したい個々のフィールドを選択できます。例えば、「assignee」や「milestone」フィールドがあなたにとって全く関係ない場合、チェックを外すことで宛先への同期が行われなくなります。
- 同期モードを使用することで、ベクトルデータベース内のレコードを重複排除しながらインクリメンタルに問題を同期でき、検索結果に古いデータが表示されることがなくなります

**すべてがうまくいっていれば、ベクトルストア宛先を介して Github から Pinecone へデータが同期されるコネクションができているはずです。同期に数分ほど時間をかけてください。最初の実行が完了したら、Pinecone インデックス管理ページを確認し、クエリ可能な多数のインデックス化されたベクトルが準備されていることを確認できます。
各ベクトルには、宛先設定で「テキストフィールド」として言及されていないフィールドを埋めたメタデータオブジェクトが関連付けられています。これらのフィールドは、埋め込まれたテキストとともに取得され、後のセクションでチャットボットによって活用されます。これが Pinecone から取得されたメタデータを備えたベクトルの例です:
{
      "id": "599d75c8-517c-4f37-88df-ff16576bd607",
      "values": [0.0076571689, ..., 0.0138477711],
      "metadata": {
        "_ab_stream": "issues",
        "_ab_record_id": 1556650122,
        "author_association": "CONTRIBUTOR",
        "comments": 3,
        "created_at": "2023-01-25T13:21:50Z",
        // ...
        "text": "...The acceptance-test-config.yml file is in a legacy format. Please migrate to the latest format...",
        "updated_at": "2023-07-17T09:20:56Z",
      }
}
以降の実行では、Airbyte は前回同期以降に変更された issue に対してのみ再埋め込みとベクトルの更新を実行します。これにより、後続の実行が高速化されつつ、データが常に最新かつ利用可能に保たれます。
ステップ4 - チャットインターフェース
データは準備できました。次に、自然言語での質問に回答できるよう、LLM(大規模言語モデル)と接続しましょう。埋め込みにはすでに OpenAI を使用しているため、最も簡単なアプローチは、質問応答にも同じく OpenAI を利用することです。
すべての要素を統合するオーケストレーションフレームワークとして Langchain を使用します。
まず、ローカル環境でいくつかの pip パッケージをインストールしてください:
pip install pinecone-client langchain openai
ここで示す基本的な機能は、以下のように動作します:
- ユーザーが質問を行う
- その質問は、ベクトルデータベース内でベクトル生成に使用されたのと同じモデル(この場合は OpenAI)を使用して埋め込まれる
- 質問ベクトルがベクトルデータベースに送信され、類似したベクトルを持つドキュメントが返される。ベクトルはテキストの意味を表すため、質問とそれに対する回答は非常に類似したベクトルを持ち、関連するドキュメントが返される
- 関連メタデータを含むすべてのドキュメントのテキストを単一の文字列に結合し、ユーザーが行った質問および提供された文脈に基づいてユーザーの質問に答えるよう指示とともに LLM に送信する
- LLM は提供された文脈に基づいて質問に回答する
- その回答がユーザーに表示される
このフローは通常 retrieval augmented generation と呼ばれます。Langchain フレームワークの RetrievalQA クラスは、基本的な対話機能をすでに実装しています。私たちの質問応答ボットの最も単純なバージョンでは、ベクトルストアと使用する LLM を提供するだけで十分です。
chatbot.py
import os
import pinecone
from langchain.chains import RetrievalQA
from langchain.embeddings import OpenAIEmbeddings
from langchain.llms import OpenAI
from langchain.vectorstores import Pinecone
embeddings = OpenAIEmbeddings()
pinecone.init(api_key=os.environ["PINECONE_KEY"], environment=os.environ["PINECONE_ENV"])
index = pinecone.Index(os.environ["PINECONE_INDEX"])
vector_store = Pinecone(index, embeddings.embed_query, "text")
qa = RetrievalQA.from_chain_type(llm=OpenAI(temperature=0), chain_type="stuff", retriever=vector_store.as_retriever())
print("Connector development help bot. What do you want to know?")
while True:
query = input("")
answer = qa.run(query)
print(answer)
print("\nWhat else can I help you with:")
このスクリプトを実行するには、OpenAI と Pinecone の認証情報を環境変数として設定する必要があります:
export OPENAI_API_KEY=...
export PINECONE_KEY=...
export PINECONE_ENV=...
export PINECONE_INDEX=...
python chatbot.py
これは一般的には動作しますが、いくつかの制限があります。デフォルトでは、LLM(大規模言語モデル)のプロンプトに渡されるのはテキストフィールドのみであるため、テキストの文脈が何なのかを把握できず、また情報源への参照も返すことができません:
Connector development help bot. What do you want to know?
セッショントークンを返すログインエンドポイント経由で認証する方法についての情報を教えていただけますか?
はい、GenericSessionTokenAuthenticator は UI でサポートされるはずです[...]
ここから、チャットボットの最適化のために多くの微調整を行う必要があります。例えば、メタデータフィールドに基づいてより多くの情報を含まれるようにプロンプトを改善し、私たちのユースケースに特化したものにするなどです:
prompt_template = """あなたは、Connector Builder という製品の GitHub イシューとドキュメントページ上で動作する質問応答ボットです。ドキュメントページは機能の概要を記述し、イシューは将来の計画やバグを記録しています。以下の文脈を使用して、末尾にある質問に回答してください。答えがわからない場合は、ただ知らないと言うだけで、無理に作り上げようとしないでください。必ず情報の出典(該当する場合は GitHub イシュー番号)を明記してください。
もし答えがまだクローズされていない GitHub イシューに基づいている場合、回答に「このイシューは未クローズです - 機能はまだリリースされていない可能性があります」と追加してください。
{context}
質問:{question}
有益な回答:"""
prompt = PromptTemplate(
template=prompt_template, input_variables=["context", "question"]
)
class ConnectorDevelopmentPrompt(PromptTemplate):
def format_document(doc: Document, prompt: PromptTemplate) -> str:
if doc.metadata["_ab_stream"] == "issues":
return f"GitHub イシューからの抜粋:{doc.page_content}, イシュー番号:{doc.metadata['number']}, イシュー状態:{doc.metadata['state']}"
else:
return super().format_document(doc, prompt)
document_prompt = ConnectorDevelopmentPrompt(input_variables=["page_content"], template="{page_content}")
qa = RetrievalQA.from_chain_type(llm=OpenAI(temperature=0), chain_type="stuff", retriever=vector_store.as_retriever(), chain_type_kwargs={"prompt": prompt, "document_prompt": document_prompt})
完全なスクリプトは Github でも確認できます。
この改訂版の RetrievalQA チェイン(文脈取得 QA チェイン)は、コンテキストが取得された後に LLM に送信されるプロンプトをカスタマイズするものです:
- 基本のプロンプトテンプレートは、この質問が何に関するものかというより広い文脈を設定します(以前は LLM はドキュメントから推測する必要がありました)。
- また、ドキュメントをプロンプトに追加する方法も変更しています。デフォルトではテキストのみが追加されますが、ConnectorDevelopmentPrompt 実装ではデータの出所となるコンテキストを設定し、関連するメタデータをプロンプトに追加することで、LLM がテキストだけでなくより多くの情報に基づいて回答できるようにしています。
Connector development help bot. What do you want to know?
ログインエンドポイント経由でセッショントークンを返す認証方法について教えてください。
ログインエンドポイント経由でセッショントークンを返す認証には、GenericSessionTokenAuthenticator を使用できます。これは Connector Builder のドキュメントに記載されており、リクエストフローの機能例(例えば metabase など)も紹介されています。この問題はまだクローズされておらず、機能がまだリリースされていない可能性があります(Github issue #26341)。
Step 5 - Put it on Slack
これまでのところ、このヘルパーはローカル環境でのみ使用可能です。しかし、Python の slack sdk を使用すれば、これを Slack ボット自体に変換するのは容易です。
そのためには、まず Slack の「App」を設定する必要があります。https://api.slack.com/apps にアクセスし、マニフェスト here に基づいて新しいアプリを作成してください(これにより、手動で権限を設定する手間が省けます)。アプリの設定が完了したら、統合したいワークスペースにインストールします。そうすると、「Bot User OAuth Access Token」が発行されるので、これをメモしておきます。その後、アプリの「Basic information」ページへ移動し、「App-Level Tokens」までスクロールして新しいトークンを作成してください。この「app level token」もメモしておいてください。
通常の Slack クライアント内では、チャンネル名をクリックして「Integrations」タブに移動することで、アプリを Slack チャンネルに追加できます:

これで、Slack アプリはユーザーからの問い合わせに回答するための「ping」を受け取る準備が整いました。次のステップは、Python コード内から Slack を呼び出すことです。そのため、まず Python クライアントライブラリをインストールする必要があります:
pip install slack_sdk
その後、既存のチャットボットスクリプトに Slack 統合機能を追加できます:
from slack_sdk import WebClient
from slack_sdk.socket_mode import SocketModeClient
from slack_sdk.socket_mode.request import SocketModeRequest
from slack_sdk.socket_mode.response import SocketModeResponse
slack_web_client = WebClient(token=os.environ["SLACK_BOT_TOKEN"])
handled_messages = {}
def process(client: SocketModeClient, socket_mode_request: SocketModeRequest):
if socket_mode_request.type == "events_api":
event = socket_mode_request.payload.get("event", {})
client_msg_id = event.get("client_msg_id")
if event.get("type") == "app_mention" and not handled_messages.get(client_msg_id):
handled_messages[client_msg_id] = True
channel_id = event.get("channel")
text = event.get("text")
result = qa.answer(text)
slack_web_client.chat_postMessage(channel=channel_id, text=result)
return SocketModeResponse(envelope_id=socket_mode_request.envelope_id)
socket_mode_client = SocketModeClient(
app_token=os.environ["SLACK_APP_TOKEN"],
web_client=slack_web_client
)
socket_mode_client.socket_mode_request_listeners.append(process)
socket_mode_client.connect()
print("listening")
from threading import Event
Event().wait()
The full script also be found on Github
スクリプトを実行するには、Slack ボットトークンとアプリトークンの環境変数も追加する必要があります:
export SLACK_BOT_TOKEN=...
export SLACK_APP_TOKEN=...
python chatbot.py
これを実行すると、追加したチャンネル内で開発用ボットアプリケーションをユーザーのように ping できるようになり、ベクトルデータベースから関連するコンテキストを読み込み、LLM(大規模言語モデル)を使用して適切な回答を生成する RetrievalQA チェーンを実行することで質問に答えてくれます:

すべてのコードは Github でも確認できます。
ステップ 6 - 追加のデータソース: ドキュメントウェブサイトのスクレイピング
Github のイシューは有用ですが、開発用ボットに知っておいてほしい情報は他にもあります。
コネクタ開発のためのドキュメントページは、質問に答えるための非常に重要な情報源であるため、必ず含める必要があります。ボットが公開されている情報と同じ情報を保持していることを確実にする最も簡単な方法は、ウェブサイトをスクレイピングすることです。このケースでは、Apify サービスを使用して、スクレイピングとウェブサイトからの構造化されたデータセットへの変換を担当させます。このデータセットは、Airbyte Apify データセットソースコネクタを使用して抽出できます。
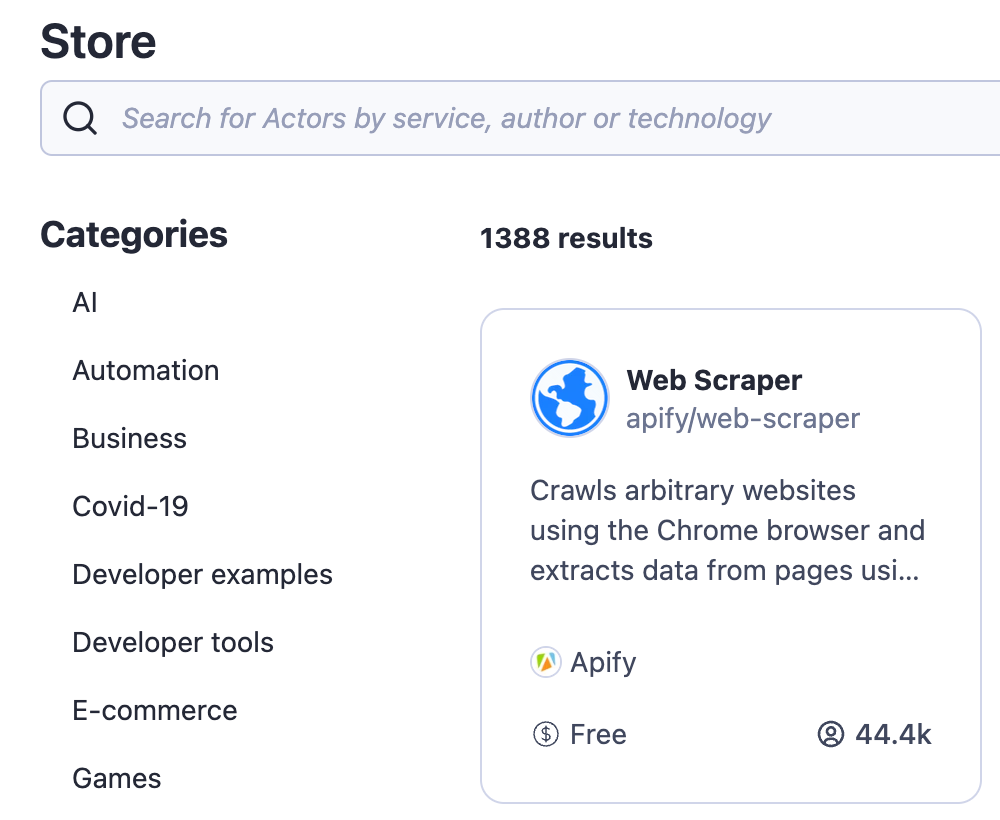
まず、Apify にログインしてストアに移動します。「Web Scraper」アクターをベースとして選択してください。これには必要な機能のほとんどがすでに実装されています
次に、新しいタスクを作成し、ドキュメントのすべてのページをスクレイピングして、ページのタイトルとすべてのコンテンツを抽出するように設定します:
- 開始 URL に https://docs.airbyte.com/connector-development/connector-builder-ui/overview/ を設定し、他のページへのリンクを含むドキュメントのイントロダクションページを指定します
- リンクセレクターに a[href] を設定して、すべてのページからすべてのリンクを追跡できるようにします
- グローブパターンに https://docs.airbyte.com/connector-development/connector-builder-ui/* を設定し、スクレイパーがドキュメント内にとどまり、インターネット全体をクロールしないように制限します
- ページ関数を構成して、ページタイトルとコンテンツを抽出します - この場合、コンテンツ要素は CSS クラス名を使用して見つけることができます
async function pageFunction(context) {
const $ = context.jQuery;
const pageTitle = $('title').first().text();
const content = $('.markdown').first().text();
return {
url: context.request.url,
pageTitle,
content
};
}
このアクターを実行すると、すぐに完了し、ページタイトルとコンテンツの列を持つ扱いやすいデータセットが得られます:

これで、Airbyte を Apify データセットに接続する時が来ました - Airbyte の Web UI に移動し、2 つ目のソースを追加してください - 「Apify Dataset」を選択します

ソースを設定するには、Apify UI の「Run」にある「Storage」タブに表示されているデータセット ID をコピーするだけで十分です。


ソースの設定が完了したら、Github ソースの場合と同様の手順で、Apify データセットからベクトルストアへデータを移動する接続を設定します。関連するテキストコンテンツが異なるフィールドに格納されているため、ベクトルストアの宛先も更新する必要があります。「text fields」に data.pageTitle と data.content を追加して保存してください。
ステップ7 - 追加のデータソース:Slackメッセージの取得
コネクタ開発に関連するもう一つの貴重な情報源は、パブリックヘルプチャンネルからのSlackメッセージです。これらは非常に類似した方法で読み込むことができます。Slackコネクタを使用して新しいソースを作成してください。クラウドを使用する場合、「Slackアカウントを認証」ボタンを使用して簡単に設定できます。それ以外の場合は、右側のドキュメントの指示に従って、必要な権限を持つSlack「アプリ」を作成し、ワークスペースに追加する方法を確認してください。すべてのチャンネルからメッセージを取得しないようにするには、チャンネル名フィルターを正しいチャンネルに設定してください。

ApifyやGithubと同様に、SlackからPineconeへデータを移動するために新しい接続を作成する必要があります。また、関連データが適切に埋め込まれ、類似性検索で正しい結果が得られるように、宛先の「テキストフィールド」にtextを追加してください。
すべてがうまくいっていれば、現在3つの接続が存在し、それぞれPineconeインデックスを使用して、それぞれのソースから中央化されたベクトルストアの宛先へデータを同期しているはずです。
接続の頻度を調整することで、チャットボットのナレッジベースを最新の状態に保つために Airbyte が接続を再実行する回数を制御できます。GitHub や Slack は頻繁に更新され効率的なインクリメンタルアップデートをサポートしているため、これらには日次以上の頻度を設定するのが理にかなっています。ドキュメントページはそれほど頻繁に変更されないため、より低い頻度に設定するか、変更があった場合にのみオンデマンドでトリガーするようにすることもできます。
ソースが増えたので、LLM が適切な回答を形成するために必要なすべての情報を得られるようプロンプトを改善しましょう:
class ContextualRetriever(VectorStoreRetriever):
def _get_relevant_documents(self, query: str, *, run_manager):
docs = super()._get_relevant_documents(query, run_manager=run_manager)
return [self.format_doc(doc) for doc in docs]
def format_doc(self, doc: Document) -> Document:
if doc.metadata["_ab_stream"] == "item_collection":
doc.page_content = f"Excerpt from documentation page: {doc.page_content}"
elif doc.metadata["_ab_stream"] == "issues":
doc.page_content = f"Excerpt from Github issue: {doc.page_content}, issue number: {int(doc.metadata['number']):d}, issue state: {doc.metadata['state']}"
elif doc.metadata["_ab_stream"] == "threads" or doc.metadata["_ab_stream"] == "channel_messages":
doc.page_content = f"Excerpt from Slack thread: {doc.page_content}"
return doc
デフォルトでは、RetrievalQA チェーンは一致する上位 5 つのドキュメントを取得するため、適用可能な場合は回答が複数のソースに基づいて同時に生成されます。
コネクタ開発支援ボット。何を知りたいですか?
ビルダーがサポートする認証方式にはどのようなものがありますか?セッショントークンを返すログインエンドポイントを認証することはできますか?
ビルダーがサポートする認証方式は、Basic HTTP、Bearer Token、API Key、および OAuth です。現在、セッショントークンを返すログインエンドポイントの認証機能はサポートされていませんが、この機能は計画されており、Github のイシュー #26341 で追跡可能です。このイシューはまだクローズされていないため、機能がまだリリースされていない可能性があります。
Basic HTTP、Bearer Token、API Key、および OAuth に関する最初の文は、認証に関するドキュメントページから取得されたものであり、2 番目の文は前述の同じ Github イシューを参照しています。
まとめ
ここでは多くの内容をカバーしました。少し立ち止まって振り返ると、以下の部分を達成できました:
- 複数のソースから非構造化データをロードしてベクトルデータベースに格納するパイプラインを設定する
- 非構造化データに関する一般的な質問にテキストベースで回答できるアプリケーションを実装する
- このアプリケーションを Slack ボットとして公開する
このシステムを通じてデータが流れることで、Airbyte は接続されたソースで変更されたレコードのみを同期し、埋め込みおよびベクトルデータベースサービスへの負荷を最小限に抑えつつ、実行中のパイプラインの現在の状態を一覧表示しながら、ベクトルデータベース内のデータを常に最新の状態に保ちます。
このセットアップは、すべての詳細をカプセル化して動作調整やデータ処理制御の選択肢が限られてしまう単一のブラックボックスサービスを使用しているわけではありません。代わりに、さまざまな場所で容易に拡張可能な複数のコンポーネントで構成されています:
- Airbyte の大規模なソースカタログと、専門的なソースを統合するためのコネクタビルダーにより、単一のツールでベクトルデータベースにほぼあらゆるデータを簡単に読み込むことができます。
- Langchain は非常に拡張性が高く、この単純なアプリケーションを超えて、他のソースからのデータ強化や会話履歴の保持による完全な対話の実装など、LLM を多様な方法で活用することを可能にします。
もし Airbyte を活用して LLM ベースのアプリケーションへデータを転送することに興味があれば、最も重要な機能に優先順位をつけるために、アンケートにご記入ください。
原文を表示
*Editor’s Note: This blog post was written in collaboration with *Airbyte*. Their *new vector database destination* makes it really easy for data to retrieve relevant context for question answering use cases via LangChain. We're seeing more and more teams seek ways to integrate diverse data sources–and keep them up-to-date automatically–and this is a fantastic way to do it! *
*Aside from the specific use case highlighted here, we're also very excited about this integration in general. It combines the hundreds of sources in AirByte with their robust scheduling and orchestration framework, and leverages the advanced transformation logic in LangChain along with LangChain's 50+ embedding provider integrations and 50+ vectorstore integrations.*
*Learn how to build a connector development support bot for Slack that knows all your APIs, open feature requests and previous Slack conversations by heart*
In a previous article, we explained how Dagster and Airbyte can be leveraged to power LLM-supported use cases. Our newly introduced vector database destination makes this even easier as it removes the need to orchestrate chunking and embedding manually - instead the sources can be directly connected to the vector database through an Airbyte connection.
This tutorial walks you through a real-world use case of how to leverage vector databases and LLMs to make sense out of your unstructured data. By the end of this, you will:
- Know how to extract unstructured data from a variety of sources using Airbyte
- Know how to use Airbyte to efficiently load data into a vector database, preparing the data for LLM usage along the way
- Know how to integrate a vector database into your LLM to ask questions about your proprietary data
What we will build
To better illustrate how this can look in practice, let’s use something that’s relevant for Airbyte itself.
Airbyte is a highly extensible system that allows users to develop their own connectors to extract data from any API or internal systems. Helpful information for connector developers can be found in different places:
- The official connector development documentation website
- Github issues documenting existing feature requests, known bugs and work in progress
- The community Slack help channel
This article describes how to tie together all of these diverse sources to offer a single chat interface to access information about connector development - a bot that can answer questions in plain english about the code base, documentation and reference previous conversations:

**In these examples, information from the documentation website and existing Github issues is combined in a single answer.
Prerequisites
For following through the whole process, you will need the following accounts. However, you can also work with your own custom sources and use a local vector store to avoid all but the OpenAI account:
- Source-specific accounts
- Apify account
- Github account
- Slack account
- Destination-specific accounts
- OpenAI account
- Pinecone account
- Airbyte instance (local or cloud)
Step 1 - Fetch Github issues
Airbyte’s feature and bug tracking is handled by the Github issue tracker of the Airbyte open source repository. These issues contain important information people need to look up regularly.
To fetch Github issues, create a new source using the Github connector.
If you are using Airbyte Cloud , you can easily authenticate using the “Authenticate your GitHub account”, otherwise follow the instructions in the documentation on the right side of how to set up a personal access token in the Github UI.
Next, configure a cutoff date for issues and specify the repositories that should be synced. In this case I’m going with “2023-07-01T00:00:00Z” and “airbytehq/airbyte” to sync recent issues from the main Airbyte repository:
Step 2 - Load into vector database
Now we have our first source ready, but Airbyte doesn’t know yet where to put the data. The next step is to configure the destination. To do so, pick the “Pinecone” connector. There is some preprocessing that Airbyte is doing for you so that the data is vector ready:
- Separating text and metadata fields and splitting up records into multiple documents to keep each document focused on a single topic and to make sure the text fits into the context window of the LLM that’s going to be used for question answering
- Embedding the text of every document using the configured embedding service, turning the text into a vector to do similarity search on
- Indexing the documents into the vector database (uploading the vector from the embedding service along with the metadata object)
Besides Pinecone, Airbyte supports loading data into Weaviate, Milvus, Qdrant and Chroma.
For using Pinecone, sign up for a free trial account and create an index using a starter pod. Set the dimensions to 1536** as that’s the size of the OpenAI embeddings we will be using
Once the index is ready, configure the vector database destination in Airbyte:
- Set chunk size to 1000 (the size refers to number of tokens, not characters, so this is roughly 4KB of text. The best chunking is dependent on the data you are dealing with)
- Configure the records fields to treat as text fields which will be embedded. All other fields will be handled as metadata. For now, set it “title” and “body” as these are the relevant feels in the issue stream of the Github source
- Set your OpenAI api key for powering the embedding service. You can find your API key in the API keys section of the platform.openai.com/account page
- For the indexing step, copy over index, environment and api key from the Pinecone UI. You can find the API key and the environment in the “API Keys” section in the UI


Step 3 - Create a connection
Once the destination is set up successfully, set up a connection from the Github source to the vector database destination. In the configuration flow, pick the existing source and destination. When configuring the connection, make sure to only use the “issues” stream, as this is the one we are interested in.
Side note: Airbyte allows to make this sync more efficient in a production environment:
- To keep the metadata focused, you can click on the stream name to select the individual fields you want to sync. For example if the “assignee” or the “milestone” field is never relevant to you, you can uncheck it and it won’t be synced to the destination.
- The sync mode can be used to sync issues incrementally while deduplicating the records in the vector database so no stale data will show up in searches
**If everything went well, there should be a connection now syncing data from Github to Pinecone via the vector store destination. Give the sync a few minutes to run. Once the first run has completed, you can check the Pinecone index management page to see a bunch of indexed vectors ready to be queried.

Each vector is associated with a metadata object that’s filled with the fields that were not mentioned as “text fields” in the destination configuration. These fields will be retrieved along with the embedded text and can be leveraged by our chatbot in later sections. This is how a vector with metadata looks like when retrieved from Pinecone:
{
"id": "599d75c8-517c-4f37-88df-ff16576bd607",
"values": [0.0076571689, ..., 0.0138477711],
"metadata": {
"_ab_stream": "issues",
"_ab_record_id": 1556650122,
"author_association": "CONTRIBUTOR",
"comments": 3,
"created_at": "2023-01-25T13:21:50Z",
// ...
"text": "...The acceptance-test-config.yml file is in a legacy format. Please migrate to the latest format...",
"updated_at": "2023-07-17T09:20:56Z",
}
}On subsequent runs, Airbyte will only re-embed and update the vectors for the issues that changed since the last sync - this will speed up subsequent runs while making sure your data is always up-to-date and available.
Step 4 - Chat interface
The data is ready, now let’s wire it up with our LLM to answer questions in natural language. As we already used OpenAI for the embedding, the easiest approach is to use it as well for the question answering.
We will use Langchain as an orchestration framework to tie all the bits together.
First, install a few pip packages locally:
pip install pinecone-client langchain openai
The basic functionality here works the following way:
- User asks a question
- The question is embedded using the same model used for generating the vectors in the vector database (OpenAI in this case)
- The question vector is sent to the vector database and documents with similar vectors are returned - as the vectors represent the meaning of the text, the question and the answer to the question will have very similar vectors and relevant documents will be returned
- The text of all documents with the relevant metadata are put together into a single string and sent to the LLM together with the question the user asked and the instruction to answer the user’s question based on the provided context
- The LLM answers the question based on the provided context
- The answer is presented to the user
This flow is often referred to as retrieval augmented generation. The RetrievalQA class from the Langchain framework already implements the basic interaction. The simplest version of our question answering bot only has to provide the vector store and the used LLM:
# chatbot.py
import os
import pinecone
from langchain.chains import RetrievalQA
from langchain.embeddings import OpenAIEmbeddings
from langchain.llms import OpenAI
from langchain.vectorstores import Pinecone

embeddings = OpenAIEmbeddings()
pinecone.init(api_key=os.environ["PINECONE_KEY"], environment=os.environ["PINECONE_ENV"])
index = pinecone.Index(os.environ["PINECONE_INDEX"])
vector_store = Pinecone(index, embeddings.embed_query, "text")

qa = RetrievalQA.from_chain_type(llm=OpenAI(temperature=0), chain_type="stuff", retriever=vector_store.as_retriever())

print("Connector development help bot. What do you want to know?")
while True:
    query = input("")
    answer = qa.run(query)
    print(answer)
    print("\nWhat else can I help you with:")
To run this script, you need to set OpenAI and Pinecone credentials as environment variables:
export OPENAI_API_KEY=...
export PINECONE_KEY=...
export PINECONE_ENV=...
export PINECONE_INDEX=...
python chatbot.py
This works in general, but it has some limitations. By default, only the text fields are passed into the prompt of the LLM, so it doesn’t know what the context of a text is and it also can’t give a reference back to where it found its information:
Connector development help bot. What do you want to know?
> Can you give me information about how to authenticate via a login endpoint that returns a session token?


Yes, the GenericSessionTokenAuthenticator should be supported in the UI[...]
From here, there’s lots of fine tuning to do to optimize our chat bot. For example we can improve the prompt to contain more information based on the metadata fields and be more specific for our use case:
prompt_template = """You are a question-answering bot operating on Github issues and documentation pages for a product called connector builder. The documentation pages document what can be done, the issues document future plans and bugs. Use the following pieces of context to answer the question at the end. If you don't know the answer, just say that you don't know, don't try to make up an answer. Always state were you got this information from (and the github issue number if applicable).
If the answer is based on a Github issue that's not closed yet, add 'This issue is not closed yet - the feature might not be shipped yet' to the answer.

{context}

Question: {question}
Helpful Answer:"""

prompt = PromptTemplate(
    template=prompt_template, input_variables=["context", "question"]
)

class ConnectorDevelopmentPrompt(PromptTemplate):
    def format_document(doc: Document, prompt: PromptTemplate) -> str:
        if doc.metadata["_ab_stream"] == "issues":
            return f"Excerpt from Github issue: {doc.page_content}, issue number: {doc.metadata['number']}, issue state: {doc.metadata['state']}"
        else:
            return super().format_document(doc, prompt)

document_prompt = ConnectorDevelopmentPrompt(input_variables=["page_content"], template="{page_content}")
qa = RetrievalQA.from_chain_type(llm=OpenAI(temperature=0), chain_type="stuff", retriever=vector_store.as_retriever(), chain_type_kwargs={"prompt": prompt, "document_prompt": document_prompt})
The full script also be found on Github
This revised version of the RetrievalQA chain customizes the prompts that are sent to the LLM after the context has been retrieved:
- The basic prompt template sets the broader context what this question is about (previously the LLM had to guess from the documents)
- It also changes the way documents are added to the prompt - by default, only the text is added, but the ConnectorDevelopmentPrompt implementation sets the context where the data is coming from and also adds relevant metadata to the prompt so the LLM can base its answer on more than just the text
Connector development help bot. What do you want to know?
> Can you give me information about how to authenticate via a login endpoint that returns a session token?

You can use the GenericSessionTokenAuthenticator to authenticate via a login endpoint that returns a session token. This is documented in the Connector Builder documentation with an example of how the request flow functions (e.g. metabase). This issue is not closed yet - the feature might not be shipped yet (Github issue #26341).
Step 5 - Put it on Slack
So far this helper can only be used locally. However, using the python slack sdk it’s easy to turn this into a Slack bot itself.
To do so, we need to set up a Slack “App” first. Go to https://api.slack.com/apps and create a new app based on the manifest here (this saves you some work configuring permissions by hand). After you set up your app, install it to the workspace you want to integrate with. This will generate a “Bot User OAuth Access Token” you need to note down. Afterwards, go to the “Basic information” page of your app, scroll down to “App-Level Tokens” and create a new token. Note down this “app level token” as well.
Within the regular Slack client, your app can be added to a slack channel by clicking the channel name and going to the “Integrations” tab:
After this, your Slack app is ready to receive pings from users to answer questions - the next step is to call Slack from within python code, so we need to install the python client library:
pip install slack_sdk
Afterwards, we can extend our existing chatbot script with a Slack integration:
from slack_sdk import WebClient
from slack_sdk.socket_mode import SocketModeClient
from slack_sdk.socket_mode.request import SocketModeRequest
from slack_sdk.socket_mode.response import SocketModeResponse

slack_web_client = WebClient(token=os.environ["SLACK_BOT_TOKEN"])

handled_messages = {}

def process(client: SocketModeClient, socket_mode_request: SocketModeRequest):
    if socket_mode_request.type == "events_api":
        event = socket_mode_request.payload.get("event", {})
        client_msg_id = event.get("client_msg_id")
        if event.get("type") == "app_mention" and not handled_messages.get(client_msg_id):
            handled_messages[client_msg_id] = True
            channel_id = event.get("channel")
            text = event.get("text")
            result = qa.answer(text)
            slack_web_client.chat_postMessage(channel=channel_id, text=result)

    return SocketModeResponse(envelope_id=socket_mode_request.envelope_id)

socket_mode_client = SocketModeClient(
    app_token=os.environ["SLACK_APP_TOKEN"],
    web_client=slack_web_client
)
socket_mode_client.socket_mode_request_listeners.append(process)

socket_mode_client.connect()
print("listening")
from threading import Event
Event().wait()
The full script also be found on Github
To run the script, the environment variables for the slack bot token and app token need to be added as environment variables as well:
export SLACK_BOT_TOKEN=...
export SLACK_APP_TOKEN=...
python chatbot.py
Running this, you should be able to ping the development bot application in the channel you added it to like a user and it will respond to questions by running the RetrievalQA chain that loads relevant context from the vector database and uses an LLM to formulate a nice answer:
All the code can also be found on Github
Step 6 - Additional data source: Scrape documentation website
Github issues are helpful, but there is more information we want our development bot to know.
The documentation page for connector development is a very important source of information to answer questions, so it definitely needs to be included. The easiest way to make sure the bot has the same information as what’s published, is to scrape the website. For this case, we are going to use the Apify service to take care of the scraping and turning the website into a nicely structured dataset. This dataset can be extracted using the Airbyte Apify Dataset source connector.
First, log into Apify and navigate to the store. Choose the “Web Scraper” actor as a basis - it already implements most of the functionality we need
Next, create a new task and configure it to scrape all pages of the documentation, extracting the page title and all of the content:
- Set Start URLs to https://docs.airbyte.com/connector-development/connector-builder-ui/overview/ , the intro page of the documentation linking to other pages
- Set Link selector to a[href] to follow all links from every page
- Set Glob Patterns to https://docs.airbyte.com/connector-development/connector-builder-ui/* to limit the scraper to stick to the documentation and not crawl the whole internet
- Configure the Page function to extract the page title and the content - in this case the content element can be found using the CSS class name
async function pageFunction(context) {
    const $ = context.jQuery;
    const pageTitle = $('title').first().text();
    const content = $('.markdown').first().text();

    return {
        url: context.request.url,
        pageTitle,
        content
    };
}
Running this actor will complete quickly and give us a nicely consumable dataset with a column for the page title and the content:
Now it’s time to connect Airbyte to the Apify data set - go to the Airbyte web UI and add your second Source - pick “Apify Dataset”
To set up the Source, you only need to copy the dataset ID that’s shown in the “Storage” tap of the “Run” in the Apify UI
Once the source is set up, follow the same steps as for the Github source to set up a connection moving data from the Apify dataset to the vector store. As the relevant text content is sitting in different fields, you also need to update the vector store destination - add data.pageTitle and data.content** to the “text fields” of the destination and save.
Step 7 - Additional data source: Fetch Slack messages
Another valuable source of information relevant to connector development are Slack messages from the public help channel. These can be loaded in a very similar fashion. Create a new source using the Slack connector. When using cloud, you can authenticate using the “Authenticate your Slack account” button for simple setup, otherwise follow the instructions in the documentation on the right hand side how to create a Slack “App” with the required permissions and add it to your workspace. To avoid fetching messages from all channels, set the channel name filter to the correct channel.
As for Apify and Github, a new connection needs to be created to move data from Slack to Pinecone. Also add text to the “text fields” of the destination to make sure the relevant data gets embedded properly so similarity searches will yield the right results.
If everything went well, there should be three connections now, all syncing data from their respective sources to the centralized vector store destination using a Pinecone index.

By adjusting the frequency of the connections, you can control how often Airbyte will rerun the connection to make sure the knowledge base of our chat bot stays up to date. As Github and Slack are frequently updated and support efficient incremental updates, it makes sense to set them to a daily frequency or higher. The documentation pages don’t change as often, so they can be kept at a lower frequency or even just be triggered on demand when there are changes.
As we have more sources now, let’s improve our prompt to make sure the LLM has all necessary information to formulate a good answer:
class ContextualRetriever(VectorStoreRetriever):
    def _get_relevant_documents(self, query: str, *, run_manager):
        docs = super()._get_relevant_documents(query, run_manager=run_manager)
        return [self.format_doc(doc) for doc in docs]

    def format_doc(self, doc: Document) -> Document:
        if doc.metadata["_ab_stream"] == "item_collection":
            doc.page_content = f"Excerpt from documentation page: {doc.page_content}"
        elif doc.metadata["_ab_stream"] == "issues":
            doc.page_content =  f"Excerpt from Github issue: {doc.page_content}, issue number: {int(doc.metadata['number']):d}, issue state: {doc.metadata['state']}"
        elif doc.metadata["_ab_stream"] == "threads" or doc.metadata["_ab_stream"] == "channel_messages":
            doc.page_content =  f"Excerpt from Slack thread: {doc.page_content}"
        return doc
By default the RetrievalQA chain retrieves the top 5 matching documents, so if it’s applicable the answer will be based on multiple sources at the same time:
Connector development help bot. What do you want to know?
> What different authentication methods are supported by the builder? Can I authenticate a login endpoint that returns a session token?

The authentication methods supported by the builder are Basic HTTP, Bearer Token, API Key, and OAuth. The builder does not currently support authenticating a login endpoint that returns a session token, but this feature is planned and can be tracked in the Github issue #26341. This issue is not closed yet - the feature might not be shipped yet.
The first sentence about Basic HTTP, Bearer Token, API Key and OAuth is retrieved from the documentation page about authentication, while the second sentence is referring to the same Github issue as before.
Wrapping up
We covered a lot of ground here - stepping back a bit, we accomplished the following parts:
- Set up a pipeline that loads unstructured data from multiple sources into a vector database
- Implement an application that can answer plain text questions about the unstructured data in a general way
- Expose this application as a Slack bot
With data flowing through this system, Airbyte will make sure the data in your vector database will always be up-to-date while only syncing records that changed in the connected source, minimizing the load on embedding and vector database services while also providing an overview over the current state of running pipelines.
This setup isn’t using a single black box service that encapsulates all the details and leaves us with limited options for tweaking behavior and controlling data processing - instead it’s composed out of multiple components that be easily extended in various places:
- The large catalog of Airbyte sources and the connector builder for integrating specialized sources allow to easily load just about any data into a vector db using a single tool
- Langchain is very extensible and allows you to leverage LLMs in different ways beyond this simple application, including enriching data from other sources, keeping a chat history to be able to have full conversations and more
If you are interested in leveraging Airbyte to ship data to your LLM-based applications, take a moment to fill out our survey so we can make sure to prioritize the most important features.
関連記事
今日のまとめ
AI日報で今日の重要ニュースをまとめ読み