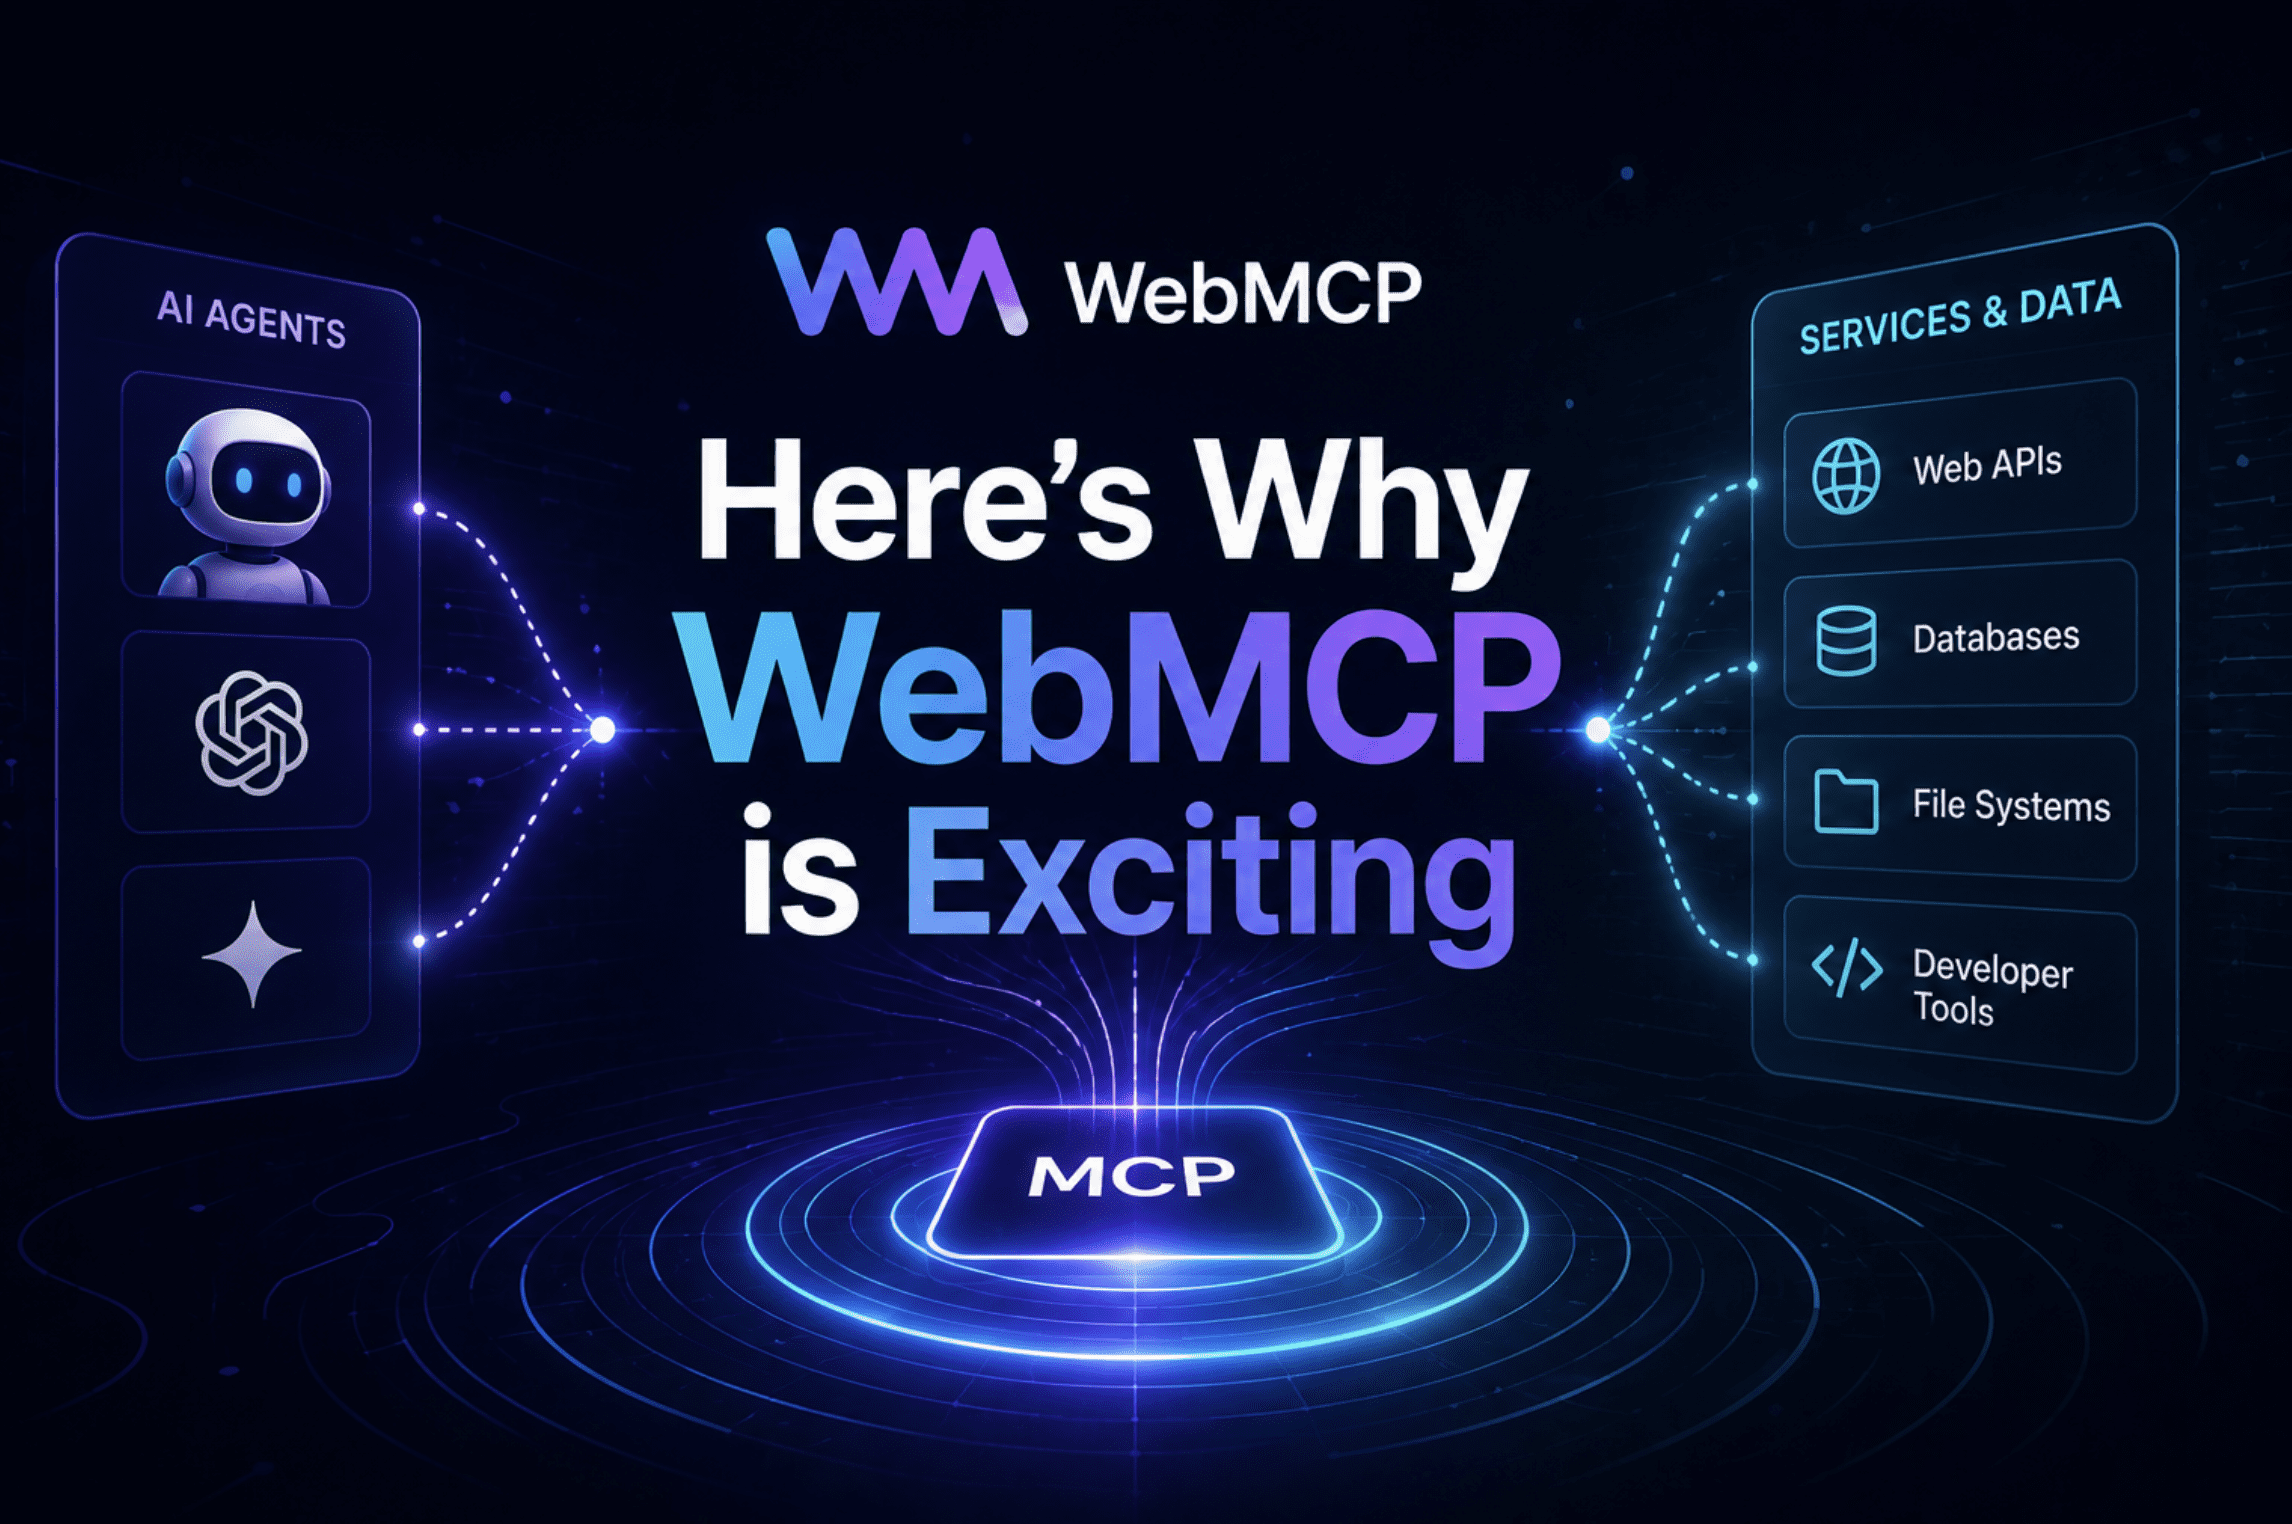
WebMCP がなぜ注目されるのか
KDnuggets は、WebMCP が標準的な MCP サーバーとして機能し、LLM エージェントに構造化されたデータアクセスを提供する可能性について解説している。
キーポイント
WebMCP の基本機能
WebMCP は、ウェブベースの MCP サーバーとして動作し、従来のローカル環境に依存しないリソース共有を可能にする。
LLM エージェントへの統合
この技術により、大規模言語モデルが外部ツールやデータソースをよりシームレスかつ安全に利用できるようになる。
標準化されたプロトコル
Model Context Protocol (MCP) の規格に基づいており、異なる AI ツール間の相互運用性を高める基盤となる。
影響分析・編集コメントを表示
影響分析
この記事は、WebMCP が MCP プロトコルの普及を加速させ、LLM エージェントの構築における環境依存問題を解決する重要なステップであることを示唆しています。しかし、現時点では具体的な実装事例や大規模な採用実績が不足しており、業界全体を変えるほどの即効性のあるインパクトとは言い難い段階です。
編集コメント
WebMCP の登場は、MCP プロトコルの実装範囲を広げる意味で興味深いが、現時点ではまだ初期段階の技術解説であり、具体的なビジネスインパクトや技術的ブレークスルーについてはさらなる検証が必要である。
 image**
# イントロダクション
今年、あなたはブラウザ AI エージェントが動作する様子を目にしたことがあるかもしれません。それはドロップダウンをクリックし、DOM の更新を待ち、スクリーンショットを読み取り、次に何をクリックするかを決定して、再び待ちます。一つのタスクに 5 秒。失敗しうる百の要素があります。CSS クラスが変われば、ドロップダウンのアニメーションが異なれば、ページが遅延読み込みを行えば、すべてが崩壊します。
これはモデルの問題ではありません。モデルは問題ありません。これはプロトコルの問題です。ウェブサイトがエージェントに対して、そのページ上で実際に何ができるのかを伝える標準的な方法がありませんでした。そのため、エージェントはピクセルごとに、クリックごとに推測するしかなかったのです。
WebMCP はその解決策です。これは、ウェブサイトがブラウザベースのエージェントに対して構造化された呼び出し可能なツールを直接公開することを可能にする、提案中のオープンウェブ標準です。エージェントが UI を解釈しようと試みるのではなく、サイトがエージェントに対して、どのような関数が存在し、それらがどのような入力を受け取り、何を返すのかを正確に伝えます。エージェントはもはや推測する必要はありません。
Google は 2026 年 5 月 21 日の Google I/O で WebMCP のオリジントライアルを発表しました。Chrome 149 では、開発者がフラグの背後でテストするだけでなく、実際のトラフィックでも有効化された状態で出荷されています。パブリックウェブ上で何かを構築する場合は、今日からこの仕組みを理解しておく価値があります。
# WebMCP は実際には何なのか
**
WebMCP は、Google と Microsoft が共同開発したブラウザネイティブのエージェントプロトコルです。W3C Web Machine Learning Community Group は 2026 年 2 月に仕様書をドラフトとして公開しました。編集者は、Microsoft の Brandon Walderman と Google の Khushal Sagar および Dominic Farolino です。
核となる考え方はシンプルです。ウェブサイトは document.modelContext インターフェースを通じて、「ツール」として名付けられた型付きの JavaScript 関数や注釈付き HTML フォームを登録します。その後、ブラウザのエージェントはこれらのツールを発見し、その説明と JSON Schemas から機能内容を理解し、マウスクリックをシミュレートするのではなく、直接呼び出すことができます。
これは、誰かにリモコンを手渡すのと、テレビ画面を指でつついてチャンネルを変えようとするのをじっと見守るのとの違いのようなものです。
WebMCP がどこに位置するかを理解するには、それがどこに属さないかを理解することが役立ちます。Anthropic の Model Context Protocol (MCP) はサーバー間プロトコルであり、モデルは stdio または HTTP を介してバックエンドに接続します。Agent-to-Agent (A2A) は異なる AI エージェント間の通信を処理します。WebMCP が扱うのは、これら 2 つがカバーしていないレイヤー、つまりログインしたユーザーがその場にいるクライアントページです。
**
 image**
「Server Layer(サーバー層)」、「Agent Layer(エージェント層)」、「Browser/Page Layer(ブラウザ/ページ層)」を示す3層スタック図
WebMCP はこのギャップを埋めるために以下の 3 つの機能を提供します:
- Discovery: チェックアウトや filter_results などのツールをページがエージェントに登録するための標準的な方法であり、訪問したエージェントが利用可能な機能を把握できるようにします。
- JSON Schema: 各ツールが期待する入力と返却値を明示的に定義し、エージェントが曖昧な UI 要素を解釈する際に発生するハルシネーション(幻覚)を削減します。
- State: ページの状態の変化に応じてツールを動的に登録・解除できるため、エージェントは常にその時点で利用可能なアクションを知ることができます。
# 従来の方法がいかに破綻していたか
WebMCP の登場以前、ブラウザエージェントには主に 2 つの選択肢しかありませんでした。1 つ目はビジョンベースの操作(vision-based actuation)、2 つ目は DOM スクレイピングです。ビジョンベースの操作とは、エージェントがスクリーンショットを撮影し、それをマルチモーダルモデルに送信してクリックすべき座標を受け取り、実際にクリックし、DOM の更新を待ってから再度スクリーンショットを撮影するという手順を繰り返すことを意味します。これはデモとしては十分に機能しましたが、信頼性を持って実装するには不十分でした。ピクセル単位の変化、アニメーション、遅延読み込み要素のいずれもが潜在的な失敗ポイントとなり得ました。
DOM スクレイピングは高速でしたが、意味論的には盲点がありました。エージェントはページ上に存在する要素を読み取ることができますが、その目的を属性名やクラス名、周囲のテキストから推測する必要がありました。「Go」とラベル付けされたボタンが検索、送信、確認、あるいはナビゲーションを意味するのか、エージェントはその都度文脈から判断しなければなりませんでした。
これらの数値は、このギャップがいかに重要であるかを反映しています。構造化されたブラウザ自動化と非構造化化の比較に関する研究では、スクレイピング手法と比較して、構造化アプローチがタスクエラーを 67% 削減し、完了率を 45% 向上させることが示されています 2026 年に公開された WebMCP 実装ガイドによる分析より。
WebMCP のこの問題に対する答えは、解釈の負担をエージェントからウェブサイト側へ移すことです。チェックアウトボタンが何をするか、サポートフォームがどのようなフィールドを期待しているかは、あなたが知っています。WebMCP は、推測なしでエージェントが読み取れる形式で、それを明示的に記述する方法を提供します。
# 2 つの API:宣言型と命令型
WebMCP は 2 つの API を導入しました。どちらも document.modelContext インターフェイスを通じてアクセス可能です。これらは異なる状況向けに設計されており、同じページ上で両方を使用することができます。
// 宣言型 API
宣言型 API は HTML フォーム向けです。既存のフォーム要素に、2 つの新規属性(toolname と tooldescription)を付与するだけで、ブラウザが自動的にそのフォームをエージェントが呼び出せる構造化ツールへ変換します。基本的なケースでは、JavaScript を記述する必要はありません。
宣言型 API を用いたサポートリクエストフォームの例は以下の通りです:
姓
名
この仕組みの働き**: ブラウザが toolname と tooldescription 属性を読み取り、そのフォームを呼び出し可能なツールとして登録します。エージェントがサポートリクエストを送信したい場合、createSupportRequest を適切な入力値とともに呼び出せばよく、ピクセル単位でのクリック操作は不要です。フォームはユーザーに対して常に表示されたままとなるため、エージェントが何を行っているかを正確に確認できます。
どちらかの属性を削除すると、ツールは自動的に登録解除されます。また、フォーム要素に toolautosubmit を追加することで、フィールドへの入力が完了した後にエージェントが直接送信できるようになり、ユーザーが手動で送信ボタンをクリックする必要もなくなります。
安定したフォームベースのインターフェースを持ち、エージェント対応への最短経路を望む場合、宣言型 API が最適な選択肢です。属性を 2 つ追加するだけ。これで完了です。
// 命令型 API
命令型 API は、宣言型 API で処理できないあらゆるケース向けです。具体的には、動的ツール、JavaScript ドライブ型のインタラクション、直接 API を呼び出すツール、アプリケーションの状態に依存するツールなどです。これらのツールは、document.modelContext.registerTool() を用いて JavaScript で定義します。
以下に実用的な例を示します。注文履歴ページをスクレイピングすることなく、エージェントが顧客の注文を確認できる注文ステータス照会ツールです。
// ログインユーザーの注文ステータスを照会する機能をエージェントに登録します。
// エージェントはユーザーの認証セッションを引き継ぐため、OAuth フローは不要です。
document.modelContext.registerTool({
name: "get_order_status",
// 説明は極めて重要です。コードを読む人間ではなく、エージェント向けに記述してください。
// 「注文を取得する」のような曖昧な説明では、エージェントは何も学びません。
description:
"選択された期間内の注文について、注文番号、現在の配送ステータス、および推定配達先住所を返します。ユーザーが注文や配送について質問した際にこの関数を呼び出してください。",
// inputSchema は JSON Schema 仕様に従い、このツールが受け付ける入力を定義します。
inputSchema: {
type: "object",
properties: {
timeframe: {
type: "string",
description: "注文を検索する期間。",
enum: [
"today",
"yesterday",
"last_7_days",
"last_30_days",
"last_6_months",
],
},
},
required: ["timeframe"],
}
// execute は、エージェントがこのツールを呼び出した際にブラウザが呼び出す関数です。
// 検証済みの入力を受け取り、エージェントが読み取れる文字列を返す必要があります。
execute: async ({ timeframe }) => {
// 既存のバックエンドからデータを取得します。ユーザーのセッションクッキーは既に存在しています。
const response = await fetch(/api/orders?timeframe=${timeframe});
const orders = await response.json();
if (!orders.length) {
return No orders found for ${timeframe}.;
}
// エージェントが解釈してユーザーに伝えることができる構造化されたサマリーを返します。
return orders
.map(
(o) =>
Order #${o.id}: ${o.status}, estimated delivery to ${o.location}
)
.join("\n");
},
});
これが何をするか: このツールは、名前、平易な説明、型付き入力スキーマ、そして非同期の execute 関数と共に登録されます。ブラウザのエージェントがページ上の利用可能なツールを問い合わせた際、get_order_status とそのスキーマが表示されます。エージェントは、何を渡すべきで、何が返ってくるかを正確に知っています。
後からツールをアンレジスト(unregister)する必要がある場合、例えばユーザーがログアウトしたり、ツールの存在意義があるセクションから移動したりした場合は、AbortController を使用します:
// ツールがもはや利用可能であるべきではない時にアンレジストします。
// これは、完全なナビゲーションなしでページセクションが変化するシングルページアプリケーション(SPA)において重要です。
const controller = new AbortController();
document.modelContext.registerTool(toolDefinition, { signal: controller.signal });
// Later, when the user logs out or the tool is no longer relevant:
controller.abort(); // Tool is unregistered immediately
What this does: Passing an AbortSignal to registerTool gives you a clean way to remove tools without tracking references manually. When you call controller.abort(), the tool disappears from the agent's discovery list right away. This is important for single-page applications where the available actions change as the user moves through the product.
You can also discover all registered tools on the current page with document.modelContext.getTools(), and call any of them manually with document.modelContext.executeTool(). The Model Context Tool Inspector Chrome extension uses exactly this pattern to let you test your tools before any real agent calls them.
# The Authentication Breakthrough
**
This is the part of WebMCP that does not get enough attention. Standard MCP integrations, the server-side, require OAuth client registration, token exchange, refresh logic, secure credential storage, and audit logging. Every service the agent needs to interact with requires its own OAuth flow. For a developer building an agent that touches five different tools, that is five separate integrations to maintain.
WebMCP はこれを完全に回避します。なぜなら、これはユーザーがすでに認証済みのページ上でブラウザ内で動作するからです。エージェントがユーザーのセッションクッキーを継承することはハックではなく、設計上の意図です。ユーザーがアプリにログインしている場合、ユーザーが権限を持って使用できるツールは、エージェントも同じく使用できます。セッションこそが資格情報となります。
これは開発者の利便性を超えた意味を持ちます。セキュリティモデルそのものを変えます。WebMCP を通じて、エージェントが実行できることは、ログインしたユーザーが直接実行できないことには一切及びません。権限の昇格はできませんし、他のユーザーのデータにアクセスすることもできません。ウェブアプリケーションの既存の権限制御境界が自動的に適用されます。
注目に値する点があります:WebMCP セキュリティガイダンス は明確に述べています。フォーム送信時にエージェントがトリガーしたかどうかを示す SubmitEvent のブール値である agentInvoked は、資格情報ではなくシグナルとして扱うべきです。これを使用して追加の権限を付与してはいけません。これはフォームを送信したのが誰かを示すものであり、身元を検証するものではありません。
# 実際のユースケース:旅行予約の完全エンドツーエンド
Google は、I/O 2026 での主要な例の一つとして旅行予約を取り上げました。これは抽象的な説明よりも、WebMCP がもたらす違いをよりよく示しています。
WebMCP がなければ、ブラウザエージェントが多都市旅行を予約する様子は次のようになります:フライトページを検索し、検索フォームのスクリーンショットを取得し、「From」フィールドを特定してクリックし、都市名を入力し、「To」フィールドをクリックして次の都市名を入力し、カスタムカレンダーウィジェットを使用している日付ピッカーを見つけてエージェントが視覚的に解釈しながらクリックで操作し、乗客数セレクターを見つけ、それと対話した上で検索ボタンを押して、一連のアクションが正しい結果を生み出したかを確認するまで待ちます。
選択子の一つが壊れていたり、エージェントが見逃すアニメーションがあったり、別のフィールドの変更時にリセットされるフォームフィールドがあったりするだけで、予約は静かに失敗するか誤って実行されます。
WebMCP を使用すると、旅行サイトは book_flight ツールを登録します:
// エージェントから構造化された入力を受け取るフライト予約ツール。
// エージェントは検索ステップで UI と一切対話する必要はありません。
document.modelContext.registerTool({
name: "search_flights",
description:
"指定した日付と乗客数に基づき、2 つの都市間の利用可能なフライトを検索します。価格、所要時間、乗り継ぎの詳細を含む一致する itineraries を返します。"
必ず JSON 形式で返してください。translation フィールドのみ。他のフィールド (technical_terms 等)は一切追加しないこと — 余計なフィールドを書こうとして本文翻訳がトークン上限で打ち切られる事故を防ぐため:
{"translation": "翻訳全文"}
{
type: "object",
properties: {
origin: {
type: "string",
description: "出発空港の IATA コード(例:LOS はラゴス)。",
},
destination: {
type: "string",
description: "到着空港の IATA コード(例:LHR はロンドン・ヒースロー)。",
},
departure_date: {
type: "string",
description: "出発日。YYYY-MM-DD 形式で指定してください。",
},
return_date: {
type: "string",
description:
"帰国日。YYYY-MM-DD 形式で指定してください。片道便の場合は省略します。",
},
passengers: {
type: "integer",
description: "乗客数。1 から 9 の範囲である必要があります。",
minimum: 1,
maximum: 9,
},
cabin_class: {
type: "string",
enum: ["economy", "premium_economy", "business", "first"],
description: "希望する客室クラス。",
},
},
required: ["origin", "destination", "departure_date", "passengers"],
},
execute: async ({ origin, destination, departure_date, return_date, passengers, cabin_class }) => {
// 既存のフライト検索 API を呼び出します。
// ユーザーのセッションが認証を処理するため、トークン管理は不要です。
const params = new URLSearchParams({
origin,
destination,
date: departure_date,
pax: passengers,
cabin: cabin_class || "economy",
...(return_date && { return: return_date }),
});
const response = await fetch(/api/flights/search?${params});
const results = await response.json();
if (!results.flights.length) {
return "No flights found for those parameters. Try different dates or nearby airports.";
}
// Return a human-readable summary the agent can present to the user.
return results.flights
.slice(0, 5)
.map(
(f) =>
${f.airline} ${f.flight_number}: departs ${f.departure_time}, arrives ${f.arrival_time}, ${f.stops === 0 ? "nonstop" : ${f.stops} stop(s)}, ${f.price} USD
)
.join("\n");
},
});
What this does**: The agent calls search_flights with typed, validated inputs. No UI interaction is required for the search step. The tool hits your existing API, the user's session handles auth, and the agent gets back a structured list of results it can summarize and present. The entire search chain that used to take multiple screenshot-click cycles happens in a single function call.
# How to Implement WebMCP Today
**
Here is the practical path from zero to a working WebMCP implementation.
// Step 1: Enabling the Chrome Flag for Local Development
Navigate to chrome://flags/#enable-webmcp-testing in Chrome, set it to Enabled**, and relaunch. This gives you the WebMCP APIs in your local browser without needing an origin trial token.
// Step 2: Installing the Model Context Tool Inspector
Chrome ウェブストアから Model Context Tool Inspector 拡張機能 をインストールしてください。これにより、任意のページに登録されているツールを確認したり、手動で呼び出したり、JSON スキーマを検証したり、出力がエージェントが理解できる形式でフォーマットされているかを確認できます。デフォルトでは gemini-3-flash-preview にプロンプトを送信するため、ツールに対する自然言語による呼び出しをすぐにテストすることができます。
// ステップ 3: 本番環境向けのオージントライアルへの参加
WebMCP がブラウザの標準機能として提供される前に実際のトラフィックでテストしたい場合は、Chrome のオージントライアルに登録してください。HTTP ヘッダーまたはメタタグに含めるためのトークンを取得でき、Chrome 149 以降のユーザーでは、あなたのオリジンで WebMCP が有効化されます。
// ステップ 4: 最初のツールの追加
最も一般的なフォーム検索、お問い合わせ、チェックアウトから宣言型 API を使い始めます。toolname と tooldescription を追加します。DevTools を開き、「Application」へ移動し、WebMCP パネルを探してツールが表示されていることを確認してください。これが最小限の実装です。
動的なツールの場合は、命令型 API へ移行し、ページの初期化コードで登録してください。エージェント向けに記述を行い、自分自身向けには書かないようにします。ここでは簡潔さよりも具体性が重要です。「特定の日の 2 つの空港間のフライトを検索する」は有用ですが、「検索する」だけでは不十分です。
// ステップ 5: クロスブラウザ対応の扱い
今日のクロスブラウザ対応には、@mcp-b/global ポリフィルを使用してください。これは、WebMCP をネイティブでまだサポートしていないブラウザにおいて、優雅にフォールバックする機能を提供します。Microsoft Edge 147 ではすでに WebMCP のネイティブサポートが標準搭載されています。Firefox については現時点で公開されたロードマップはありません。Safari には WebKit のバグトラッカーへのエントリーがありますが、実装コミットメントはまだありません。
npm install @mcp-b/global
// メインのエントリーファイルの先頭、ツール登録の前
import "@mcp-b/global";
// このインポート後、すべてのブラウザで document.modelContext が利用可能になります。
// ネイティブサポートを持つ Chrome や Edge では、ポリフィルはノーオペレーション(何もしない)として動作します。
// 他のブラウザでは、フォールバックメカニズムを通じてツール呼び出しを転送する互換性のあるインターフェースを設定します。
これが何をするか: ポリフィルは、まだネイティブの WebMCP を持たないブラウザにおいて document.modelContext インターフェースを提供します。ツールの登録コードはすべての環境で同じままです。Chrome が WebMCP を安定したデフォルト機能として搭載すれば、ポリフィルは自動的に退きます。
# まとめ
**
Web は人間が閲覧するために作られました。過去 2 年間、エージェントたちはクリックし、待ち、スクリーンショットを撮り、推測するという同じ方法で Web を利用しようと試みてきました。これは常に暫定的な解決策に過ぎませんでした。
WebMCP は、エージェントに直接語りかけるウェブサイトを実現するインフラストラクチャです。つまり、「ここでできることはこれです」「渡す必要があるのはこれです」「返ってくるのはこれです」と明確に伝えるサイトです。推測は不要です。脆いピクセル追従もありません。CSS クラスが変更されるたびに壊れることもありません。
オージントライアル(初期試験)は現在開催中です。始めるためのコストは、フォーム上の 2 つの HTML 属性だけです。早期に移行することのデメリットは実質ゼロです。メリットは、エコシステムが成熟した際にエージェントがデフォルトでアクセスするサイトになることです。仕様共同著者やブラウザの採用曲線に基づけば、それは「いつか」ではなく「いつ」という問題です。
始めたい場合は、Chrome フラグを有効にし、インスペクタ拡張機能をインストールし、公式の WebMCP ドキュメントを読み、今週中に最初のフォームに注釈をつけてください。早期参入者の機会は今開かれています。この機会は永遠に続くわけではありません。
Shittu Olumide は、最先端の技術を活用して説得力のある物語を構築することに情熱を持つソフトウェアエンジニアでありテクニカルライターです。細部への鋭い眼と複雑な概念を簡素化する才能を持っています。また、Twitter でも Shittu を見つけることができます。
原文を表示
**
# Introduction
You have probably watched a browser AI agent work at some point this year. It clicks a dropdown, waits for the DOM to update, reads a screenshot, decides what to click next, and waits again. One task. Five seconds. A hundred things that could go wrong. If the CSS class changes, if the dropdown animates differently, if the page lazy-loads something, the whole thing breaks.
That is not a model problem. The models are fine. It is a protocol problem. There was no standard way for a website to tell an agent what it could actually do on the page, so agents were left guessing pixel by pixel, click by click.
WebMCP** is the fix. It is a proposed open web standard that lets websites expose structured, callable tools directly to browser-based agents. Instead of an agent trying to interpret your UI, your site tells the agent exactly what functions exist, what inputs they take, and what they return. The agent stops guessing.
Google announced the WebMCP origin trial at Google I/O 2026 on May 21, and Chrome 149 shipped with it enabled for real traffic not just developers behind a flag. If you build anything on the public web, this is worth understanding today.
# What WebMCP Actually Is
**
WebMCP is a browser-native agent protocol co-developed by Google and Microsoft. The W3C Web Machine Learning Community Group** published the specification as a draft in February 2026, with three editors: Brandon Walderman from Microsoft, Khushal Sagar and Dominic Farolino from Google.
The core idea is simple: a website registers "tools" named, typed JavaScript functions or annotated HTML forms through a document.modelContext interface. A browser agent can then discover those tools, understand what they do from their descriptions and JSON Schemas, and call them directly instead of simulating mouse clicks.
Think of it as the difference between handing someone a remote control and watching them poke at your television screen, trying to change the channel.
To understand where WebMCP fits, it helps to know where it does not fit. Anthropic's Model Context Protocol (MCP) is a server-to-server protocol, the model connects to your backend over stdio or HTTP. Agent-to-Agent (A2A) handles communication between different AI agents. WebMCP handles the layer those two miss: the client page, with the logged-in user sitting right there.
**
A three-layer stack diagram showing "Server Layer" "Agent Layer" and "Browser/Page Layer"
WebMCP provides three things to bridge this gap:
- Discovery: a standard way for pages to register tools with agents, such as checkout or filter_results, so an agent visiting your page knows what is available
- JSON Schema: explicit definitions of what inputs each tool expects and what it returns, which reduces the hallucination that happens when agents are left to interpret ambiguous UI elements
- State: tools can be registered and unregistered dynamically as the page state changes, so the agent always knows what actions are available at a given moment
# Why the Old Way Was Broken
Before WebMCP, browser agents had two options: vision-based actuation or DOM scraping. Vision-based actuation meant the agent took a screenshot, sent it to a multimodal model, got back coordinates to click, clicked, waited for the DOM to update, took another screenshot, and repeated. It worked well enough to demo. It did not work well enough to ship reliably. Every pixel change, every animation, every lazy-loaded element was a potential failure point.
DOM scraping was faster but semantically blind. The agent could read what elements existed on the page, but it had to guess their purpose from attribute names, class names, and surrounding text. A button labeled "Go" could mean search, submit, confirm, or navigate and the agent had to figure that out from context every single time.
The numbers reflect how significant the gap is. Research on structured versus unstructured browser automation shows that structured approaches reduce task errors by 67% and improve completion rates by 45% compared to scraping methods, according to analysis from WebMCP implementation guides published in 2026.
WebMCP's answer to all of this is to move the interpretation burden from the agent to the website. You know what your checkout button does. You know what fields your support form expects. WebMCP gives you a way to say that explicitly, in a format the agent can read without any guesswork.
# The Two APIs: Declarative and Imperative
WebMCP introduces two APIs, both accessible through the document.modelContext interface. They are designed for different situations, and you can use both on the same page.
// The Declarative API
The Declarative API is for HTML forms. You annotate your existing form elements with two new attributes: toolname and tooldescription, and the browser automatically translates the form into a structured tool the agent can call. You do not need to write any JavaScript for the basic case.
Here is what a support request form looks like with the Declarative API:
  First Name


  Last Name
What this does**: The browser reads the toolname and tooldescription attributes and registers the form as a callable tool. When an agent wants to submit a support request, it calls createSupportRequest with the appropriate inputs, no pixel-clicking required. The form remains visible to the user throughout, so they can see exactly what the agent is doing.
If you remove either attribute, the tool is automatically unregistered. You can also add toolautosubmit to the form element to let the agent submit it directly once it has populated the fields, instead of requiring the user to click the submit button manually.
The Declarative API is the right choice when you have a stable, form-based interface and want the simplest path to agent-readiness. Add two attributes. Done.
// The Imperative API
The Imperative API is for everything the Declarative API cannot handle, dynamic tools, JavaScript-driven interactions, tools that call APIs directly, tools that depend on application state. You define these tools in JavaScript using document.modelContext.registerTool()
Here is a practical example: an order status lookup tool that lets an agent check a customer's orders without scraping the order history page.
// Register a tool that lets an agent query order status for a logged-in user.
// The agent inherits the user's authenticated session -- no OAuth flow needed.

document.modelContext.registerTool({
  name: "get_order_status",

  // Description is critical -- write it for the agent, not for a human reading the code.
  // A vague description like "get orders" teaches the agent nothing useful.
  description:
    "Returns the order number, current shipping status, and estimated delivery location for orders in a selected time period. Call this when the user asks about their orders or a delivery.",

  // inputSchema follows the JSON Schema spec and defines what inputs this tool accepts.
  inputSchema: {
    type: "object",
    properties: {
      timeframe: {
        type: "string",
        description: "The time period to search orders within.",
        enum: [
          "today",
          "yesterday",
          "last_7_days",
          "last_30_days",
          "last_6_months",
        ],
      },
    },
    required: ["timeframe"],
  },

  // execute is the function the browser calls when an agent invokes this tool.
  // It receives the validated input and should return a string the agent can read.
  execute: async ({ timeframe }) => {
    // Fetch from your existing backend -- the user's session cookies are already present.
    const response = await fetch(`/api/orders?timeframe=${timeframe}`);
    const orders = await response.json();

    if (!orders.length) {
      return `No orders found for ${timeframe}.`;
    }

    // Return a structured summary the agent can interpret and relay to the user.
    return orders
      .map(
        (o) =>
          `Order #${o.id}: ${o.status}, estimated delivery to ${o.location}`
      )
      .join("\n");
  },
});
What this does: The tool is registered with a name, a plain-language description, a typed input schema, and an async execute function. When a browser agent asks for available tools on the page, it sees get_order_status alongside its schema. It knows exactly what to pass in and what to expect back.
If you need to unregister a tool later, for example, when a user logs out or navigates away from a section where the tool makes sense, you use an AbortController:
// Unregistering a tool when it should no longer be available.
// This matters for SPAs where page sections change without a full navigation.

const controller = new AbortController();

document.modelContext.registerTool(toolDefinition, { signal: controller.signal });

// Later, when the user logs out or the tool is no longer relevant:
controller.abort(); // Tool is unregistered immediately
What this does: Passing an AbortSignal to registerTool gives you a clean way to remove tools without tracking references manually. When you call controller.abort(), the tool disappears from the agent's discovery list right away. This is important for single-page applications where the available actions change as the user moves through the product.
You can also discover all registered tools on the current page with document.modelContext.getTools(), and call any of them manually with document.modelContext.executeTool(). The Model Context Tool Inspector Chrome extension uses exactly this pattern to let you test your tools before any real agent calls them.
# The Authentication Breakthrough
**
This is the part of WebMCP that does not get enough attention. Standard MCP integrations, the server-side, require OAuth client registration, token exchange, refresh logic, secure credential storage, and audit logging. Every service the agent needs to interact with requires its own OAuth flow. For a developer building an agent that touches five different tools, that is five separate integrations to maintain.
WebMCP sidesteps this entirely because it operates inside the browser, on a page the user is already authenticated on. The agent inheriting the user's session cookies is not a hack, it is the design. If the user is logged into your app, any tool the user has permission to use, the agent can use it too. The session is the credential.
This matters beyond developer convenience. It changes the security model. The agent cannot do anything through WebMCP that the logged-in user could not do directly. It cannot escalate privileges. It cannot access other users' data. The existing permission boundaries of your web application apply automatically.
One thing worth noting: the WebMCP security guidance is explicit that agentInvoked, the boolean on SubmitEvent that tells you whether an agent triggered the form, should be treated as a signal, not a credential. Do not use it to grant additional permissions. It tells you who submitted the form; it does not verify identity.
# A Real Use Case: Travel Booking End to End
Google used travel booking as one of its primary examples at I/O 2026, and it illustrates the difference WebMCP makes better than anything abstract.
Without WebMCP, a browser agent booking a multi-city trip looks like this: search the flights page, screenshot the search form, identify the "From" field, click it, type a city, click the "To" field, type the next city, find the date picker which uses a custom calendar widget that the agent has to interpret visually click through it, find the passenger count selector, interact with it, then hit search and wait to see if the whole chain of actions produced the right results.
One broken selector, one animation the agent misses, one form field that resets when another changes and the booking fails silently or incorrectly.
With WebMCP, the travel site registers a book_flight tool:
// A flight booking tool that accepts structured input from an agent.
// The agent does not need to interact with the UI at all for the search step.

document.modelContext.registerTool({
  name: "search_flights",
  description:
    "Search available flights between two cities for given dates and passenger count. Returns matching itineraries with price, duration, and layover details.",

  inputSchema: {
    type: "object",
    properties: {
      origin: {
        type: "string",
        description: "Departure airport IATA code (e.g. LOS for Lagos).",
      },
      destination: {
        type: "string",
        description: "Arrival airport IATA code (e.g. LHR for London Heathrow).",
      },
      departure_date: {
        type: "string",
        description: "Departure date in YYYY-MM-DD format.",
      },
      return_date: {
        type: "string",
        description:
          "Return date in YYYY-MM-DD format. Omit for one-way flights.",
      },
      passengers: {
        type: "integer",
        description: "Number of passengers. Must be between 1 and 9.",
        minimum: 1,
        maximum: 9,
      },
      cabin_class: {
        type: "string",
        enum: ["economy", "premium_economy", "business", "first"],
        description: "Requested cabin class.",
      },
    },
    required: ["origin", "destination", "departure_date", "passengers"],
  },

  execute: async ({ origin, destination, departure_date, return_date, passengers, cabin_class }) => {
    // Call your existing flight search API.
    // The user's session handles authentication -- no token management needed.
    const params = new URLSearchParams({
      origin,
      destination,
      date: departure_date,
      pax: passengers,
      cabin: cabin_class || "economy",
      ...(return_date && { return: return_date }),
    });

    const response = await fetch(`/api/flights/search?${params}`);
    const results = await response.json();

    if (!results.flights.length) {
      return "No flights found for those parameters. Try different dates or nearby airports.";
    }

    // Return a human-readable summary the agent can present to the user.
    return results.flights
      .slice(0, 5)
      .map(
        (f) =>
          `${f.airline} ${f.flight_number}: departs ${f.departure_time}, arrives ${f.arrival_time}, ${f.stops === 0 ? "nonstop" : `${f.stops} stop(s)`}, ${f.price} USD`
      )
      .join("\n");
  },
});
What this does**: The agent calls search_flights with typed, validated inputs. No UI interaction is required for the search step. The tool hits your existing API, the user's session handles auth, and the agent gets back a structured list of results it can summarize and present. The entire search chain that used to take multiple screenshot-click cycles happens in a single function call.
# How to Implement WebMCP Today
**
Here is the practical path from zero to a working WebMCP implementation.
// Step 1: Enabling the Chrome Flag for Local Development
Navigate to chrome://flags/#enable-webmcp-testing in Chrome, set it to Enabled**, and relaunch. This gives you the WebMCP APIs in your local browser without needing an origin trial token.
// Step 2: Installing the Model Context Tool Inspector
Install the Model Context Tool Inspector extension from the Chrome Web Store. This lets you see which tools are registered on any page, call them manually, inspect their JSON Schemas, and verify that the output is formatted in a way the agent can understand. It sends prompts to gemini-3-flash-preview by default, so that you can test natural language invocations against your tools immediately.
// Step 3: Joining the Origin Trial for Production
If you want to test WebMCP on real traffic before it ships as a default browser feature, sign up for the Chrome origin trial. You get a token to include in your HTTP headers or a meta tag, and Chrome 149+ users will have WebMCP enabled on your origin.
// Step 4: Adding Your First Tool
Start with the Declarative API on your most common form search, contact, checkout. Add toolname and tooldescription. Open DevTools, go to Application, look for the WebMCP panel, and confirm your tool appears. That is the minimum viable implementation.
For dynamic tools, move to the Imperative API and register them in your page initialization code. Write descriptions for the agent, not for yourself, specificity matters more than brevity here. "Search flights between two airports for a given date" is useful. "Search" is not.
// Step 5: Handling Cross-Browser Support
For cross-browser support today, use the @mcp-b/global polyfill, which falls back gracefully on browsers that do not yet support WebMCP natively. Microsoft Edge 147 already ships native WebMCP support. Firefox has no public timeline yet. Safari has a WebKit bug-tracker entry but no commitment.
npm install @mcp-b/global

// At the top of your main entry file, before any tool registration
import "@mcp-b/global";

// After this import, document.modelContext is available in all browsers.
// In Chrome and Edge with native support, the polyfill is a no-op.
// In other browsers, it sets up a compatible surface that forwards tool calls
// through a fallback mechanism
What this does: The polyfill provides the document.modelContext interface in browsers that do not yet have native WebMCP. Your tool registration code stays the same across all environments. When Chrome ships WebMCP as a stable default feature, the polyfill steps aside automatically.
# Wrapping Up
**
The web was built for humans to browse. For the last two years, agents have been trying to use it the same way clicking, waiting, screenshotting, guessing. That was always a stopgap.
WebMCP is the infrastructure that makes the next version possible: websites that speak directly to agents, that say "here is what you can do here, here is what you need to pass in, here is what you will get back." No guessing. No fragile pixel-chasing. No breaking every time a CSS class changes.
The origin trial is open now. The cost of getting started is two HTML attributes on a form. The downside of moving early is essentially zero. The upside is being the site agents reach for by default when the ecosystem matures which, based on the spec co-authors and the browser adoption curve, is a question of when, not if.
If you want to start: enable the Chrome flag, install the inspector extension, read the official WebMCP docs, and annotate your first form this week. The window to be an early mover is open. It will not stay open forever.
Shittu Olumide** is a software engineer and technical writer passionate about leveraging cutting-edge technologies to craft compelling narratives, with a keen eye for detail and a knack for simplifying complex concepts. You can also find Shittu on Twitter.
関連記事
Amazon Bedrock AgentCore に Web 検索機能を導入
AWS は、学習データに依存して最新情報を取得できない AI エージェントの課題を解決するため、Amazon Bedrock AgentCore に Web 検索機能を一般提供開始した。これによりエージェントはリアルタイムの株価やニュースなどを参照可能になった。
Amazon Quick と Cisco Webex MCP サーバーを用いた会議準備・フォローアップ支援アシスタントの構築
AWS は、Amazon Quick と Cisco Webex の MCP サーバーを連携させることで、会議の準備や事後処理を単一の会話型ワークフローで完結させる方法を公開した。これにより、ユーザーは複数のツールを行き来せずとも必要な情報を一元的に取得できる。
NVIDIA BioNeMo Agent Toolkit を活用したライフサイエンス発見のための AI 科学者構築
NVIDIA は、論文の読解やコード記述、仮説生成などを行うエージェント機能を提供する「BioNeMo Agent Toolkit」を公開し、AI 科学者をライフサイエンス研究に導入する手法を発表した。
今日のまとめ
AI日報で今日の重要ニュースをまとめ読み