数値パフォーマンス向上のための NumPy の 3 つの技
KDnuggets は、NumPy を用いた計算処理のパフォーマンス向上を目指す開発者向けに、具体的な最適化テクニックを 3 つ紹介している。
キーポイント
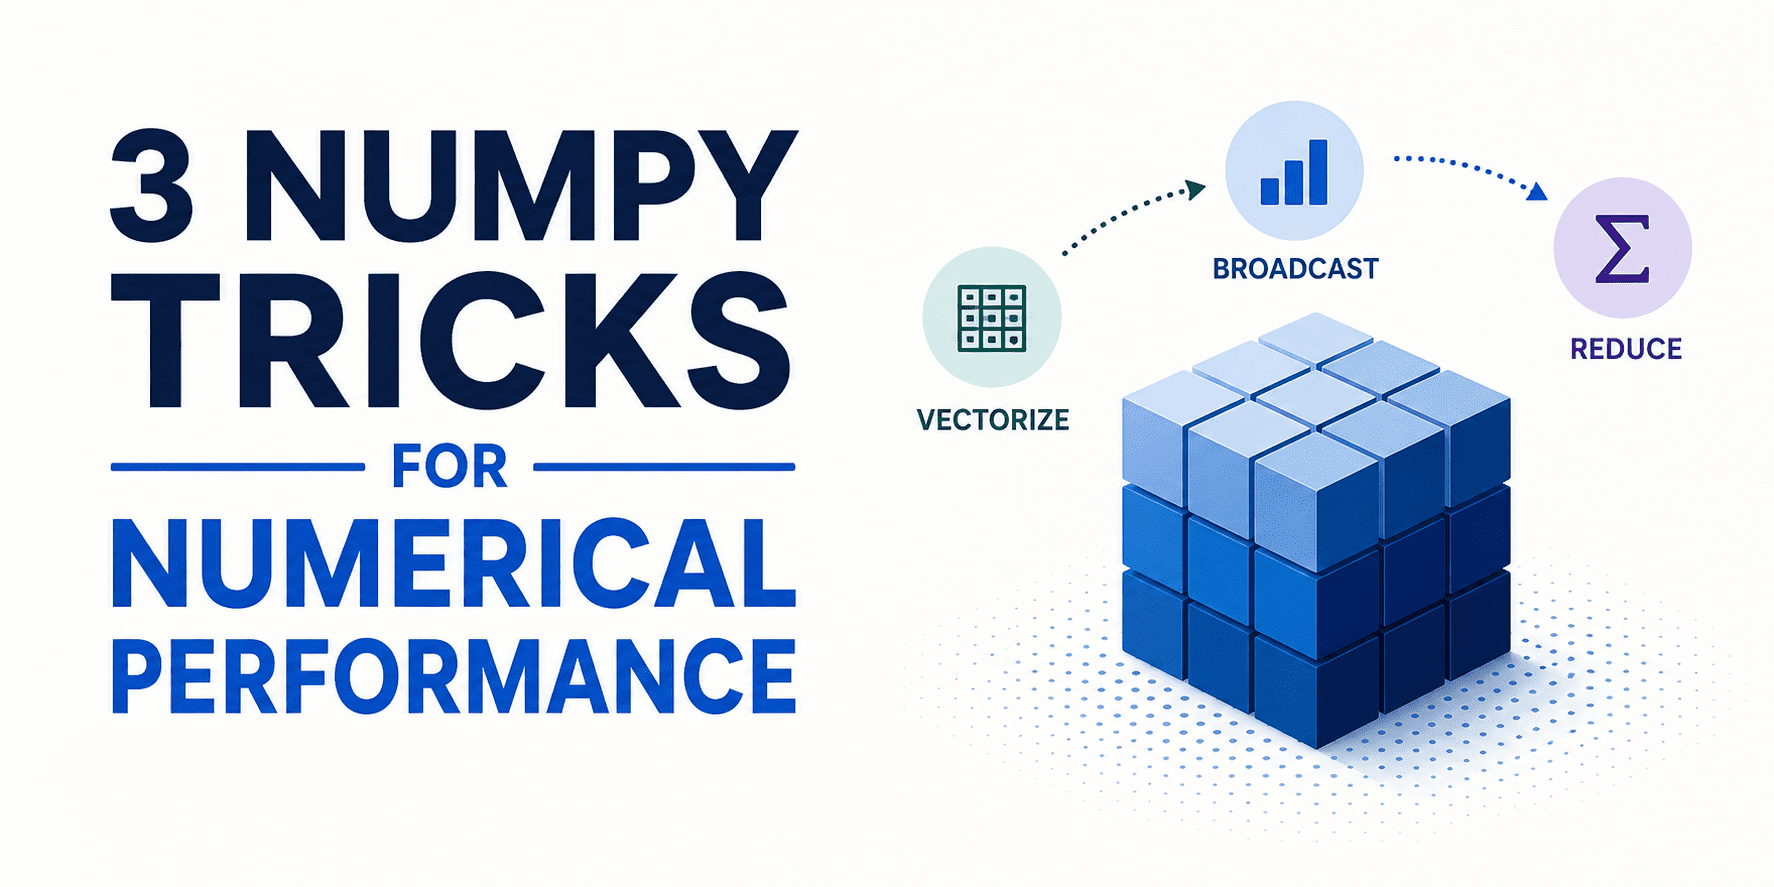
ベクトル化演算の活用
明示的な for ループを避け、NumPy の内蔵関数やブロードキャスト機能を用いて行列演算を行うことで、Python のオーバーヘッドを排除し高速化する。
データ型とメモリ配置の最適化
計算に必要な精度(float32 vs float64)を選択し、連続したメモリ領域(C-contiguous)を確保することで、キャッシュ効率を最大化する。
インプレース演算とメモリの再利用
不要な中間配列の生成を防ぎ、既存の配列上で直接計算を行うインプレース演算(in-place operations)を採用してメモリ使用量を削減する。
影響分析・編集コメントを表示
影響分析
この記事は、AI やデータサイエンスの分野で大量の数値計算を行う開発者にとって、コードの実行効率を劇的に改善するための即戦力となる知見を提供しています。特にメモリリソースが限られる環境や、大規模なモデル学習前の前処理段階において、これらのテクニックを実装することでパフォーマンスボトルネックを解消できる可能性があります。
編集コメント
本格的な AI モデル開発の前段階となるデータ処理やシミュレーションにおいて、基礎的なライブラリの使い方を深めることは、リソース効率を高める上で極めて重要です。
 image**
# イントロダクション
Python の科学計算および機械学習エコシステムは、NumPy に大きく依存しています。これは、Pandas、Scikit-Learn、SciPy、PyTorch といったライブラリの背後にあるパフォーマンスエンジンとして機能します。NumPy の高速性は、最適化された C で実装されていることに由来し、Python のオブジェクトモデルや動的インタプリタによるオーバーヘッドなしで、連続したメモリブロックを操作できる点にあります。
残念ながら、多くのデータサイエンティストや開発者は、この力を活用しない NumPy コードを書いてしまっています。標準的な Python ループを引き継いだり、不要なメモリアロケーションや配列のコピーを強制する素朴な計算式を書いたりすることで、パフォーマンスのボトルネックが生じてしまいます。大規模データを扱う際、これらの非効率性は RAM の肥大化、キャッシュミス、および実行時間の遅延につながります。高パフォーマンスの数値コードを書くためには、NumPy が内部でどのように計算、メモリアロケーション、データレイアウトを管理しているかを理解する必要があります。
本記事では、コードを最適化するための 3 つの重要な NumPy トリックを取り上げます:
- ベクトル化とブロードキャスト(vectorization and broadcasting)
- out パラメータを使用したインプレース操作(in-place operations using the out parameter)
- コピーではなくメモリビューを活用する(leveraging memory views instead of copies)
# 1. 明示的なループに対するベクトル化とブロードキャスト
明示的な Python の for ループは、数値計算における最大の速度阻害要因です。データ構造を要素ごとに反復処理すると、Python インタプリタが各ステップで型チェックとメソッドの参照実行を強制されることになります。
よくある落とし穴として、np.vectorize を使用することが挙げられます。多くの開発者は、標準的な Python 関数を np.vectorize でラップすることで最適化された C コードに変換できると誤解しています。実際には、np.vectorize は単にクリーンな API の背後で遅い標準的な Python ループを実行する利便性ラッパーに過ぎず、パフォーマンスの向上効果はゼロです。
最適化するためには、ネイティブのユニバーサル関数(ufuncs)とブロードキャスト(broadcasting)を使用してコードを記述する必要があります。ブロードキャストにより、NumPy はデータをコピーすることなく異なる形状の配列に対して演算を実行でき、処理を直接コンパイルされた C で実行できます。
この素朴なアプローチでは、2 次元配列を行ごと、列ごとに反復して列ごとの標準化(列平均の減算と列標準偏差による除算)を行います:
import numpy as np
import time
サンプル行列を作成(50000 行、1000 列)
matrix = np.random.rand(50000, 1000)
start_time = time.time()
ループに基づく素朴な列正規化
res = matrix.copy()
for col in range(matrix.shape[1]):
col_mean = np.mean(matrix[:, col])
col_std = np.std(matrix[:, col])
for row in range(matrix.shape[0]):
res[row, col] = (matrix[row, col] - col_mean) / col_std
duration_loop = time.time() - start_time
print(f"Nested loop processed matrix in: {duration_loop:.4f} seconds")
Output:
Nested loop processed matrix in: 10.9986 seconds
ループ処理の代わりに、垂直方向(axis=0)に沿って平均値と標準偏差を計算します。NumPy はブロードキャスティング(broadcasting)を用いて、これらの 1 次元要約統計量を自動的に 2 次元行列の各行に整合させます:
import numpy as np
import time
サンプル行列を作成(50000 行、1000 列)
matrix = np.random.rand(50000, 1000)
start_time = time.time()
コンパイルされた C で axis=0 に沿って平均値と標準偏差を計算
means = np.mean(matrix, axis=0)
stds = np.std(matrix, axis=0)
ブロードキャスティングが自動的に形状を展開し、1 行で計算を実行
res_vectorized = (matrix - means) / stds
duration_vectorized = time.time() - start_time
print(f"Vectorized broadcasting processed matrix in: {duration_vectorized:.4f} seconds")
Output:
Vectorized broadcasting processed matrix in: 0.1972 seconds
これは約 56 倍の高速化です!
ベクトル化された実装では、matrix - means の演算と、それに続く stds による除算が、NumPy のブロードキャスティング規則(broadcasting rules)に従って実行されます。matrix が形状 (50000, 1000) で、means が形状 (1000,) であるため、NumPy は概念的に means 配列を matrix の形状に合わせて伸長します。内部では、この展開はデータを複製することなく瞬時にメモリ上で行われ、計算は SIMD(Single Instruction, Multiple Data)CPU 命令へと下位レベルでプッシュされるため、50 倍以上の劇的な高速化が実現されます。
# 2. インプレース操作と out パラメータ
y = 2 * x + 3 のような式を書くと、効率的に実行されるように思えるかもしれません。しかし、内部では NumPy がこの式を段階的に評価しています。
- 2 * x の結果を格納するためにメモリに一時的な配列を割り当てます
- その一時的な配列に 3 を加算した結果を格納するための別の配列も割り当てます
- 最後に、この二番目の一時的な配列を変数名 y にバインドします
非常に大きな配列(例えば数百万の要素を持つもの)を扱う場合、これらの一時的な中間配列を割り当ててガベージコレクションを行うことは、多大なオーバーヘッドを生み出します。これは CPU キャッシュを荒廃させ、メモリバス帯域幅を飽和させます。
このオーバーヘッドを防ぐには、*= や += などの演算子を使用してインプレース計算を実行するか、NumPy のほぼすべてのユニバーサル関数に組み込まれている out パラメータを利用します。
この素朴な方法は、巨大な配列に対して基本的な線形スケーリングを行い、複数の一時的割り当てを引き起こします:
import numpy as np
import time
1000 万要素の大きな 1D 配列を作成する
x = np.random.rand(10000000)
scale = 2.5
offset = 1.2
start_time = time.time()
標準的な連鎖計算は一時的な中間配列を作成する
y_naive = scale * x + offset
duration_naive = time.time() - start_time
print(f"Chained expression executed in: {duration_naive:.4f} seconds")
出力:
Chained expression executed in: 0.0393 seconds
ここでは、ターゲット出力配列を一度だけ事前確保し、そのバッファをすべての後続の数学演算に再利用することで、一時的な割り当てを回避しています:
import numpy as np
import time
1000万要素を持つ大規模な 1D 配列を作成する
x = np.random.rand(10000000)
scale = 2.5
offset = 1.2
start_time = time.time()
最終的な配列を事前確保する
y_optimized = np.empty_like(x)
中間変数なしでターゲットバッファに直接数学演算を実行する
np.multiply(x, scale, out=y_optimized)
np.add(y_optimized, offset, out=y_optimized)
duration_optimized = time.time() - start_time
print(f"Optimized in-place expression executed in: {duration_optimized:.4f} seconds")
print(f"Speedup: {duration_naive / duration_optimized:.2f}x faster!")
Output:
Optimized in-place expression executed in: 0.0133 seconds
最適化された例では、np.multiply(x, scale, out=y_optimized) を使用して乗算の結果を事前に確保した y_optimized 配列に直接書き込んでいます。その後、np.add(y_optimized, offset, out=y_optimized) がオフセットを加算し、結果を同じバッファに書き戻します。これにより、一時的なバッファの割り当てとガベージコレクションが完全に回避され、システムメモリの節約、データが CPU キャッシュ内に保持されること、そして実行速度の向上が実現されます。
# 3. メモリビューとメモリコピー(スライシング vs 高度なインデックス)
NumPy が配列の*ビュー*を返すのか、それとも*コピー*を返すのかを理解することは、数値プログラミングにおいて最も重要なトピックの一つです:
- ビューとは、元の配列と同じ基盤となるデータバッファを指し示す新しい配列オブジェクトです。ビューを作成する操作はゼロコピーであり、$O(1)$ の定数時間と空間で実行されます。
- コピーは完全に新しいデータバッファを割り当ててデータを複製します。これは $O(N)$ の線形時間と空間を要します。
基本的なスライシング(開始インデックス、終了インデックス、ステップインデックスを使用、例:arr[0:10:2])は常にビューを返します。一方、高度なインデックス付け(インデックスのリストやブールマスクを使用、例:arr[[0, 2, 4]])は常にコピーを返します。
配列の部分セグメントを読み取るか更新するだけであれば、高度なインデックス付けを使用すると、膨大で不要なメモリ割り当てが発生します。
ここでは、インデックスのリストを渡すことで巨大な 2D 行列(すべての偶数番目の行と列)をサブサンプリングしようとしています。これにより NumPy は大きな新しい配列を割り当ててすべての要素をコピーするよう強制されます:
import numpy as np
import time

# 10,000 x 10,000 要素の行列を作成
matrix = np.random.rand(10000, 10000)

start_time = time.time()

# 整数配列を使用した高度なインデックス付けはデータの物理的なコピーを強制する
rows = np.arange(0, matrix.shape[0], 2)
cols = np.arange(0, matrix.shape[1], 2)
sub_matrix_copy = matrix[rows[:, None], cols]

duration_copy = time.time() - start_time
print(f"Advanced indexing copy completed in: {duration_copy:.4f} seconds")
出力:
Advanced indexing copy completed in: 0.1575 seconds
では、同じ操作を基本スライシングを使用して実行してみましょう。データをコピーするのではなく、NumPy はストライドメタデータを変更して、即座に同じバッファを指すように調整します:
import numpy as np
import time
10,000 x 10,000 要素の行列を作成
matrix = np.random.rand(10000, 10000)
start_time = time.time()
基本スライシングはゼロコピービューを即座に返します
sub_matrix_view = matrix[::2, ::2]
duration_view = time.time() - start_time
print(f"Basic slicing view completed in: {duration_view:.8f} seconds")
出力:
Basic slicing view completed in: 0.00001001 seconds
matrix[::2, ::2] を使用して配列をスライスすると、NumPy は基盤となるデータバッファに一切触れません。単に、異なる形状と新しい *strides* (次の要素を見つけるために各次元で進むバイト数) という修正されたメタデータを持つ新しい配列ヘッダを作成するだけです。この操作は、行列がどれだけ大きかろうとも、1 マイクロ秒未満で完了します。
ただし、トレードオフに注意してください。ビューが同じメモリバッファを共有しているため、sub_matrix_view を変更すると、元の matrix も変更されてしまいます。元の配列を変更したくない場合は、明示的に .copy() を呼び出す必要があります。
# まとめ
クリーンでパフォーマンスの高い NumPy コードを書くには、ループ、メモリアロケーション、データ構造に対する考え方を切り替える必要があります。標準的な Python の概念を避け、ネイティブな NumPy のメカニズムを採用することで、計算上のボトルネックを排除できます。
要約すると:
- Python のループや np.vectorize を捨てて、ベクトル化されたブロードキャスト計算に任せて、最適化された C 言語レベルまで処理を押し下げましょう
- インプレイス演算と out パラメータを使用してアロケータを迂回し、キャッシュの競合を防ぎ、RAM 使用量を削減しましょう
- ビューとコピーの違いをマスターして、高価な高度インデックスによるコピーではなく、即座に実行されるゼロコピーのスライシングを活用しましょう
これら 3 つのパフォーマンス設計パターンを統合することで、データ処理パイプラインは生産環境のワークロードに対して、軽量で高速かつスケーラブルなものになります。
Matthew Mayo** (@mattmayo13) はコンピュータサイエンスの修士号とデータマイニングの大学院卒業証書を取得しています。KDnuggets と Statology の編集長、および Machine Learning Mastery の寄稿編集者として、Matthew は複雑なデータサイエンスの概念を誰もが理解できるようにすることを目的としています。彼の専門的な関心分野には、自然言語処理、言語モデル、機械学習アルゴリズム、そして新興 AI の探求が含まれます。彼はデータサイエンスコミュニティにおける知識の民主化という使命に駆り立てられています。Matthew は 6 歳の頃からコーディングを続けています。
原文を表示
**
# Introduction
The Python scientific computing and machine learning ecosystem relies heavily on NumPy. It acts as the performance engine behind libraries like Pandas, Scikit-Learn, SciPy, and PyTorch. NumPy's speed comes from its underlying implementation in optimized C, where contiguous blocks of memory are manipulated without the overhead of Python's object model and dynamic interpreter.
Unfortunately, many data scientists and developers write NumPy code that fails to leverage this power. By carrying over standard Python loops or writing naive calculations that force unnecessary memory allocations and array copies, performance bottlenecks are suffered. When working with large datasets, these inefficiencies lead to bloated RAM usage, cache misses, and slow execution times. To write high-performance numerical code, you must understand how NumPy manages computation, memory allocation, and data layouts under the hood.
In this article, we will cover three essential NumPy tricks to optimize your code:
- vectorization and broadcasting
- in-place operations using the out parameter
- leveraging memory views instead of copies
# 1. Vectorization & Broadcasting Over Explicit Loops
Explicit Python for loops are the greatest speed killer in numerical computing. Iterating over a data structure element-by-element forces the Python interpreter to perform type checking and method lookups at every single step.
A common pitfall is using np.vectorize. Many developers assume that wrapping a standard Python function with np.vectorize converts it into optimized C code. In reality, np.vectorize is merely a convenience wrapper that runs a slow, standard Python loop behind a cleaner API, providing zero performance benefits.
To optimize, you must write code using native universal functions (ufuncs) and broadcasting. Broadcasting allows NumPy to perform operations on arrays of different shapes without copying data, processing operations directly in compiled C.
This naive approach iterates through a 2D array row-by-row and column-by-column to perform column-wise standardization (subtracting the column mean and dividing by the column standard deviation):
import numpy as np
import time

# Create a sample matrix (50000 rows, 1000 columns)
matrix = np.random.rand(50000, 1000)

start_time = time.time()

# Naive loop-based column normalization
res = matrix.copy()
for col in range(matrix.shape[1]):
    col_mean = np.mean(matrix[:, col])
    col_std = np.std(matrix[:, col])
    for row in range(matrix.shape[0]):
        res[row, col] = (matrix[row, col] - col_mean) / col_std

duration_loop = time.time() - start_time

print(f"Nested loop processed matrix in: {duration_loop:.4f} seconds")
Output:
Nested loop processed matrix in: 10.9986 secondsInstead of looping, we compute the mean and standard deviation along the vertical axis (axis=0). NumPy automatically aligns these 1D summary statistics with the 2D matrix rows using broadcasting:
import numpy as np
import time

# Create a sample matrix (50000 rows, 1000 columns)
matrix = np.random.rand(50000, 1000)

start_time = time.time()

# Compute means and standard deviations along axis 0 in compiled C
means = np.mean(matrix, axis=0)
stds = np.std(matrix, axis=0)

# Let broadcasting automatically expand the shapes and compute in one line
res_vectorized = (matrix - means) / stds

duration_vectorized = time.time() - start_time
print(f"Vectorized broadcasting processed matrix in: {duration_vectorized:.4f} seconds")
Output:
Vectorized broadcasting processed matrix in: 0.1972 secondsThat's a ~56x speedup!
In the vectorized implementation, the operations matrix - means and the subsequent division by stds are executed using NumPy's broadcasting rules. Because matrix has shape (50000, 1000) and means has shape (1000,), NumPy conceptually stretches the means array to match the shape of the matrix. Under the hood, this expansion happens instantly in memory without duplicating data, and the calculations are pushed down to SIMD (Single Instruction, Multiple Data) CPU instructions, yielding a massive 50x+ speedup.
# 2. In-place Operations & the out Parameter
When you write expressions like y = 2 * x + 3, you might expect it to run efficiently. However, under the hood, NumPy evaluates this expression step-by-step:
- It allocates a temporary array in memory to store the result of 2 * x
- It allocates another array to store the result of adding 3 to the temporary array
- It finally binds this second temporary array to the variable name y
When working with very large arrays (e.g. millions of entries), allocating and garbage-collecting these temporary intermediate arrays creates substantial overhead. It thrashes the CPU caches and saturates memory bus bandwidth.
We can prevent this overhead by performing in-place calculations using operators like *= and +=, or by utilizing the out parameter built into almost all NumPy universal functions.
This naive method performs a basic linear scaling on a massive array, causing multiple temporary allocations:
import numpy as np
import time

# Create a large 1D array of 10 million elements
x = np.random.rand(10000000)
scale = 2.5
offset = 1.2

start_time = time.time()

# Standard chained math creates temporary intermediate arrays
y_naive = scale * x + offset

duration_naive = time.time() - start_time
print(f"Chained expression executed in: {duration_naive:.4f} seconds")
Output:
Chained expression executed in: 0.0393 secondsHere, we pre-allocate the target output array once, and reuse its buffer for all subsequent mathematical operations, bypassing temporary allocations:
import numpy as np
import time

# Create a large 1D array of 10 million elements
x = np.random.rand(10000000)
scale = 2.5
offset = 1.2

start_time = time.time()

# Pre-allocate the final array
y_optimized = np.empty_like(x)

# Perform math directly into the target buffer without intermediate variables
np.multiply(x, scale, out=y_optimized)
np.add(y_optimized, offset, out=y_optimized)

duration_optimized = time.time() - start_time

print(f"Optimized in-place expression executed in: {duration_optimized:.4f} seconds")
print(f"Speedup: {duration_naive / duration_optimized:.2f}x faster!")
Output:
Optimized in-place expression executed in: 0.0133 secondsIn the optimized example, we use np.multiply(x, scale, out=y_optimized) to write the result of the multiplication directly into our pre-allocated y_optimized array. Then, np.add(y_optimized, offset, out=y_optimized) adds the offset and writes the result back into the same buffer. This completely avoids allocating and garbage-collecting temporary buffers, saving system memory, keeping data in the CPU cache, and boosting execution speed.
# 3. Memory Views vs. Memory Copies (Slicing vs. Advanced Indexing)
Understanding when NumPy returns a *view* of an array versus a *copy* is one of the most critical topics in numerical programming:
- A view is a new array object that points to the exact same underlying data buffer as the original array. Creating a view is a zero-copy operation that runs in $O(1)$ constant time and space.
- A copy allocates a brand-new data buffer and duplicates the data. This runs in $O(N)$ linear time and space.
Basic slicing (using start, stop, and step indices, e.g. arr[0:10:2]) always returns a view. In contrast, advanced indexing (using lists of indices or boolean masks, e.g. arr[[0, 2, 4]]) always returns a copy.
If you only need to read or update sub-segments of an array, using advanced indexing triggers massive, unnecessary memory allocations.
Here, we attempt to sub-sample a massive 2D matrix (every second row and column) by passing lists of indices. This forces NumPy to allocate a large new array and copy all the elements:
import numpy as np
import time

# Create a matrix of 10,000 x 10,000 elements
matrix = np.random.rand(10000, 10000)

start_time = time.time()

# Advanced indexing using integer arrays forces a physical copy of data
rows = np.arange(0, matrix.shape[0], 2)
cols = np.arange(0, matrix.shape[1], 2)
sub_matrix_copy = matrix[rows[:, None], cols]

duration_copy = time.time() - start_time
print(f"Advanced indexing copy completed in: {duration_copy:.4f} seconds")
Output:
Advanced indexing copy completed in: 0.1575 secondsNow let's perform the same operation, but use basic slicing. Instead of copying data, NumPy adjusts the stride metadata to point to the same buffer instantly:
import numpy as np
import time

# Create a matrix of 10,000 x 10,000 elements
matrix = np.random.rand(10000, 10000)

start_time = time.time()

# Basic slicing returns a zero-copy view instantly
sub_matrix_view = matrix[::2, ::2]

duration_view = time.time() - start_time
print(f"Basic slicing view completed in: {duration_view:.8f} seconds")
Output:
Basic slicing view completed in: 0.00001001 secondsWhen you slice an array using matrix[::2, ::2], NumPy does not touch the underlying data buffer. It simply creates a new array header with modified metadata: a different shape and new *strides* (the number of bytes to step in each dimension to find the next element). This operation runs in less than a microsecond, regardless of how large the matrix is.
However, be aware of the trade-off: because the view shares the same memory buffer, mutating sub_matrix_view will modify the original matrix as well. If you must avoid modifying the original array, you must explicitly call .copy().
# Wrapping Up
Writing clean, performant NumPy code requires changing how you think about loops, memory allocations, and data structures. By avoiding standard Python concepts in favor of native NumPy mechanics, you can eliminate computational bottlenecks.
To recap:
- Ditch Python loops and np.vectorize and let vectorized broadcasting push calculations down to optimized C
- Use in-place operations and the out parameter to bypass the allocator, preventing cache thrashing and reducing RAM usage
- Master views vs. copies to leverage instant, zero-copy slicing instead of expensive advanced indexing copies
Integrating these three performance design patterns will keep your data processing pipelines lean, fast, and scalable for production workloads.
Matthew Mayo** (@mattmayo13) holds a master's degree in computer science and a graduate diploma in data mining. As managing editor of KDnuggets & Statology, and contributing editor at Machine Learning Mastery, Matthew aims to make complex data science concepts accessible. His professional interests include natural language processing, language models, machine learning algorithms, and exploring emerging AI. He is driven by a mission to democratize knowledge in the data science community. Matthew has been coding since he was 6 years old.
関連記事
データサイエンティストが知るべき Python の必須概念 5 つ
この記事は、データサイエンティストがスパゲッティコードから高速で生産レベルのデータパイプラインへ移行するために必要な Python の 5 つの必須概念を詳しく解説しています。
データサイエンティストが知っておくべき実用的な SQL の技
KDnuggets は、データサイエンティストが効率的にデータを処理するために役立つ実践的な SQL のテクニックを紹介している。
クリックして再生する画像コンポーネント「click-to-play」の公開
Simon Willison が、クリックした際にのみ GIF を読み込む Web コンポーネント「click-to-play」を公開し、初期表示は静止画として動作する機能を導入した。
今日のまとめ
AI日報で今日の重要ニュースをまとめ読み