GitHub、アジェンティックワークフローの導入ガイドを公開
本文の状態
日本語全文を表示中
詳細モードで約27分の本文を読めます。
同じ出来事の情報源
この情報源を基点に整理
KDnuggets
KDnuggets は、GitHub が新機能「アジェンティックワークフロー」の使い方を解説する記事を発表し、バックログ処理などの自動化事例を紹介した。
AI深層分析を開く2026年8月6日 00:02
AI深層分析
キーポイント
Agentic Workflows の概要と目的
GitHub は Issue や Pull Request の整理など、推論を要する反復作業を自動化するために、GitHub Actions 内でコードエージェントを実行できる「Agentic Workflows」を公開プレビューとして提供した。
実装方法と仕組み
開発者は .github/workflows ディレクトリに Markdown ファイルを作成し、YAML フロントマターで設定を記述して自然言語で指示を与えるだけで、gh-aw CLI ツールがこれを標準的な GitHub Actions ワークフローに変換する。
セキュリティと既存インフラの活用
この機能は別個の実行環境を必要とせず、既存のランナー、ブランチ保護ルール、ポリシー制約をそのまま利用するため、セキュリティモデルが強化された状態で動作する。
開発体制と対応エンジン
GitHub Next と Microsoft Research が共同でプロジェクトを開発しており、現時点では GitHub Copilot を含む 4 つの AI エンジンをサポートしている。
Markdown を YAML ワークフローへ変換
GitHub Actions のワークフローディレクトリに配置した Markdown ファイルの frontmatter と自然言語指示を、CLI ツールが通常の .lock.yml ファイルに変換する。これにより既存の実行環境やポリシー制約をそのまま再利用できる。
重要な引用
It's the exact kind of work GitHub built Agentic Workflows to take off your plate.
There is no separate agent runtime bolted onto your repository. It reuses your existing runners, your existing branch protection rules, and your existing policy constraints.
"there is no separate agent runtime bolted onto your repository. It reuses your existing runners, your existing branch protection rules, and your existing policy constraints"
"Agentic Workflows is closer to a standing policy: 'every Monday, summarize the week's issue activity' or 'every time a PR opens, review it for security concerns.'"
編集コメントを表示
編集コメント
GitHub Actions の枠組み内で自律型エージェントを実行できる機能の提供は、開発ワークフローの自動化における重要な転換点となる。既存のセキュリティモデルを維持したまま実装可能である点は、企業環境での導入障壁を下げる決定的な要素と言える。
Source Article
元記事を日本語で読む
本文に関係しない購読案内、埋め込み通知、サイト内プロモーションは除いています。
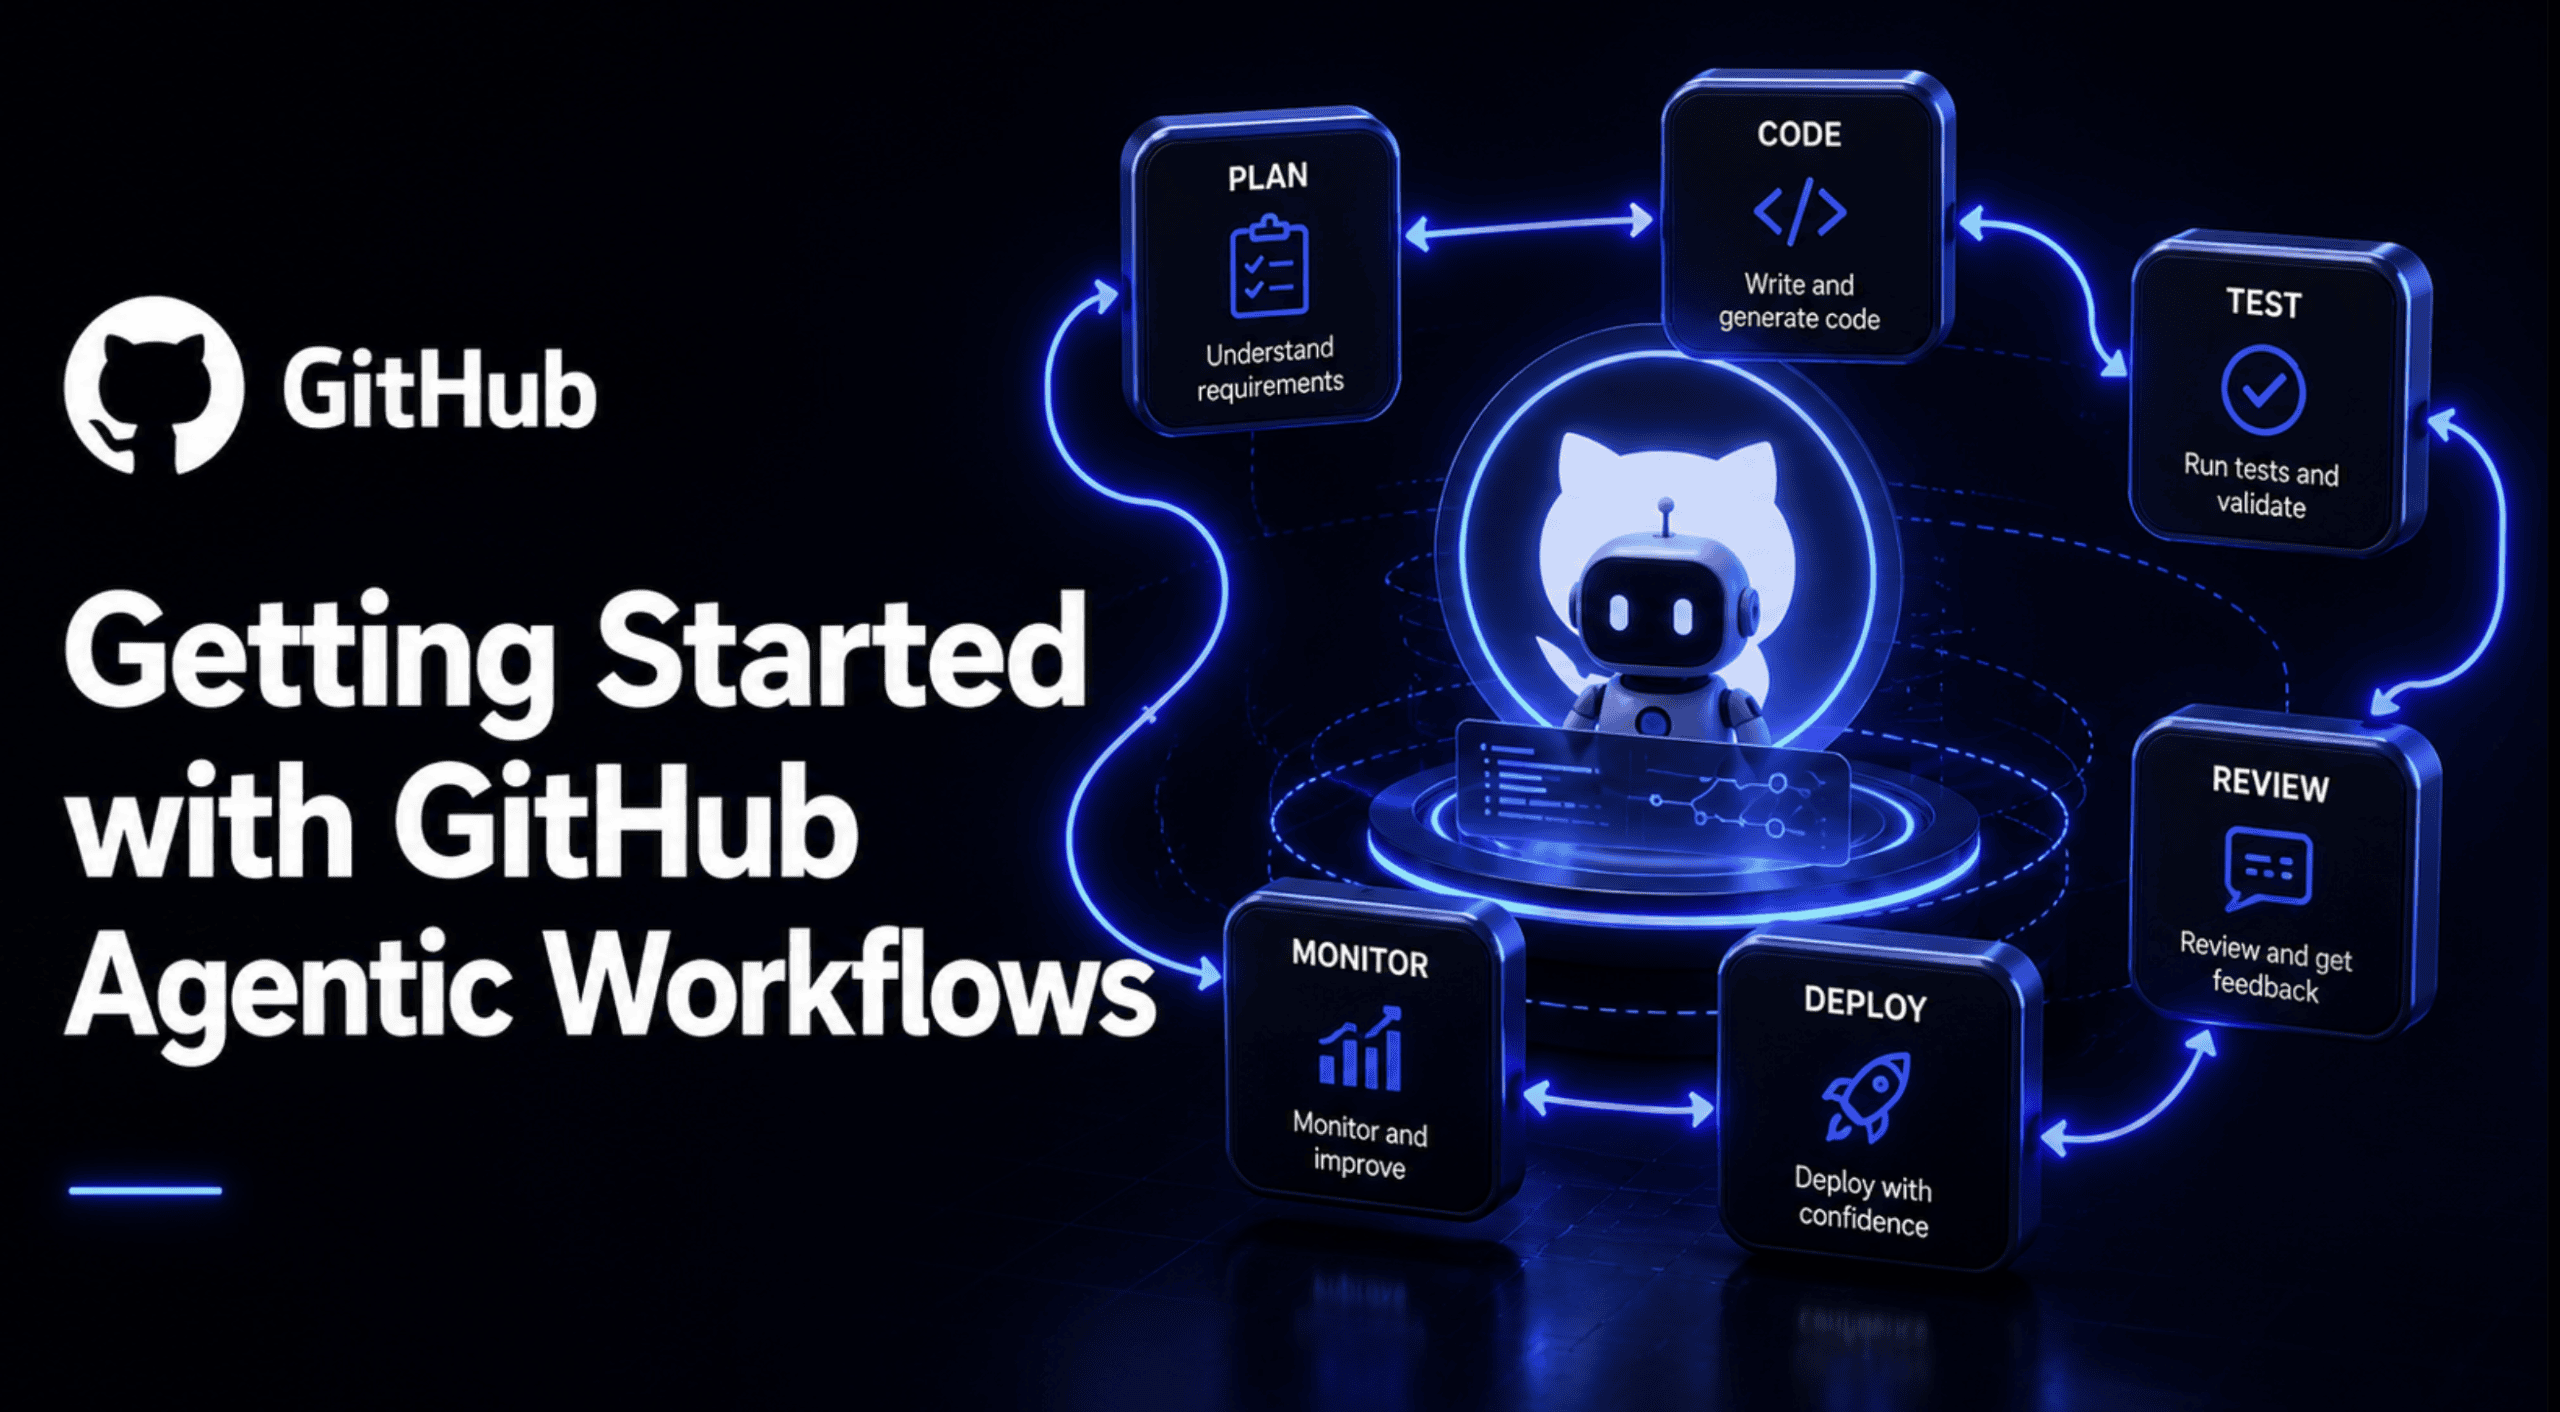
GitHub エージェント型ワークフローの紹介
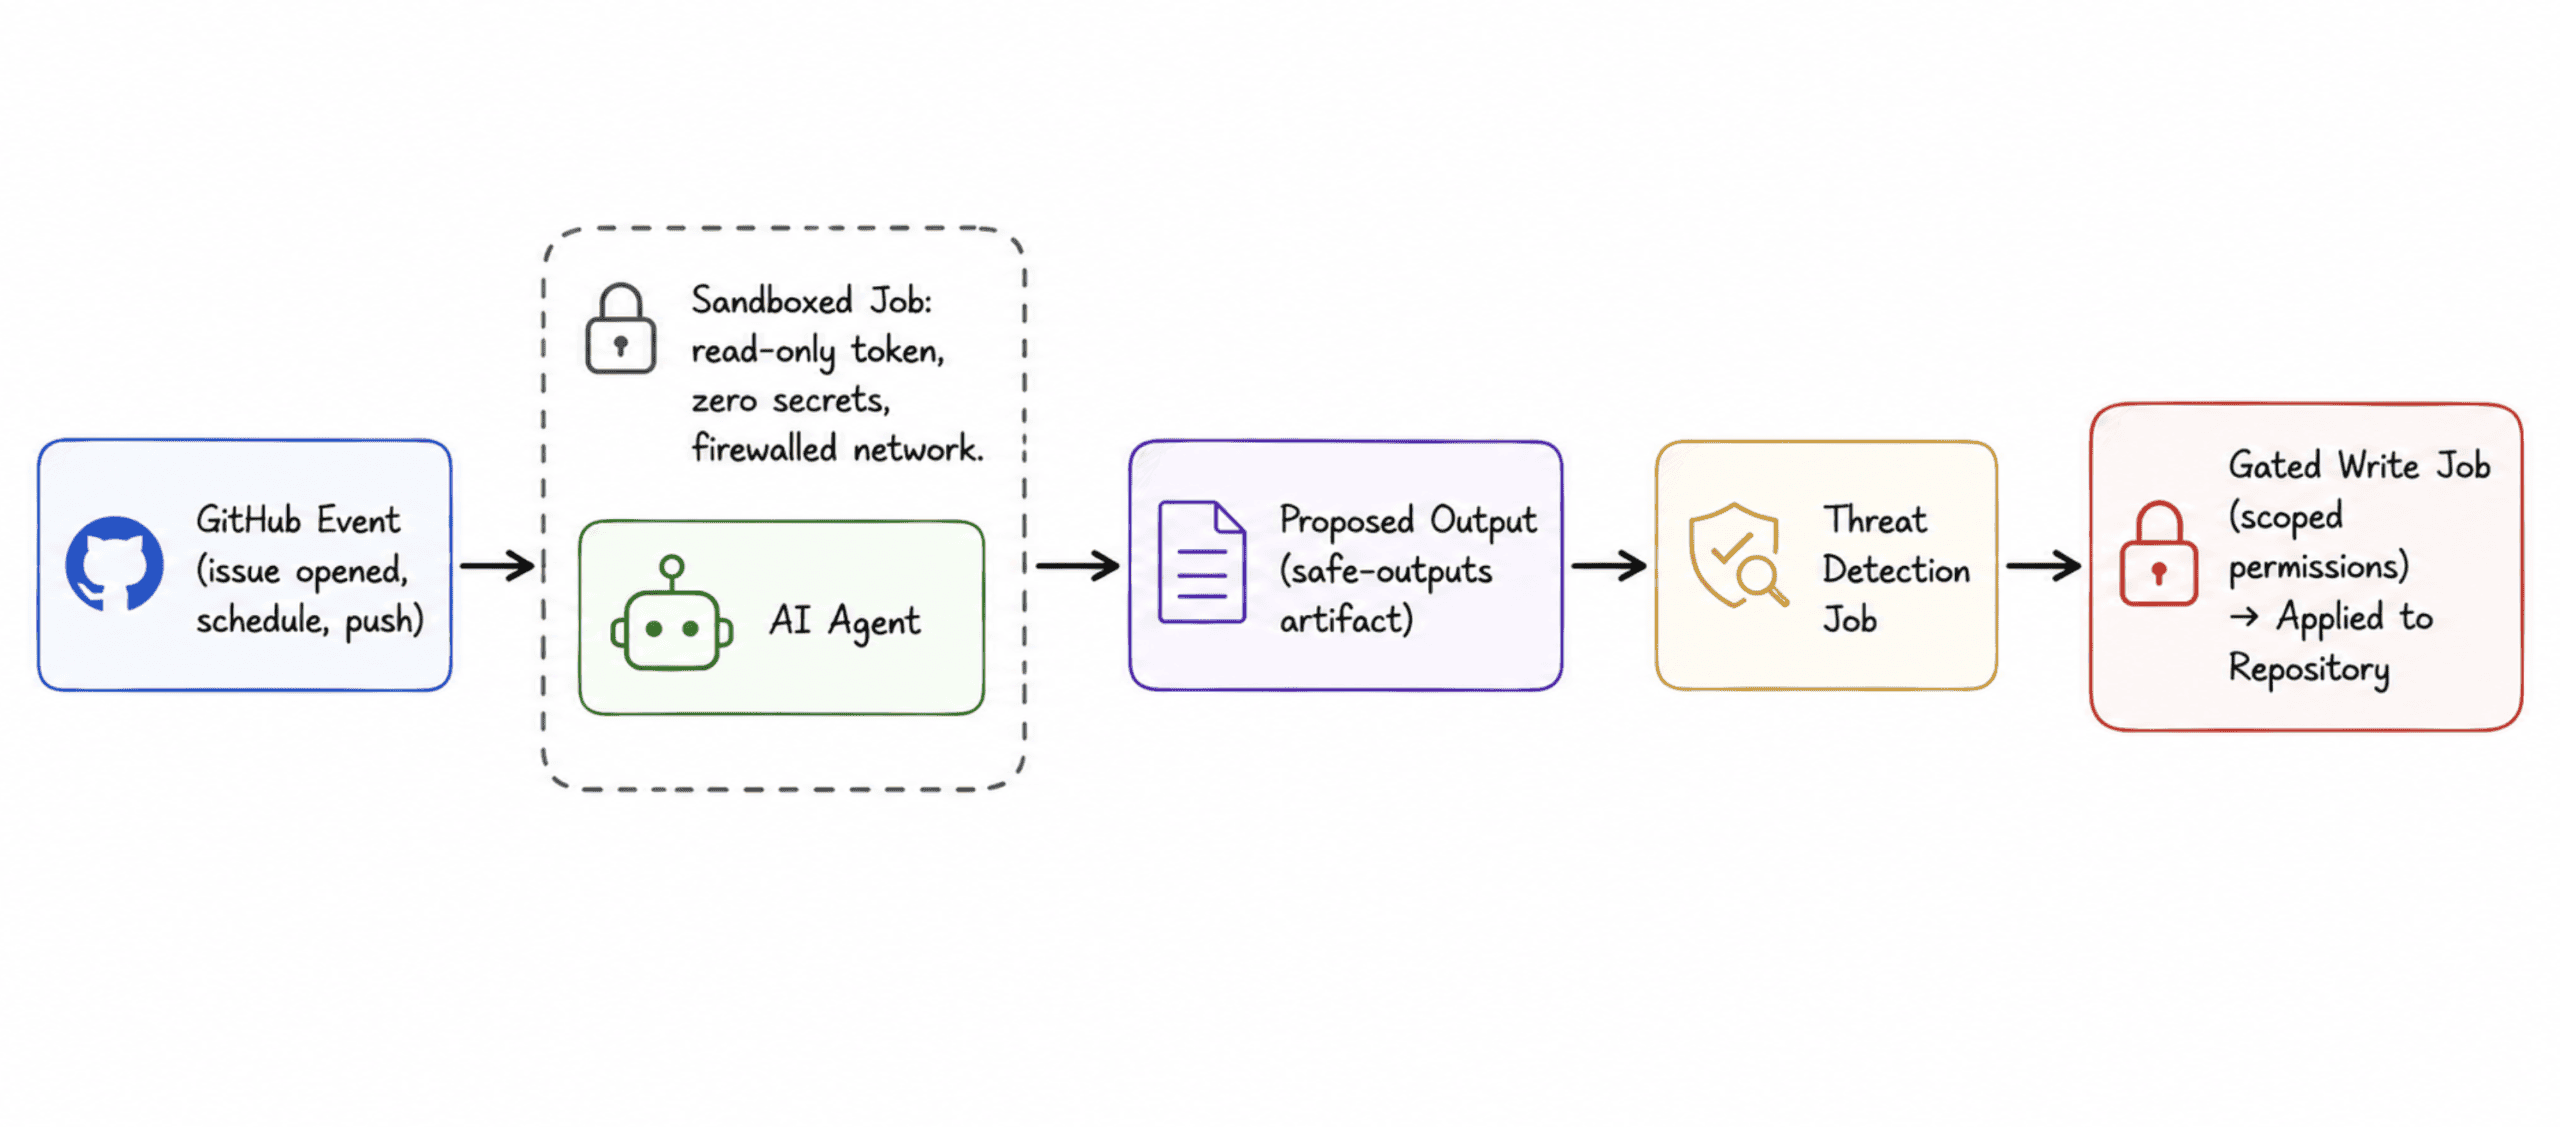
月曜日の午前 9 時。バックログには 43 の新しいイシューが溜まっています。本物のバグもあれば、重複する機能リクエストもあります。単なるタイプミスの愚痴を吐き出したものさえあります。この週にトリアージ(選別)担当になった人は、実際に作ろうとしていた作業に取り掛かる前に、まず 2 時間かけてこれらすべてを読み込み、ラベル付けし、返信する必要があります。
GitHub が「エージェント型ワークフロー」で解決しようとしたのは、まさにこうした業務です。2026 年 6 月 11 日、GitHub はエージェント型ワークフローをパブリックプレビューへ移行しました。これにより、すべてのリポジトリで GitHub Actions 内にコーディングエージェントを実行できるようになり、推論を要する反復作業を自動処理することが可能になりました。コード補完でもチャットサイドバーでもないのです。イシューやプルリクエストを読み込み、あるいは数週間にわたるコミットを分析して、有益なアクションを起こすスケジュール実行型またはイベントトリガー型のエージェントです。
この記事では、この機能の正体と、そのセキュリティモデルがなぜ重要なのか、そして今日からどのようにワークフローを作成・コンパイル・実行できるのかを解説します。読み終える頃には、あなた自身で動作するトリアージワークフローが完成し、まだ改善が必要な部分についても明確に理解できるようになっているはずです。
マーケティング用語を排して本質を捉えれば、このアイデアは非常にシンプルです。.github/workflows/ ディレクトリに Markdown ファイルを作成し、その先頭に YAML フロントマターでワークフローの実行タイミング、アクセス権限、そして AI エンジンを指定します。フロントマターの下には、エージェントに実行してほしいタスクを自然な英語で記述するだけです。
CLI ツール gh-aw がこの Markdown ファイルを読み込み、.lock.yml ファイルへとコンパイルします。これは通常の GitHub Actions ワークフローと同じ形式です。ここで重要なのは、リポジトリに別々のエージェントランタイムを追加する必要がない点です。既存のランナーやブランチ保護ルール、ポリシー制約をそのまま再利用できます。自然言語で記述されているように見えますが、その裏側ではただの Actions が動いているからです。
このプロジェクトは **GitHub Next と Microsoft Research** によって開発されており、標準で GitHub Copilot、Anthropic の Claude、OpenAI Codex、Google Gemini の 4 つの AI エンジンをサポートしています。これらに当てはまらない場合は、カスタムプロセッサを接続するオプションもあります。デフォルトエンジンは Copilot で、組織がすでに Copilot プランを購入している場合、ワークフローの実行コストをその組織の請求先に直接課金できます。別途 API キーを管理する必要はありません。
これは、GitHub が「Continuous AI」と呼ぶより大きな構想の一部でもあります。これは、AI をソフトウェアのライフサイクル全体に体系的に適用する実践であり、一度きりのプロンプト入力として扱うものではありません。Agentic Workflows は、人がキーボードの前に座って Copilot に質問した時だけでなく、スケジュールに従ったりリポジトリ内のイベントに応じて実行したりするための仕組みです。
また、これが何ではないかを明確にしておくことも重要です。これは、特定のタスクをエージェントに任せるために、手動でイシューやプルリクエストから起動する Copilot のクラウドコーディングエージェントとは異なります。Agentic Workflows は、より「恒久的なポリシー」に近いものです。「毎週月曜日にその週のイシュー活動を要約する」「プルリクエストがオープンされるたびにセキュリティ上の懸念を確認する」といったルールです。前者は任せるタスクですが、後者はリポジトリ自体に組み込まれた習慣です。
# なぜ注目すべきか
GitHub は通常、プレビューの初期段階で導入数値を公表しません。そのため、今回の発表にあたって顧客名入りの引用文を添えたことは、内部テストがすでに相当な進捗を遂げていたことを示しています。
Carvana は、柔軟性と組み込まれた制御機能により、エンジニアリングチームが複数のリポジトリにまたがる変更を含む本格的に複雑なシステムでもエージェントワークフローを実行できるという確信を得たと GitHub に伝えています。これは公式のチェンジログにも記載されています。
Marks & Spencer も異なる角度から同様の事例を語っています。彼らの開発者は、課題の選別や依存関係の維持、脆弱性の対策、日常的なレビューといった退屈な作業にスプリント時間を奪われていました。そこで再利用可能なエージェントワークフローのカタログを構築し、どのリポジトリでもその自動化を利用できるようにしたことで、毎回ゼロから作り直す必要がなくなりました。
Hud.io は、機能リストをざっと眺めていると見落としやすい重要な点を指摘しています。エージェントにプルリクエストを開かせること自体は決して難しいことではありません。重要なのは、その出力を信頼して実際にマージできるかどうかです。これが次節で詳述するセキュリティ設計の根幹となる考え方です。
現在の機能の概要は、GitHub 自身の数値ページから直接引用した通り以下のようになります:
| 指標 | 値 |
|---|---|
| 対応 AI エンジン | 4 つの組み込み (Copilot, Claude, Codex, Gemini) およびカスタムエンジンサポート |
| セキュリティレイヤー | 5 つ (読み取り専用トークン、シークレットなし、ネットワークファイアウォール、安全な出力、脅威検出) |
| 文書化された設計パターン | 18 以上 (IssueOps, ChatOps, DailyOps, BatchOps など) |
| 対応する GitHub イベントトリガー | 10 以上 (issues, pull_request, push, schedule, discussion, label など) |
| 安全な出力タイプ | 8 以上 (create-issue, create-pull-request, add-comment, add-label など) |
| インストール | 1 つのコマンド: gh extension install github/gh-aw |
ここでの真の物語はセキュリティモデルにある
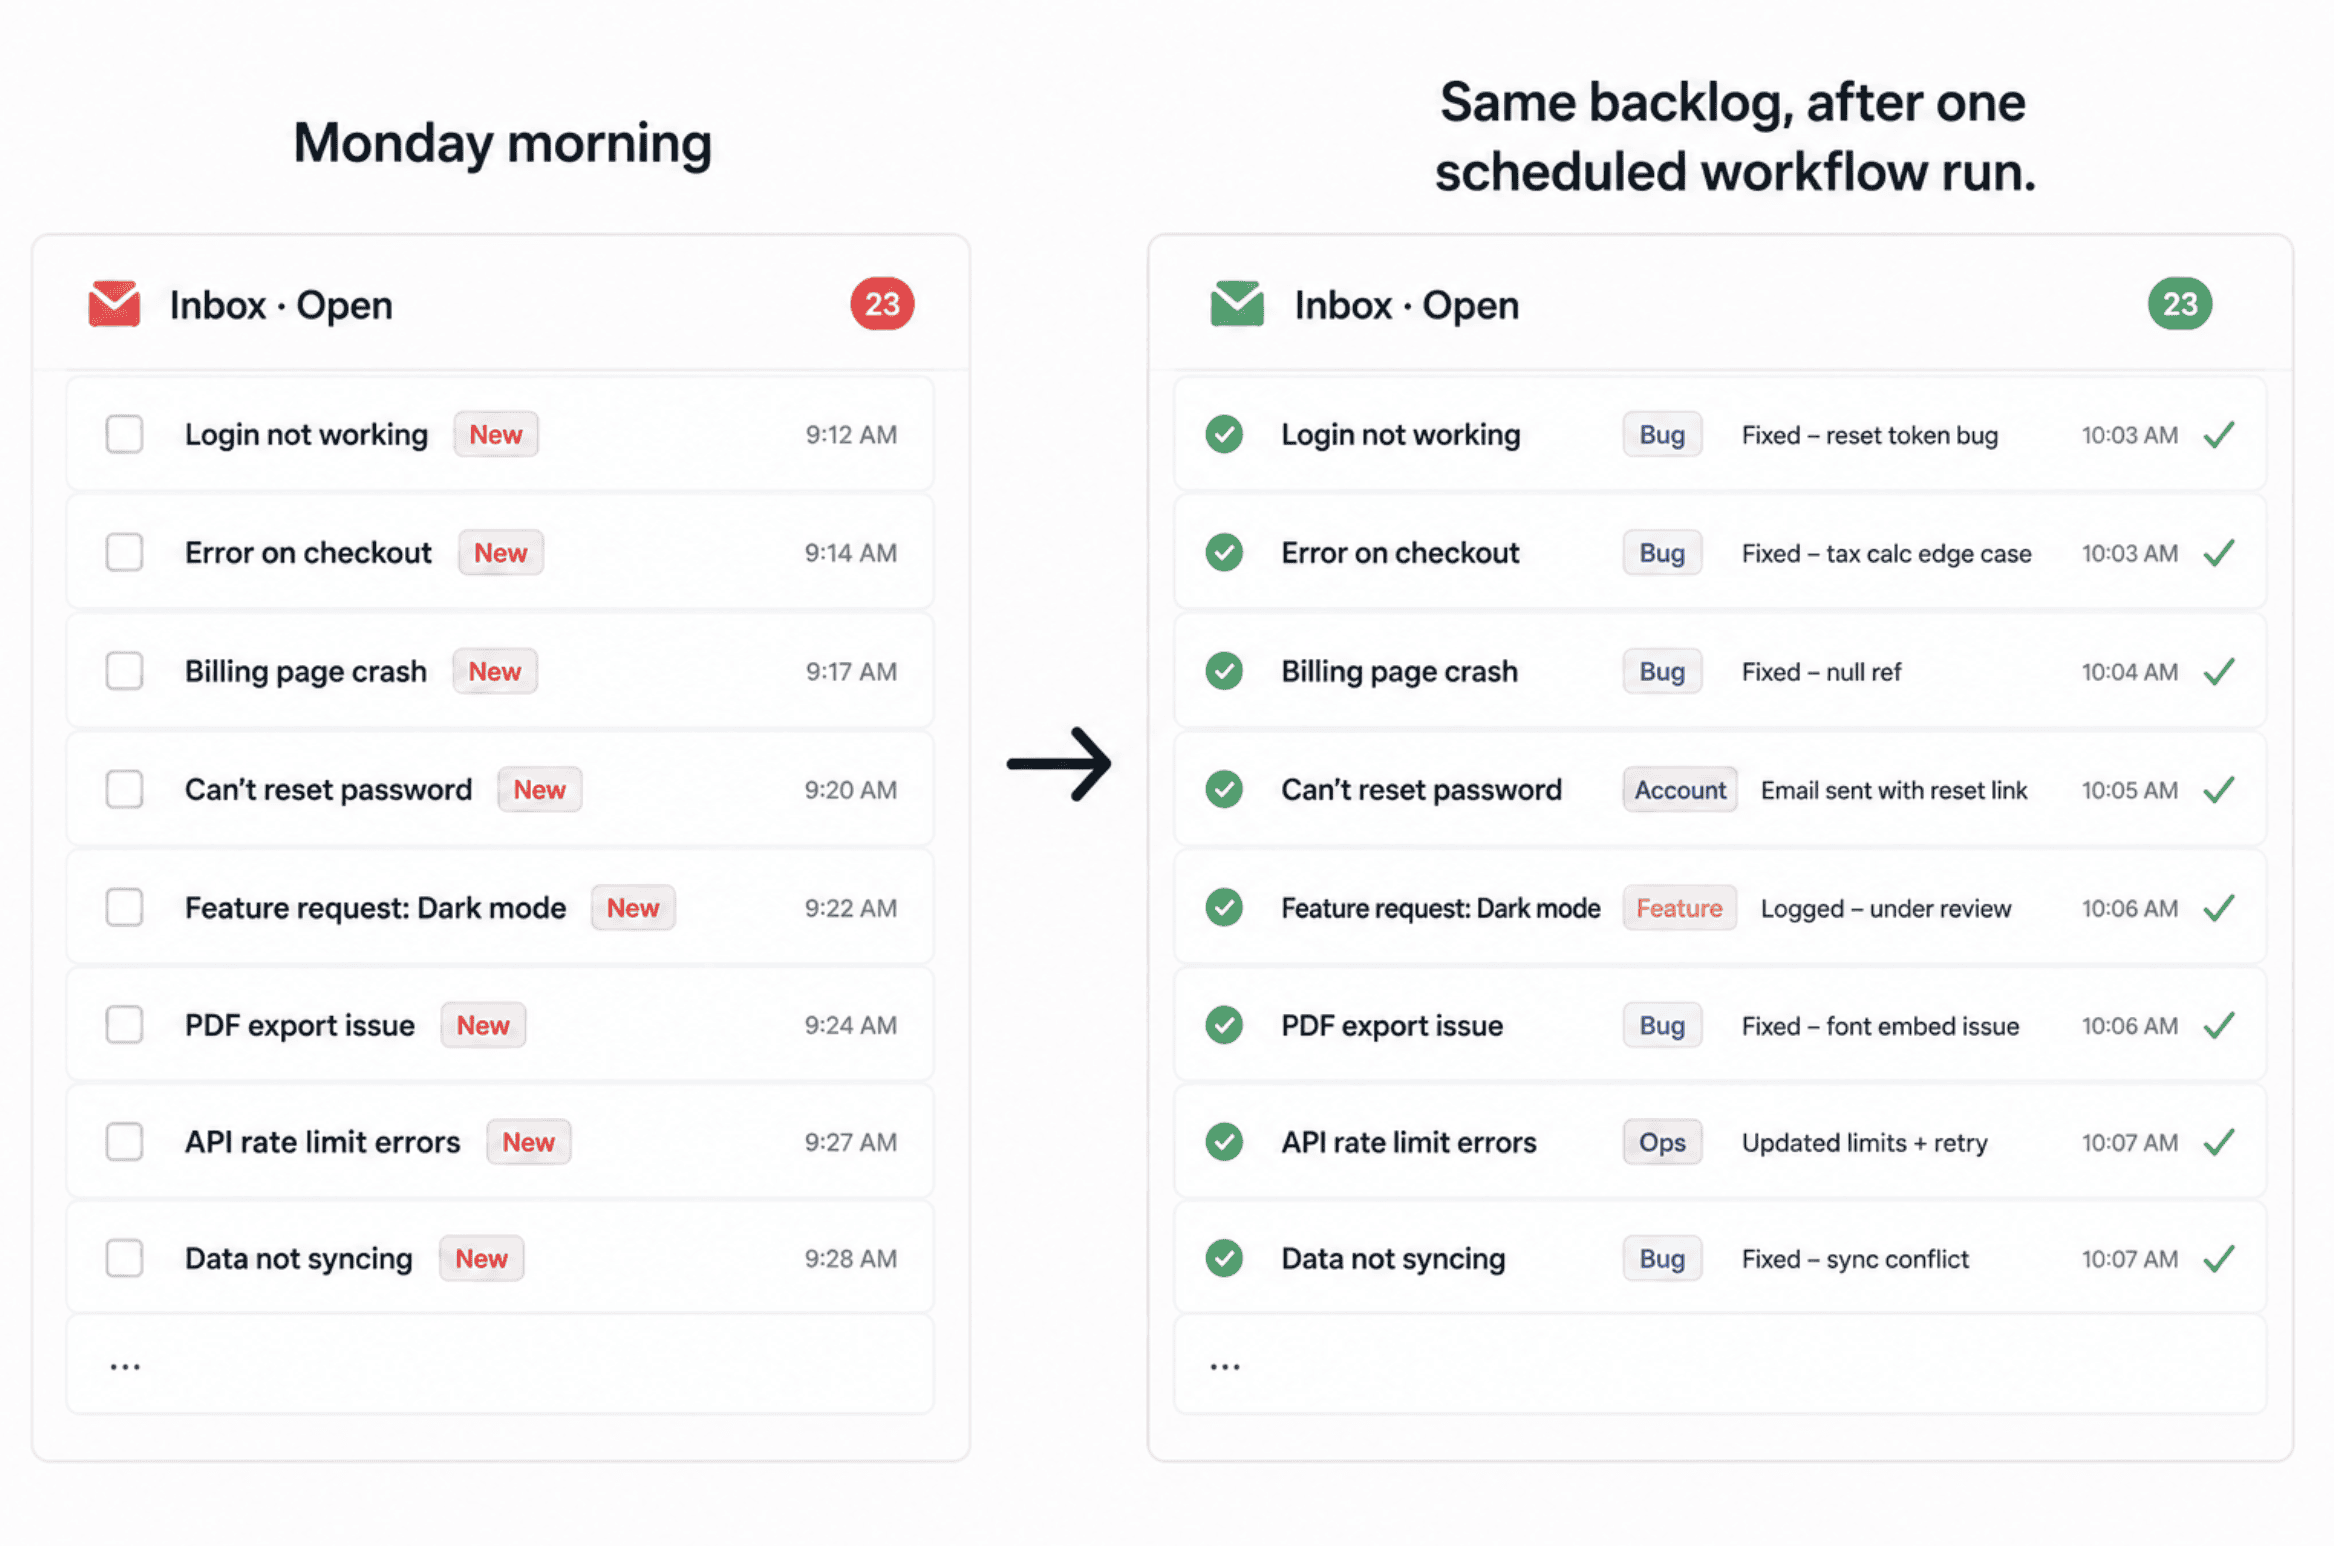
「AI が今すぐあなたの DevOps を代行する」という謳い文句の多くは、最も重要な疑問をすっ飛ばしてしまいます。つまり、「エージェントが失敗した場合、あるいは最悪の場合、課題コメントやリポジトリ内のファイルに潜む敵対的な存在によって操作されたらどうなるのか?」という問いです。信頼できないテキストを読み取るあらゆるエージェントにおいて、リポジトリコンテンツを通じたプロンプトインジェクションは既知のリスクです。GitHub はそれが起こり得ないと仮定するのではなく、それを封じ込めるために 5 つの層を具体的に構築しました。
- 読み取り専用トークン: エージェントの GitHub トークンはデフォルトで読み取り専用のスコープに設定されています。エージェントがコードのプッシュ、PR の作成、ファイルの直接削除を試みても、エージェントが何を試そうとも、トークン自体がそれを許可しないため実行されません。
- エージェントプロセス内にシークレットは存在しない: AI モデルを実際に実行しているプロセスには、書き込み用トークン、API キー、あるいはあらゆる種類の認証情報は一切渡されません。それらはすべて、エージェントの実行が完了し、提案された出力がチェックされた後に実行される別のジョブ内でのみ保持されます。もし実行中にエージェントが乗っ取られても、そこにあるのは盗む価値のあるものなど何もないのです。
ネットワークファイアウォールの背後にあるサンドボックス化されたコンテナ:エージェントは隔離されたコンテナ内で実行され、すべての送信トラフィックは GitHub が「Agent Workflow Firewall」と呼ぶ Squid プロキシ を経由してルーティングされます。このプロキシはドメインの明示的な許可リストを強制しており、許可リスト外の通信はカーネルレベルで遮断されるため、侵害されたエージェントがデータを盗み出すための経路を持ちません。
安全な出力:これは、モデルの実践的な動作を支える仕組みを理解する上で特に重要な部分です。エージェントがリポジトリに直接書き込むことはできません。代わりに、実行したい内容を構造化した形で記述します(例:「このタイトルと本文でイシューを作成する」)。その要求を読み取り、ワークフローのフロントマターで明示的に許可された範囲内でのみ適用を行う、権限を狭く制限された別ジョブが処理を担当します。具体的には、1 回の実行あたり最大 1 つのイシュー作成というハードキャップや、必須のタイトルプレフィックス、特定のラベル制限などです。エージェントは提案し、ゲート付きで決定論的なジョブが実行を完了させます。
エージェント型ワークフローの始め方
エージェントによる脅威検出: 上記のような出力が実際にリポジトリに反映される前には、専用の 脅威検出ジョブ が実行され、AI を活用した独自のスキャンが行われます。これにより、コードへの注入攻撃や漏洩した認証情報、不審なコードパターンがないかチェックされます。何か問題があると判断された場合は実行全体が失敗し、何も書き込まれません。
つまり、エージェントはリポジトリ内のほぼすべての内容を読み取ることは可能ですが、その行動はあなたが定義する狭く監査可能な契約を通じてのみ行われます。これは、サードパーティの GitHub Action をインストールして信頼に基づいて広範な書き込み権限を付与する従来のモデルとは、明確に異なる信頼関係の構築を意味します。
始める前に必要なもの
始めるために必要なものは多くありませんが、以下の項目はすべて重要です。
- サポートされている AI エンジンのいずれかのアカウント(**GitHub Copilot**、**Anthropic Claude**、**OpenAI Codex**、または **Google Gemini**)
- 書き込み権限を持つ GitHub リポジトリ
- そのリポジトリで GitHub Actions が有効になっていること
- すでにマシン上で認証済みの GitHub CLI(バージョン 2.0.0 以降)
CLI のバージョンを確認するには gh --version を実行し、認証が必要な場合は以下を実行してください。
# Logs your local gh CLI into GitHub with the two scopes
# agentic workflows need: repo access and workflow write access
gh auth login --scopes repo,workflow
設定が完了したら、Markdown から YAML へ実際に変換する拡張機能をインストールしてください。
# Installs the gh-aw extension into your existing GitHub CLI
gh extension install github/gh-aw
すでに GitHub CLI のバージョンが 2.90.0 以上であれば、gh aw コマンドを初めて実行した際に自動でこの拡張機能のインストールを提案してくれます。そのため、突然「拡張機能が不足しています」というエラーに遭遇することはありません。
# 認証の設定
これが初めて使う際、ほぼすべての人がつまずくステップです。ここはゆっくり進めることをお勧めします。
GitHub Copilot を、Copilot プランが適用されている組織のレポジトリ内で利用している場合、組み込みの GITHUB_TOKEN を使用するのが適切です。これにより、利用料金が直接組織に請求され、レポジトリのシークレットとして個人用アクセストークン(PAT)を管理する必要がなくなります。ただし、組織管理者はまず Copilot のポリシー設定で「Copilot CLI の利用料金を組織に請求する」オプションを有効にする必要があります。これがオンになれば、ワークフローのフロントマターには以下の記述を追加するだけで済みます。
permissions:
  contents: read
  copilot-requests: write   # routes Copilot billing through the org, not a personal token
これは、2026 年 6 月 11 日のリリースから適用された、実際に注目に値する変更です。この日以降、GitHub Agentic Workflows はこのパスにおいて PAT を一切不要になりました。
2026 年 2 月の技術プレビュー期間中に公開された手元のチュートリアル記事では、Copilot Requests の権限を持つ細粒度の PAT を生成し、それを COPILOT_GITHUB_TOKEN シークレットとして手動で追加する手順が紹介されていました。この手順は、個人リポジトリや、独自の API キーをシークレットとして保存する必要がある Claude や Codex などのサードパーティエンジンを利用する場合に引き続き利用可能です。しかし、組織所有のリポジトリ内で Copilot を実行している場合は、今やトークンのやり取りを一切省略できます。
シークレットの保存が必要なケース(個人リポジトリ、またはエンジンを Claude と Codex に指定する場合)では、GitHub UI または CLI の gh aw secrets set コマンドを通じて、一度だけリポジトリの Actions シークレットに追加します。
# 最初のワークフロー作成
**
実際に本番のリポジトリで動かしたいものを作りましょう。具体的には、新規 Issue が開かれた瞬間にトリアージを行い、分類やラベル付けを実行し、短く有益なレスポンスを投稿するエージェントです。
このファイルを人手で記述することも可能ですが、より良い初体験として、コーディングエージェントに scaffolding(骨組み作成)を任せることをお勧めします。リポジトリごとに一度だけ以下のコマンドを実行して設定してください:
# Adds skills, instructions, and a helper agent to this repo
# so any coding agent you use afterward understands how to
# author and edit agentic workflows correctly
gh aw init
次に、お好みのコーディングエージェント(Copilot CLI または VS Code のエージェントモードのどちらでも利用可能です)から、「新しく開かれたイシューをトリアージし、タイプと優先度で分類してラベルを付け、承認コメントを投稿する新しいワークフローを作成してください」といったプロンプトを入力します。エージェントがファイル作成と最初のコンパイルパスを処理してくれます。
ただし、生成されたファイルを自分で読み込んで理解しておくことも有益です。そこで、.github/workflows/issue-triage.md にそのまま貼り付けられるよう、手書きで記述したバージョンをご紹介します:
---
description: Classify new issues, apply labels, and post a short response
on:
  issues:
    types: [opened]        # only fires when a brand-new issue is created

permissions:
  contents: read            # agent can read repo files for context
  issues: read               # agent can read the issue itself

network: defaults            # outbound traffic limited to the default allowlist

tools:
  github:
    toolsets: [issues]       # only issue-related GitHub tools are exposed

safe-outputs:
  add-label:
    max: 3                   # never apply more than 3 labels in one run
  add-comment:
    max: 1                   # exactly one acknowledgment comment, never more
---

# Issue Triage Agent

When a new issue is opened, read its title, body, and any code
snippets included in it.

Classify the issue as one of: bug, feature request, question, or
documentation gap.

Assess priority as critical, high, medium, or low, based on how
much of the system the issue affects and whether it blocks other
users.

Apply labels that reflect both the type and the priority.

Post one short comment thanking the reporter, restating your
classification in plain language, and letting them know a
maintainer will follow up if it's high priority or above.

Keep the comment under four sentences. Don't speculate about a
fix. Just acknowledge and route.このファイルが各行で実際に何をしているか:on ブロックは、誰かが新しい issue を開いたときのみ実行されることを意味し、編集やコメント時には実行されません。これにより、実行コストを抑えつつ予測可能な動作を実現しています。permissions ブロックは意図的に制限されており、リポジトリの内容と issue の両方に対して読み取り専用となっています。これは、エージェントの役割が直接何かを修正するのではなく、観測と分類に限定されているためです。
network: defaults を設定すると、外部への通信は GitHub の標準的な許可リストに制限され、コンテナがインターネット全体に開放されるのを防ぎます。また tools ブロックでエージェントがアクセスできる GitHub API の範囲を限定することで、例えば課題データの取得だけで済む場合にプルリクエストの閲覧を開始するといった不要な操作を防げます。
そして、safe-outputs ブロックは本記事で前述した実際の信頼境界です。エージェントが提案できるのはラベルを最大 3 つとコメントを正確に 1 つだけであり、実行中に何が適切だと判断しようとも、これ以外は一切出力できません。
ファイルの保存後、コンパイルを実行します:
# Reads the Markdown file and generates the real GitHub Actions
# YAML (issue-triage.lock.yml) that Actions will actually run
gh aw compile
.md ファイルと生成された .lock.yml ファイルの両方を一緒にコミットしてください。両方のファイルをバージョン管理に含めることが重要です。Markdown ファイルが真実のソースとなり、Actions が実行するのはロックファイルです。これは、パッケージのロックファイルがマニフェストと共に存在するのと似た考え方です。
Push してテスト用の issue を作成し、Actions タブを確認するか、実際の issue を待たずに手動でトリガーすることもできます:
# Manually kicks off a workflow run by name, useful for testing
# before you rely on the real event trigger
gh aw run issue-triage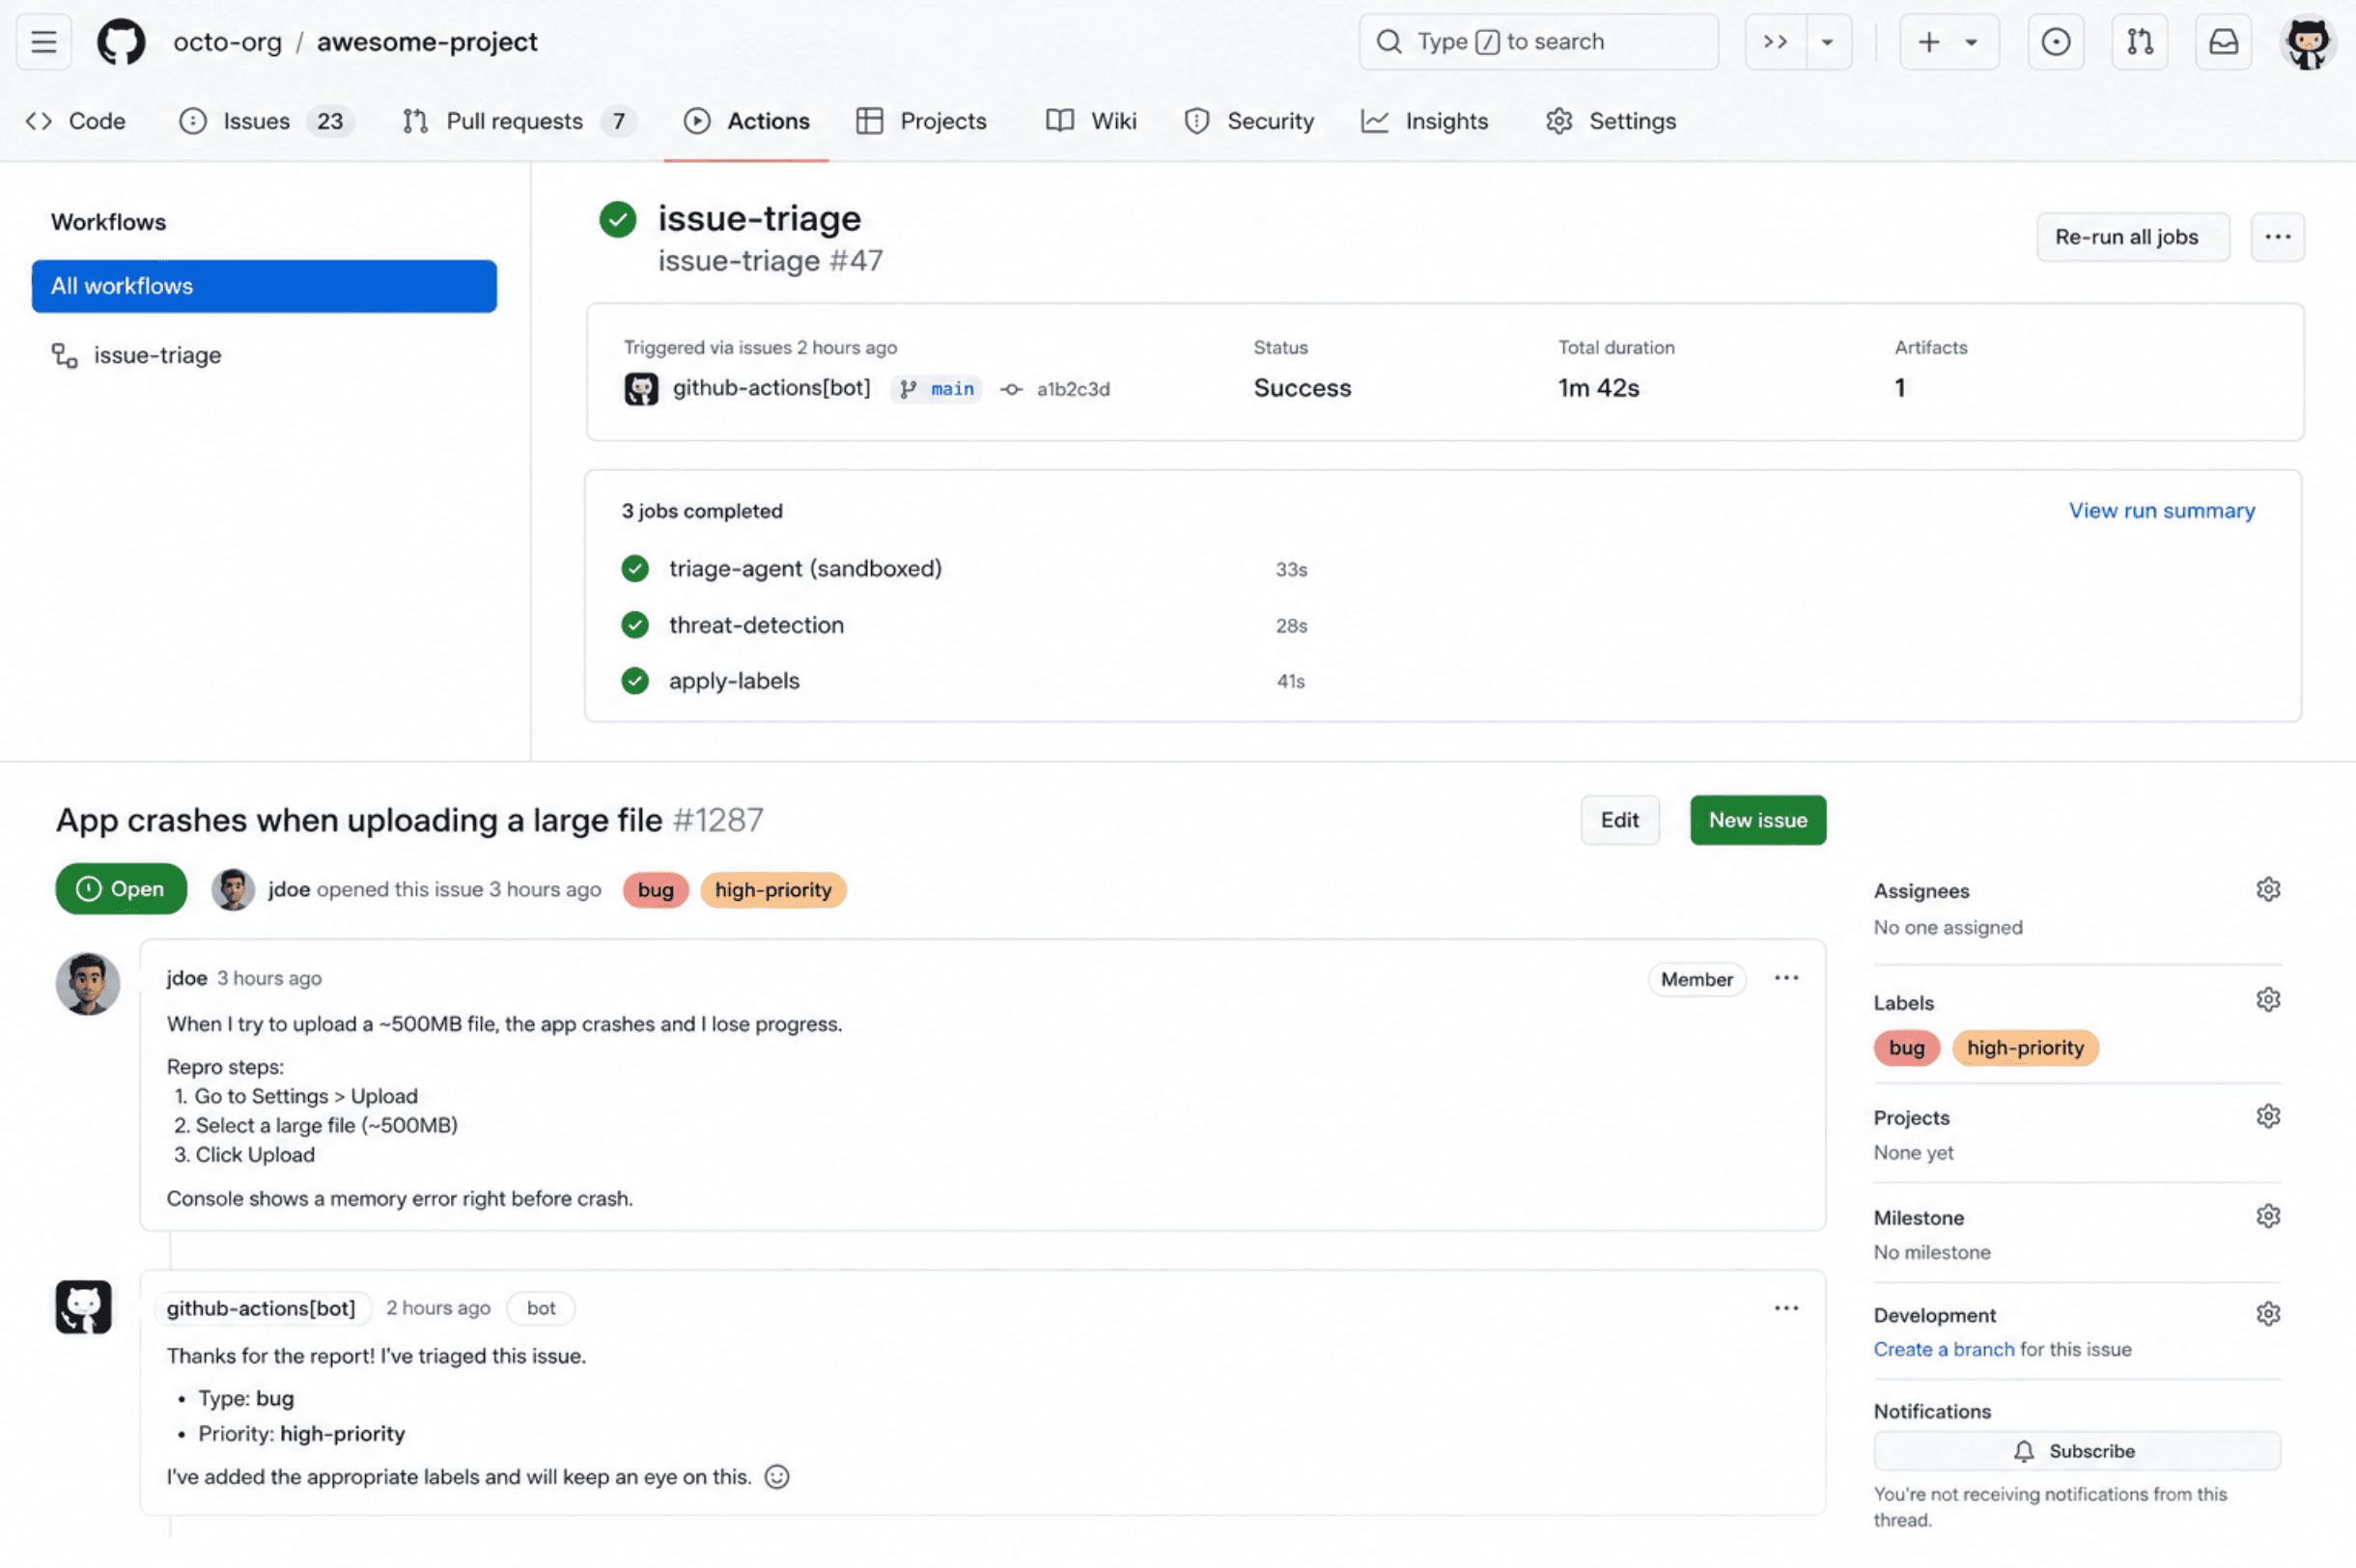
**
# フロントマターの各フィールドを理解する
上記の例では一部のフィールドしか使用していませんが、ゼロから独自ワークフローを記述する前に、利用可能なすべてのフィールドの構造を知っておくと役立ちます。
| 項目 | 制御対象 |
|---|---|
on | ワークフローをトリガーするイベント。標準的な GitHub Actions のトリガー構文(issues, pull_request, schedule, push など)と同じ構文を使用します。 |
permissions | エージェント自体に付与されるリポジトリ権限。設定しない場合は read-all がデフォルトとなります。 |
safe-outputs | エージェントがリクエストできる特定の書き込み操作(それぞれに独自の制限があります):create-issue, add-comment, create-pull-request, add-label など。 |
engine | ワークフローを実行する AI エンジン。デフォルトは copilot で、claude, codex, gemini もサポートされています。 |
tools | エージェントが閲覧できる GitHub API アクセスのカテゴリ。完全な権限セットからスコープを限定したものです。 |
network | サンドボックス化されたコンテナ内からの外部ネットワークアクセスを制御します。 |
完全なリファレンスは gh-aw フロントマインドドキュメント に掲載されています。単一のトリガーを超えたワークフローの作成を始める際は、ぜひブックマークしておきましょう。
知っておくべき一般的なパターン
GitHub では、これらのワークフローに関する 18 種類以上の反復的な設計パターンが文書化されており、実際の利用状況はごく一部の主要なパターンに集中しています。
- IssueOps は、前述のトリアージ例で示されている通りです。これは issue のイベントに応答し、個々の issue のライフサイクルを管理するエージェントです。
- DailyOps や WeeklyOps パターンは、イベントではなくスケジュールに基づいて実行され、要約やレポート、ヘルスチェックを生成します。GitHub 自身の ドキュメント例 では、週ごとの issue アクティビティレポートが紹介されています。これは過去 7 日間の issue アクティビティを確認し、総数や繰り返されるテーマ、そしてまだ対応が必要な項目の短いリストをまとめた単一のサマリー issue を作成するエージェントです。これには
scheduleトリガーと、1 回の実行ごとに最大 1 つに制限された安全な出力であるcreate-issueのみを使用します。
- ChatOps パターンはコメントやメンションに応答し、メンテナーが issue や PR に直接
"@bot summarize this thread"と入力するだけで、構造化された回答を受け取れるようにします。
BatchOps パターンは、スケジュールに基づいて一度に多数のアイテムを処理します。例えば、すべてのオープンな依存関係更新 PR をスキャンしてマージ競合を検出したり、リポジトリ全体を一括で走査して古いイシューをフラグ付けしたりするケースが該当します。
完全な分類体系を暗記する必要はありません。重要なのは、自動化したい業務のほとんどがこのいずれかのパターンに当てはまることを認識し、ゼロから独自に設計するよりも既存のパターンを活用した方が圧倒的に速いという点です。
自作ではなくワークフローを再利用する
毎回ゼロから始める必要はありません。GitHub Next では **agentics** という公開カタログを維持しており、トリアージ、コンプライアンスチェック、レポート作成など、すぐに使えるワークフローが揃っています。これらを直接リポジトリに引き込むことができます。
# Imports a pre-built workflow from GitHub Next's public catalogue
# and walks you through configuring it interactively
gh aw add-wizard githubnext/agentics/daily-repo-status
対話型ではないセットアップでは gh aw add コマンドも同様に機能し、特定のバージョンを固定することも可能です。このようにしてワークフローをインポートすると、CLI が frontmatter に source: 値を記録します。これにより後ほど gh aw update を実行した際に、どこから上流の変更を取得すべきかを把握できるようになります。
ここでは特に注意すべき点が二つあります。まず、信頼できるソースからのみワークフローをインポートしてください。他人の指示に基づいて、AI エージェントにリポジトリへの実際的なアクセス権限を与えることになるからです。また、ソースリポジトリで private: true とマークされたワークフローは他場所でインポートできないため、すべての内部チームのワークフローカタログが自組織外でも再利用できるとは期待しないでください。
まだまだ荒削りな部分について
公開プレビュー機能のための入門ガイドでありながら、すべてが完成されているかのように振る舞うのは不誠実です。実際に本番に近いリポジトリでこの機能を運用した開発者からのリアルな体験談に基づき、いくつか知っておくべき点があります。例えば、自身が構築・実行した 4 つのワークフローを詳細に記述した、開発者の Hector Flores 氏による 記事 などです。
デバッグ機能はまだ一部で不透明な部分が残っています。エージェントが想定外の分類を行った際、その理由を理解できるのは標準的な GitHub Actions のログのみであり、意思決定の根拠を説明する構造化された推論トレースは提供されていません。現状ではこれで対応可能ですが、これはパワーユーザーから最初に要望される機能です。
ワークフロー実行ごとのリアルタイムなコスト可視化はまだ実現されていません。各実行では、エンジンへの請求に対して AI トークンが消費されます。事後に全体の使用状況を確認することはできますが、数十のレポジトリにまたがる機能を展開する前にチームが予算を設定できるよう、ワークフローごとの見積もりは提供されていません。
.lock.yml のコンパイルステップは、設計の一部というよりは足場(スキャフォールディング)のように感じられます。確かに信頼性はありますが、Markdown ソースと生成されたロックファイルの 2 ファイル構成は、将来的にはプラットフォームに直接統合されるものではないでしょうか。つまり、.md ファイルをプッシュするだけで GitHub がネイティブにコンパイルし、別個の CLI ステップが不要になるような未来が来るはずです。
それでも、試してみるのをためらう必要はありません。ただし、期待値は正しく持っておくべきです。これは急速に進化する公開プレビューであり、完成した製品ではありません。1 年後に最も重要となる部分——安全な出力の契約と階層化されたセキュリティモデル——は、すでに現在の機能の中で最も堅牢な要素となっています。
# 他の Copilot ツールとの位置関係
GitHub が既に「Copilot」という名前で提供している他のツールと混同されがちです。そこで、それぞれの違いを明確にするための簡単な比較表を用意しました。
| — | GitHub エージェント型ワークフロー | Copilot クラウドコーディングエージェント | 従来のカスタムアクション |
|---|---|---|---|
| トリガーの仕組み | リポジトリイベントまたはスケジュールによる、完全自律型 | 人間がタスクに手動で割り当て | リポジトリイベントによる、完全自律型 |
| 定義場所 | YAML フロントマター付きの Markdown | プロンプトまたは割り当てられた課題 | 手書きの YAML とカスタムスクリプト |
| デフォルトのアクセス権限 | 読み取り専用、または安全な出力を介した書き込みのみ | 割り当てられた特定のタスクにスコープ限定 | 付与された権限のすべて(広範な場合が多い) |
| 最も適した用途 | 反復的な推論ベースのリポジトリメンテナンス | 単発の実装または調査タスク | 決定論的、ルールベースの自動化 |
これら 3 つの手法は互いに排他的なものではなく、健全な運用では通常すべてを併用します。具体的には、linting やテストといった決定論的なチェックにはカスタム Actions を使い、特定機能の開発を手渡す際にはクラウドベースのコーディングエージェントを活用し、固定ルールに当てはまらないが毎回人が手動で開始する必要もない判断が必要な業務には Agentic Workflows を担当させます。
# 結びの言葉
GitHub Agentic Workflows を考える上で最も有用な視点は、「AI が YAML を書くようになった」ということではありません。重要なのは、ルールベースではなく「判断」を自動化に組み込めるようになった点です。従来の Action では「src/auth/ に変更を加えた PR は必ずセキュリティレビューが必要」といったルールを強制できますが、Agentic Workflow は「セキュリティ上重要な箇所と思われるものを検知し、適切にルーティングする」という行動を取れます。これは以前は人が毎回注意深く対応する必要があった、本質的に難しく異なる課題です。
初めて試す場合は、イシューのトリアージから始めるのがおすすめです。これが最もシンプルなパターンであり、コメントとラベルのみが関わるため、安全な出力を保証する契約を推論しやすいからです。テスト用のイシューを開いて数分以内に動作するか失敗するかがわかります。一度この仕組みを理解できれば、スケジュールされたレポート作成、PR レビュー、ドキュメントの維持管理へと移行するのは、外から見たほど大きな飛躍ではありません。
最新のセットアップ手順については、公式のクイックスタートガイド をご確認ください。また、共有する価値のある成果物を構築された場合は、現在プレビュー中であるこの機能に関するフィードバックを GitHub が積極的に収集している コミュニティディスカッション で共有してください。
Shittu Olumide は、最先端の技術を活用して説得力のある物語を紡ぐことに情熱を注ぐソフトウェアエンジニアでありテクニカルライターです。細部へのこだわりが強く、複雑な概念をわかりやすく解説する才能に長けています。また、Twitter でも活動しています。
原文を表示
**
# Introducing GitHub's Agentic Workflows
It's 9 AM on a Monday, and forty-three new issues are sitting in the backlog. Some are real bugs. Some are duplicate feature requests. A couple are just someone venting about a typo. Whoever is on triage duty this week is going to spend the first two hours of their day reading, labelling, and replying to all of them before they can touch anything they actually planned to build.
That's the exact kind of work GitHub built Agentic Workflows to take off your plate. On June 11, 2026, GitHub moved Agentic Workflows into public preview, giving every repository the ability to run coding agents inside GitHub Actions to handle exactly this kind of reasoning-heavy, repetitive work. Not code completion. Not a chat sidebar. A scheduled or event-triggered agent that reads an issue, a pull request, or a week's worth of commits, and does something useful with what it finds.
This article walks through what the feature actually is, why the security model matters more than the pitch-deck version of it, and how to write, compile, and run your first workflow today. By the end, you'll have a working triage workflow of your own and a clear sense of what's still a bit rough around the edges.
Strip away the marketing language, and the idea is fairly simple. You write a Markdown file that lives in .github/workflows/. The top of that file has a small block of YAML frontmatter describing when the workflow runs, what it's allowed to touch, and which AI engine powers it. Below the frontmatter, you write plain-English instructions describing what you want the agent to do.
A command-line interface (CLI) tool called gh-aw reads that Markdown file and compiles it into a .lock.yml file, which is a completely ordinary GitHub Actions workflow. That's the part worth sitting with for a second: there is no separate agent runtime bolted onto your repository. It reuses your existing runners, your existing branch protection rules, and your existing policy constraints, because underneath the natural language, it's just Actions**.
The project is built by GitHub Next and Microsoft Research, and it currently supports four AI engines out of the box: GitHub Copilot, Anthropic's Claude, OpenAI Codex, and Google Gemini, with the option to plug in a custom processor if none of those fit. Copilot is the default engine, and if your organization already pays for a Copilot plan, workflow runs can bill directly to that organization instead of requiring you to manage a separate API key.
It also sits inside a bigger idea GitHub calls Continuous AI, which is really just the practice of applying AI systematically across the software lifecycle instead of one prompt at a time. Agentic Workflows is the mechanism for doing that on a schedule or in response to repository events, rather than only when a person happens to be sitting at their keyboard asking Copilot a question.
It's also worth being clear about what this is not. It isn't the same thing as Copilot's cloud coding agent, which you kick off manually from an issue or a pull request when you want an agent to implement something specific for you right now. Agentic Workflows is closer to a standing policy: "every Monday, summarize the week's issue activity" or "every time a PR opens, review it for security concerns." One is a task you hand off. The other is a habit you build into the repository itself.
# Why This Is Worth Paying Attention To
**
GitHub doesn't typically publish adoption numbers this early in a preview, so the fact that they attached named customer quotes to the launch says something about how far along the internal testing already was.
Carvana told GitHub the flexibility and built-in controls gave their engineering team enough confidence to run agentic workflows across genuinely complex systems, including changes that touch more than one repository at a time, according to the official changelog. Marks & Spencer described a similar story from a different angle: their developers were losing real sprint hours to the boring stuff — issue triage, dependency maintenance, vulnerability remediation, and routine review — and building a shared catalogue of reusable agentic workflows let teams pick up that automation across any repository without reinventing it each time.
Hud.io made a point that's easy to miss if you're only skimming the feature list: getting an agent to open a pull request was never the hard part of this. Trusting the output enough to actually merge it is. That's really the whole thesis behind the security design covered in the next section.
Here's the shape of the feature as it stands today, pulled directly from GitHub's own numbers page:
| Metric | Value |
|---|---|
| Supported AI engines | 4 built-in (Copilot, Claude, Codex, Gemini), plus custom engine support |
| Security layers | 5 (read-only token, zero secrets, network firewall, safe outputs, threat detection) |
| Documented design patterns | 18+ (IssueOps, ChatOps, DailyOps, BatchOps, and more) |
| Supported GitHub event triggers | 10+ (issues, pull_request, push, schedule, discussion, label, and others) |
| Safe output types | 8+ (create-issue, create-pull-request, add-comment, add-label, and others) |
| Installation | One command: gh extension install github/gh-aw |
# The Security Model Is the Real Story Here
Most "*AI does your DevOps now*" pitches skip straight past the obvious question: what happens when the agent gets it wrong, or worse, gets manipulated by something hostile sitting inside an issue comment or a file in the repo. Prompt injection through repository content is a known risk with any agent that reads untrusted text, and GitHub built five layers specifically to contain that, rather than pretend it can't happen.
- Read-only tokens: The agent's GitHub token is scoped to read-only access by default. If it tries to push code, open a PR, or delete a file directly, the token itself doesn't allow it, regardless of what the agent decides to attempt.
- Zero secrets in the agent process: The process actually running the AI model never receives write tokens, API keys, or credentials of any kind. Those live only in a separate job that runs after the agent has already finished and its proposed output has been checked. If the agent is compromised mid-run, there's nothing in its reach worth stealing.
- A sandboxed container behind a network firewall: The agent executes inside an isolated container, and all outbound traffic is routed through what GitHub calls the Agent Workflow Firewall, a Squid proxy enforcing an explicit allowlist of domains. Anything outside that allowlist gets dropped at the kernel level, so a compromised agent has no path to quietly phone home with your data.
- Safe outputs: This is the part worth understanding properly, because it's the mechanism that makes the rest of the model work in practice. The agent can't write to your repository directly at all. Instead, it produces a structured description of what it wants to do — something like "open an issue with this title and this body." A separate job with narrowly scoped write permissions reads that request and applies only what you've explicitly allowed in the workflow's frontmatter: a hard cap of one issue per run, a required title prefix, specific label restrictions, whatever you decide. The agent proposes. A gated, deterministic job disposes.
- Agentic threat detection: Before any of that output actually lands in your repo, a dedicated threat-detection job runs its own AI-powered scan across the proposed changes, checking for injection attempts, leaked credentials, or suspicious code patterns. If something looks wrong, the whole run fails, and nothing gets written.
Put together, the agent can read almost anything in your repository, but it can only ever act through a narrow, auditable contract you define yourself. That's a meaningfully different trust model from installing a third-party GitHub Action and granting it broad write permissions on faith.
# What You Need Before You Start
You don't need much to get going, but each of these matters:
An account with one of the supported AI engines: GitHub Copilot, Anthropic Claude, OpenAI Codex, or Google Gemini. A GitHub repository where you have write access. GitHub Actions must be enabled on that repository. And the GitHub CLI, version 2.0.0 or later, must already be authenticated on your machine.
Check your CLI version with gh --version, and if you need to authenticate, run:
# Logs your local gh CLI into GitHub with the two scopes
# agentic workflows need: repo access and workflow write access
gh auth login --scopes repo,workflow
Once that's done, install the extension that does the actual Markdown-to-YAML compilation:
# Installs the gh-aw extension into your existing GitHub CLI
gh extension install github/gh-aw
If you're already on GitHub CLI 2.90.0 or newer, running any gh aw command will offer to install this automatically the first time you use it, so you won't hit a missing-extension error out of nowhere.
# Setting Up Authentication
This is the one step that trips up almost everyone the first time, so it's worth slowing down here.
If you're using GitHub Copilot inside a repository owned by an organization with a Copilot plan, you want the built-in GITHUB_TOKEN approach. It bills usage straight to your organization and means nobody has to babysit a personal access token (PAT) as a repo secret. Your organization admin needs to enable "Allow use of Copilot CLI billed to the organization**" under Copilot policy settings first. Once that's on, all you need in your workflow frontmatter is:
permissions:
  contents: read
  copilot-requests: write   # routes Copilot billing through the org, not a personal token
This is a genuinely recent change worth calling out directly: as of the same June 11, 2026 release, GitHub Agentic Workflows no longer requires a PAT at all for this path. Earlier hands-on writeups from the technical preview period in February 2026 describe generating a fine-grained PAT with Copilot Requests permission and manually adding it as a COPILOT_GITHUB_TOKEN secret. That step still exists as an option for personal repositories or for third-party engines like Claude or Codex that need their own API key stored as a secret, but if you're running Copilot inside an org-owned repo, you can skip the token dance entirely now.
For anything that does need a stored secret (personal repos, or Claude and Codex as your engine), you add it once through your repository's Actions secrets, either in the GitHub UI or with gh aw secrets set from the CLI.
# Writing Your First Workflow
**
Let's build something you'd actually want running in a real repository: an agent that triages new issues the moment they're opened, classifies them, labels them, and posts a short, useful response.
You could write this file by hand, but a better first experience is to let a coding agent scaffold it for you. Run this once per repository to set that up:
# Adds skills, instructions, and a helper agent to this repo
# so any coding agent you use afterward understands how to
# author and edit agentic workflows correctly
gh aw init
Then, from inside your coding agent of choice (Copilot CLI or VS Code agent mode both work), you'd prompt something like: create a new workflow that triages newly opened issues, classifies them by type and priority, applies labels, and posts an acknowledgement comment. The agent handles the file creation and the first compile pass for you.
But it helps to actually read and understand the file it produces, so here's a hand-written version you can drop straight into .github/workflows/issue-triage.md:
---
description: Classify new issues, apply labels, and post a short response
on:
  issues:
    types: [opened]        # only fires when a brand-new issue is created

permissions:
  contents: read            # agent can read repo files for context
  issues: read               # agent can read the issue itself

network: defaults            # outbound traffic limited to the default allowlist

tools:
  github:
    toolsets: [issues]       # only issue-related GitHub tools are exposed

safe-outputs:
  add-label:
    max: 3                   # never apply more than 3 labels in one run
  add-comment:
    max: 1                   # exactly one acknowledgment comment, never more
---

# Issue Triage Agent

When a new issue is opened, read its title, body, and any code
snippets included in it.

Classify the issue as one of: bug, feature request, question, or
documentation gap.

Assess priority as critical, high, medium, or low, based on how
much of the system the issue affects and whether it blocks other
users.

Apply labels that reflect both the type and the priority.

Post one short comment thanking the reporter, restating your
classification in plain language, and letting them know a
maintainer will follow up if it's high priority or above.

Keep the comment under four sentences. Don't speculate about a
fix. Just acknowledge and route.
What this file is actually doing, line by line:** The on block means this only runs when someone opens a new issue, not on edits or comments, which keeps running cheap and predictable. The permissions block is deliberately narrow — read-only on both repo contents and issues — because the agent's job here is to observe and classify, not to modify anything directly. network: defaults keeps outbound calls restricted to GitHub's standard allowlist rather than opening the container up to the wider internet. The tools block scopes down which GitHub API surface the agent even has access to, so it can't, say, start browsing pull requests when all it needs is issue data. And the safe-outputs block is the actual trust boundary discussed earlier in this article: the agent can suggest up to three labels and exactly one comment, and nothing else, no matter what it decides mid-run would be a good idea.
Once the file is saved, compile it:
# Reads the Markdown file and generates the real GitHub Actions
# YAML (issue-triage.lock.yml) that Actions will actually run
gh aw compile
Commit both the .md file and the generated .lock.yml file together. Yes, both files go into version control. The Markdown is your source of truth, and the lock file is what Actions executes — similar in spirit to how a package lock file sits alongside a manifest.
Push, open a test issue, and watch the Actions tab. Or trigger it manually without waiting for a real issue:
# Manually kicks off a workflow run by name, useful for testing
# before you rely on the real event trigger
gh aw run issue-triage
**
# Understanding Every Field in the Frontmatter
The example above only used a handful of fields, but it helps to know the full shape of what's available before you start writing your own workflows from scratch.
| Field | What It Controls |
|---|---|
on | The event that triggers the workflow, using the same syntax as standard GitHub Actions triggers (issues, pull_request, schedule, push, and more) |
permissions | The repository permissions granted to the agent itself; defaults to read-all if you don't set it |
safe-outputs | The specific write operations the agent is allowed to request, each with its own limits (create-issue, add-comment, create-pull-request, add-label, and others) |
engine | Which AI engine runs the workflow; copilot is the default, with claude, codex, and gemini also supported |
tools | Which categories of GitHub API access the agent can see at all, scoped down from the full permission set |
network | Controls outbound network access from inside the sandboxed container |
The full reference lives on the gh-aw frontmatter documentation, and it's worth bookmarking once you start writing workflows that go beyond a single trigger.
# Common Patterns Worth Knowing
GitHub documents more than eighteen recurring design patterns for these workflows, and most real usage clusters around a handful of them.
- IssueOps is exactly what the triage example above demonstrates: an agent that reacts to issue events and manages the lifecycle of individual issues.
- DailyOps or WeeklyOps patterns run on a schedule rather than an event, producing digests, reports, or health checks. GitHub's own documentation example for this is a weekly issue activity report: an agent that reviews the last seven days of issue activity and opens a single summary issue covering totals, recurring themes, and a short list of items that still need attention, using nothing more than a schedule trigger and a create-issue safe output capped at one per run.
- ChatOps patterns respond to comments or mentions, letting a maintainer type something like "@bot summarize this thread" directly into an issue or PR and get a structured response back.
- BatchOps patterns process many items at once on a schedule — things like scanning every open dependency-update PR for merge conflicts, or flagging stale issues across an entire repository in a single pass.
You don't need to memorize the full taxonomy. What matters is recognizing that almost anything you'd want automated fits one of these shapes, and starting from an existing pattern is much faster than designing your own from a blank page.
# Reusing Workflows Instead of Writing Your Own
You don't have to start from zero every time. GitHub Next maintains a public catalogue called agentics with ready-made workflows covering triage, compliance checks, reporting, and more. You can pull one directly into your repository:
# Imports a pre-built workflow from GitHub Next's public catalogue
# and walks you through configuring it interactively
gh aw add-wizard githubnext/agentics/daily-repo-status
For a non-interactive setup, gh aw add works the same way and lets you pin a specific version. When you import a workflow this way, the CLI records a source: value in the frontmatter, which is how gh aw update later knows where to pull upstream changes from.
Two things worth being careful about here. First, only import workflows from sources you actually trust and have reviewed, since you're effectively giving an AI agent a defined but real slice of access to your repository based on someone else's instructions. Second, workflows marked private: true in their source repo can't be imported elsewhere at all, so don't expect every internal team's workflow catalogue to be reusable outside its own org.
# What's Genuinely Still Rough
It would be dishonest to write a getting-started guide for a public preview feature and pretend everything is polished. A few things are worth knowing going in, based on real hands-on accounts from developers who've actually run this in production-adjacent repos, including a detailed write-up from developer Hector Flores documenting four workflows he built and ran.
Debugging is still opaque in places. When an agent makes a classification you didn't expect, your only real window into why is standard GitHub Actions logs, not a structured reasoning trace explaining the decision. That's workable for now, but it's the first thing power users ask for.
There's no real-time cost visibility per workflow run. Each execution consumes AI tokens against your engine's billing, and while you can check overall usage after the fact, there's no per-workflow estimate to help a team set a budget before turning something on across dozens of repositories.
The .lock.yml compilation step feels like scaffolding rather than a permanent part of the design. It works reliably, but the two-file pattern (Markdown source plus generated lock file) reads like something that will eventually get absorbed directly into the platform, where you push a .md file and GitHub compiles it natively without a separate CLI step.
None of that should stop you from trying it. It should just set your expectations correctly: this is a fast-moving public preview, not a finished product, and the parts of it that will matter most in a year — the safe-outputs contract and the layered security model — are already the strongest part of what exists today.
# Where This Fits Next to Other Copilot Tools
It's easy to conflate this with other things GitHub already ships under the Copilot name, so here's a quick side-by-side to keep them straight.
| — | GitHub Agentic Workflows | Copilot Cloud Coding Agent | A Traditional Custom Action |
|---|---|---|---|
| How it's triggered | Repository events or a schedule, fully autonomous | Manually assigned to a task by a person | Repository events, fully autonomous |
| What it's defined in | Markdown with YAML frontmatter | A prompt or assigned issue | Hand-written YAML plus custom scripts |
| Default access | Read-only, write-only through safe outputs | Scoped to the specific task assigned | Whatever permissions you grant, often broad |
| Best suited for | Recurring, reasoning-based repo maintenance | One-off implementation or investigation tasks | Deterministic, rule-based automation |
None of these three replace each other. A healthy setup usually runs all three at once: custom Actions for deterministic checks like linting and tests, the cloud coding agent for when you want to hand off a specific feature, and Agentic Workflows for the recurring judgment calls that don't fit a fixed rule but also don't need a person to kick them off every time.
# Closing Thoughts
The most useful way to think about GitHub Agentic Workflows isn't "AI writes my YAML now." It's that you can finally encode judgment calls into automation instead of only rules. A traditional Action can enforce "every PR touching src/auth/ needs a security review." An agentic workflow can act on "flag anything that looks security-sensitive and route it appropriately" — which is a genuinely different and harder problem that used to require a person paying attention every single time.
If you're trying this for the first time, start with issue triage. It's the simplest pattern; the safe-outputs contract is easy to reason about with only a comment and a label at stake, and you'll see it work or fail within minutes of opening a test issue. Once that clicks, the jump to scheduled reports, PR review, and documentation upkeep is a much smaller leap than it looks like from the outside.
Read through the official quickstart guide for the most current setup steps, and if you build something worth sharing back, the community discussion is where GitHub is actively collecting feedback while the feature is still in preview.
Shittu Olumide** is a software engineer and technical writer passionate about leveraging cutting-edge technologies to craft compelling narratives, with a keen eye for detail and a knack for simplifying complex concepts. You can also find Shittu on Twitter.
News to Guide
ニュースの次に確認する
発表内容を、現在の料金や仕様と照らし合わせられる関連ガイドです。
今日のまとめ
AIデイリーブリーフで今日の重要ニュースをまとめ読み