巨大な AI 生成プルリクエストをレビュー可能なスタックへ変換
本文の状態
日本語全文を表示中
詳細モードで約15分の本文を読めます。
同じ出来事の情報源
この情報源を基点に整理
GitHub Blog
GitHub は、AI コーディングエージェントが生成する巨大なプルリクエストのレビュー難易度が高まる課題に対し、スタック型プルリクエストによる構造化アプローチの重要性を強調し、実用的な解決策を提示した。
AI深層分析を開く2026年8月5日 11:12
AI深層分析
キーポイント
AI エージェントとプルリクエスト構造のミスマッチ
Gartner の予測通り AI エージェントが生産性を向上させる一方で、従来のコード生成パターンは単一の巨大なプルリクエストを生み出しやすく、レビューを困難にする。
スタック型プルリクエストの活用
機能追加を複数の関連する小さなプルリクエストに分割し、連鎖させることで、コンフリクトの解消や文脈の維持を容易にする手法が提案される。
レビューの質と速度への影響
巨大な変更はレビューヤーの文脈喪失を招きフィードバック品質を低下させるが、小さな単位に分割することでレビューの効率と精度を回復できる。
スタック型プルリクエストによる分解
単一の巨大なプルリクエストではなく、依存関係を持つ論理的な層に機能を分解し、それぞれを独立してレビュー可能な小さな単位にする。
AI エージェントとの連携とスコープ管理
開発者が定義したワークストリームに従い、各層の担当エージェントが厳格なスコープ規則で作業を行い、単一関心のプルリクエストを生成する。
重要な引用
They amplify the need to make it.
The large pull request becomes hard to review—so it just…sits there.
Instead of shooting for a single pull request that addresses the issue in its entirety, you break down the feature into logical layers and identify the dependency chain to arrive at your desired goal.
Each agent follows a strict scoping discipline to achieve the goal of small, single-scoped pull requests.
編集コメントを表示
編集コメント
AI エージェントの台頭により、従来の開発ワークフローにおけるレビューの質が脅かされるという指摘は鋭い。スタック型プルリクエストの活用は、単なる技術的な工夫ではなく、AI 時代における協働開発の新たな標準となる可能性を秘めている。
Source Article
元記事を日本語で読む
本文に関係しない購読案内、埋め込み通知、サイト内プロモーションは除いています。
最後にリリースした大きな機能について考えてみてください。正直に答えてください。その機能を巨大なプルリクエストに詰め込んだか、それとも範囲を限定した小さなプルリクエストに分割しましたか?ここ数年、あなたは常に「レビューが地獄になるほど巨大化するプルリクエストを見守る」か「小さなプルリクエストの連鎖に分解して、変更が入るたびに手動で同期し、コンフリクトを解きほぐす必要がある」という選択肢の間で静かに決断を下してきました。
どちらの選択肢にもトレードオフがあります。一つはレビューが難しく、もう一つは維持管理が困難です。その日の判断は、より痛みが少ない方へ傾きます。
そこにコーディングエージェントを加えてみましょう。彼らは非常に生産性が高く、Gartner によると 2028 年までに SDLC のあらゆる段階で 50% の生産性向上を牽引すると予測されています。しかし、彼らがプルリクエストの構造をどうするかという選択自体を取り除くことはできません。むしろ、その重要性を増幅させるのです。
この記事では、スタックされたプルリクエストを使ってレビューを簡素化する例を追っていきましょう。
詳しく見てみましょう:ショッピングアシスタントへの商品検索機能追加
ショッピングアシスタントに商品検索機能を追加するようプロンプトを発行し、数分後に戻ってきてレビューや調整、承認を行うとしましょう。しかし、その単一のプルリクエストには往々にして以下のような内容が混在しています。
- 新しいデータモデルとそのシードデータ
- API ルートとそのバリデーション
- クライアント側の接続、UI、そして空の状態/フォールバック状態/エラー状態
これらすべてが、巨大な 1,000 行以上の差分として一つのプルリクエストにまとめられています。
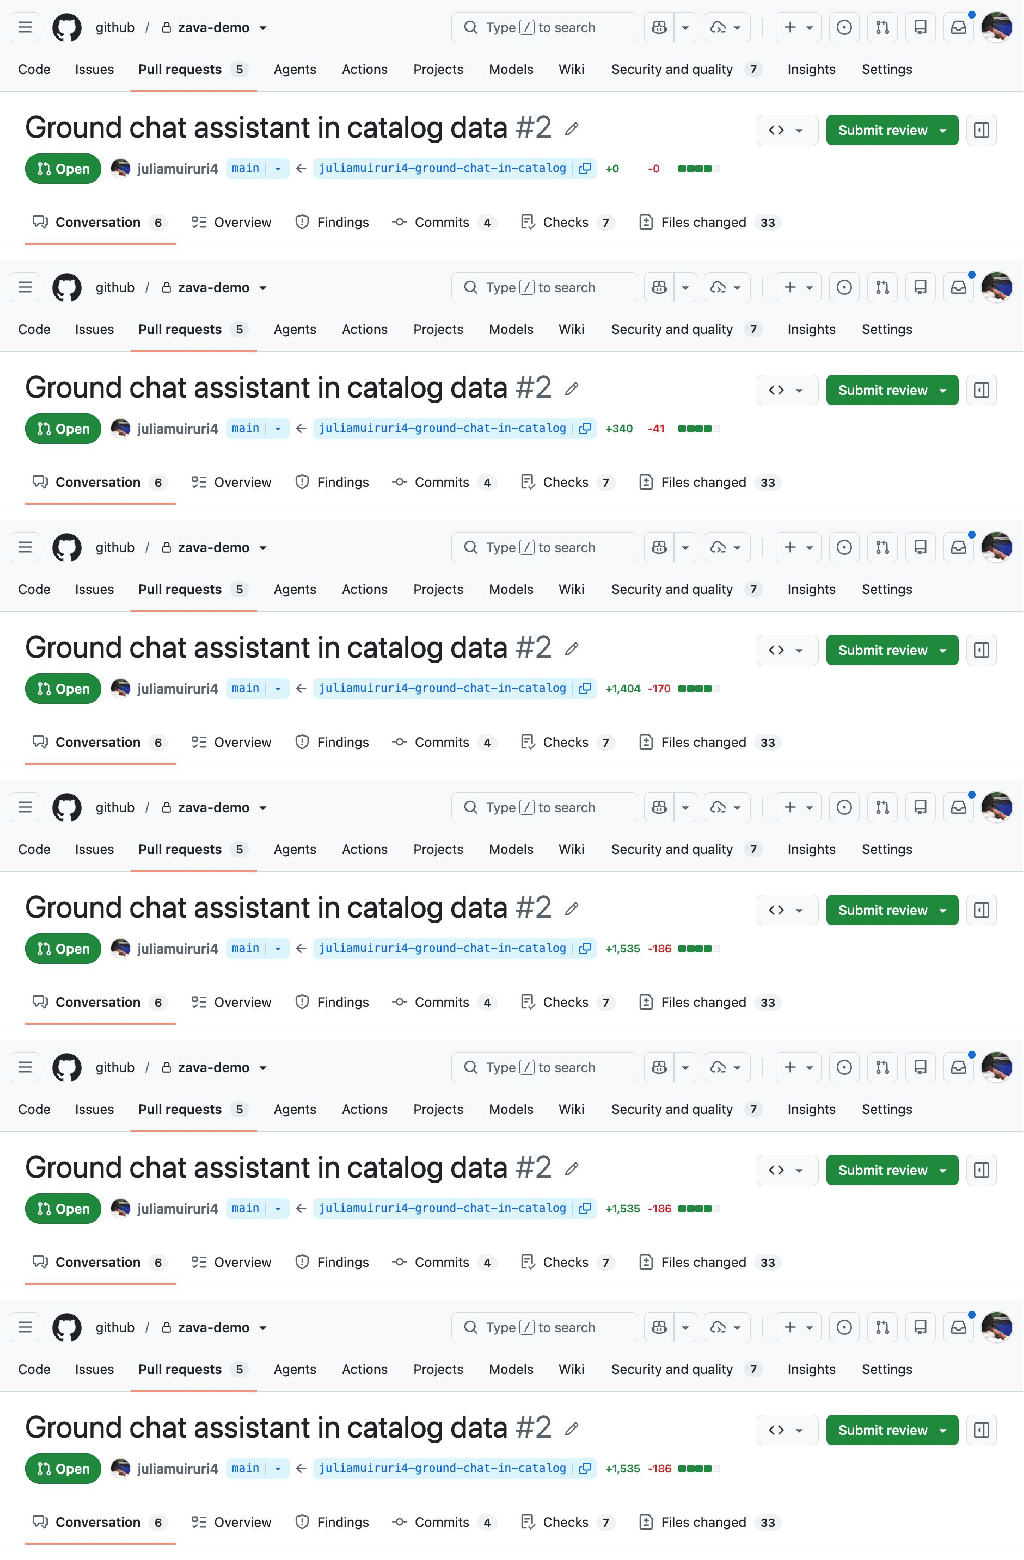
長年にわたり従来のコード記述法で訓練された AI エージェントにとって、このパターンはデフォルトのリリース方法となっています。では、実際にどうなるか見てみましょう。
既存の Web アプリケーションに商品検索機能を追加したいとします。その出発点は以下の通りです。
ランダム行生成器からの応答を表示するモック AI アシスタント
不整合な商品データがハードコードされ、コンポーネント間に散在している状態
カタログモジュールも API もデータ層もない——何もありません。
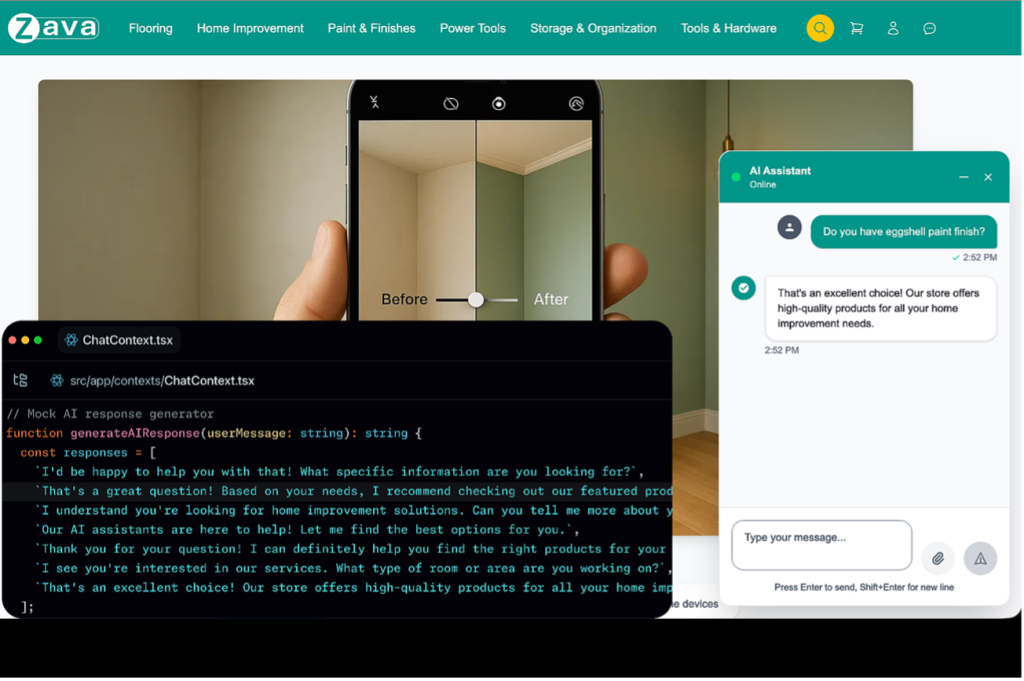
機能実装のためのイシューが作成されると、典型的なフローは、フィーチャーブランチを作成し、コーディングエージェント(または複数のカスタムエージェント)に割り当て、実装コードの最初のドラフトと更新されたテストを取得することになります。
……そして、あなたはコードを読み直します(いや、読むかもしれません)。その後、機能動作を手動で検証し、必要な修正を加え、プッシュして、長く浅い AI 生成の説明付きでプルリクエストを開き、CI チェックが緑になることを確認し、差分を自己レビューした上でレビュアーに依頼します。そして、こうなります。
レビュアー:1,721 行も変更されている!この説明は役に立たないな。後でレビューするよ。
その後に続くのはよくある光景です。
巨大なプルリクエストはレビューが困難になり、そのまま放置されます。
レビュアーは文脈を失い、フィードバックの質が低下します。
マージまでの時間がさらに長くなります。
これは、機能実装前に衝突が発生しやすく、手作業で手間のかかるプロセスを開始するものであり、最終的にはレビューが不十分な状態でリリースされてしまいます。
GitHub のスタックプルリクエストは、より良く異なる構造のデリバリーを導入します。その原理はシンプルです:分解です。課題をすべて解決する単一のプルリクエストを目指すのではなく、機能を論理的な層に分割し、目的の目標に到達するための依存関係チェーンを特定します。これにより、あなたやエージェントは、巨大なプルリクエストとして終わりがちな作業を、小さく焦点を絞り、独立してレビュー可能な層の連鎖へと分解するネイティブな方法を得ます。
レビューが困難だった大規模なプルリクエストは、論理的に順序付けられたより小さなプルリクエストのスタックへと変わります。各プルリクエストは単一の関心事項にスコープを絞り、レビュアーの頭の中で保持できるほど小さく、かつ直前のレビュー済みプルリクエストから自然に流れてくる十分なコンテキストを持っています。
では、実現しましょう。
スタック構造について
問題を分解し、層状のスタックを整える際の手順を見てみましょう。
まず、最も重要なのはスタックベースを設定することです。これは重要です。なぜなら、CI チェックやスタック管理ライフサイクル全体におけるマージルールは、このスタックベースに対して評価されるからです。
次に、作業の中核となる基盤ユニットを特定し、それをスタックの最下部(ベースに近い位置)に配置します。そして、依存する作業をその上に層状に積み上げていきます。
- スタック層 (L#)/ブランチ:出荷対象 / 依存先
L1 (feat/catalog-data): シードデータ、バリデーション、データアクセスモジュールを備えた型付きカタログ
main (stack base)
L2 (feat/search-api): バリデーション済み /api/products/search エンドポイント feat/catalog-data
L3 (feat/chat-grounding): チャットが API を呼び出し、実際の製品データから回答する feat/search-api
L4 (feat/grounded-ui): 製品の引用カードと状態管理 feat/chat-grounding
こうすることで、データ、API、接続、UX という各関心が明確になり、それぞれのレビュー担当者を割り当てることが可能になります。データはデータ所有者が、UI は UI 担当者がレビューを行います。
GitHub のネイティブなスタックプルリクエスト機能は、プルリクエスト UI から起動でき、gh stack CLI を介してターミナルへシームレスに拡張されます。
スタックプルリクエストの CLI 拡張機能をインストールするには、以下を実行してください。
gh extension install github/gh-stack
従来ならこれで作業開始だったところですが、今回は違います。あなたと共に働くエージェントがいます。これらのエージェントには、スタックの仕組みや、あなたの代わりにそれらを作成・管理する方法を学習させる必要があります。そのために「gh-stack skills」が用意されています。
gh skill install github/gh-stack
あるいは、以下のようにしても構いません。
npx skills add github/gh-stack
上記の例にある特定の特徴を実現するための開発ワークフローでは、各エージェントに定義された作業ストリームと、小規模で単一スコープのプルリクエストという目標を達成するための厳格なスコーピング規律が設定されています。
レイヤー/ブランチ エージェント
L1 (feat/catalog-data) データモデラーエージェント
L2 ( feat/search-api) バックエンドエージェント
L3 (feat/chat-grounding) フロントエンドエージェント
L4 (feat/grounded-ui) フロントエンドエージェント
セットアップの最後のステップは、CI(継続的インテグレーション)が設定されていることを確認することです。前述した通り、各プルリクエストはスタックベースに対して評価され、これらのチェックはすべてのレイヤーで実行されます。
これで本格的な作業が始まります。
レイヤー 1:データカタログの基盤
現在のエージェントワークフローの多くは自動化されており、ループ内で自律的に実行されますが、説明のためにここでは一歩ずつ解説していきます。
この時点では、すべてのエージェントがスタックされたプルリクエストの仕組みに精通しています。したがって、この段階での典型的なワークフローは以下のようになります。
- データモデラーエージェントを適切なプロンプトで呼び出す
- エージェントが新しいスタックを初期化し、feat/catalog-data という最初のブランチを作成します。ベースには main を指定し、コマンド gh init stack を使用します。
- チェックアウトして作業を行い、バリデーションを実行する
- (すべてのチェックが緑色=成功) → レイヤーをコミット / (失敗) → 反復処理
将来のレビュアーへのメモ:型は正しいか?データは検証されているか?クエリヘルパーは安全か?これを定期的に確認してください。
レイヤー 2:製品検索 API
以下のようなフローに従います。
- バックエンドエージェントを適切なプロンプトで呼び出す
- エージェントが次のレイヤー feat/search-api を追加します。ベースとなるのはレイヤー 1 の feat/catalog-data です。これにより、完了したデータアクセスモジュールをインポートできます。コマンドは gh stack add です。
- チェックアウトして作業を行い、バリデーションを実行する
- 開発者が API を手動でテストする
- (API が動作し && すべてのチェックが緑色=成功) → レイヤーをコミット / (失敗) → 反復処理
将来のレビュアーへのメモ:入力値は検証されているか?レスポンスの契約(コントラクト)は安定しているか?エラーや空の状態はここで処理されるのか、それとも下流に委譲されるのか。これらを必ず確認してください。
レイヤー 3: チャットを API に接続する
次のレイヤーでは、以下の手順を実行します。
適切なプロンプトでフロントエンドエージェントを呼び出します。
エージェントは、レイヤー 2 をベースに「feat/chat-grounding」という新しい機能を追加します。このベースとなるのは「feat/search-api」で、データアクセスモジュールと検証済みの API を含むブランチが作成されます。
チェックアウトして動作確認を行い、Playwright でブラウザテストを実行します。
(すべてのチェックが緑色=合格) ならそのレイヤーをコミットする。そうでなければ反復(イテレーション)を行います。
将来のレビュアーへのメモ:回答すべては実際の API レスポンスに遡れるか?API が失敗したり、何も返さなかったりした場合はどうなるのか。これらも必ず確認してください。
レイヤー 4: 根拠のある UI と引用表示
レイヤー 3 とレイヤー 4 は同じ著者(フロントエンドエージェント)によって作成されていますが、その積み上げ方は意図的に異なります。これは、UI の担当者が背後のデータフローまでチェックする必要がなく、逆にデータフローの担当者も UI を気にしなくて済むようにするためです。この構造により、両者の独立性を担保しています。
したがって、フロントエンドエージェントは以下の作業を行います。
レイヤー 3 に「feat/grounded-ui」という新しい機能を追加します。ベースとなるのは「feat/chat-grounding」です。
チェックアウトして動作確認を行い、Playwright でブラウザテストを実行します。
(すべてのチェックが緑色=合格) ならそのレイヤーをコミットする。そうでなければ反復(イテレーション)を行います。
将来のレビュアーへのメモ:すべての引用リンクは実際の製品に結びついているか?読み込み中、空の状態、エラー状態はすべてカバーされているか。これらも必ず確認してください。
スタックを提出する
ローカルに作成した 4 つのスタックブランチは準備完了です。次は gh stack push でリモートへプッシュし、gh stack submit を使って GitHub 上で相互リンクされたプルリクエストを作成します。
各レイヤーにおけるスタックマップと CI の状況
GitHub に切り替えると、4 つのプルリクエストがすべてオープン状態になります。それぞれのトップには「スタックマップ」が表示され、これはスタック内のプルリクエスト間をワンクリックで移動できるナビゲーションシステムです。
スタックのレビューと更新
ここからは帽子をかぶり変え、レビュアーとしての視点でスタックされたプルリクエストをどう扱うか見ていきましょう。
スタックマップは、スタックの最上部から最下部へと、成功するマージを目指すためのナビゲーション支援ツールです。移動方向は明確で、「上から読み、下からレビュー」します。
文脈把握のために「上から読む」ことで、レビュープロセスの最初に関数の最終目標を把握できます。「ああ、チャットインターフェースに商品カードを表示するのが目的なんだ」というように方針が定まります。
一方、事前に決めたチェックポイントを積み上げるために「下からレビュー」します。各レイヤーの実装は、その前のレイヤーを理解した上でなければ意味を持ちません。
先ほどの例のように、一度に 1,720 行を超える単一の巨大なプルリクエストをレビューする必要はありません。代わりに、スタックとして分割された小さく独立したターゲット単位でレビューを分散できます。
レビュープロセスに関与する人間であるあなたは、まずスタックの最下位にあるレイヤー 1 のプルリクエストを確認します。すると、自動コードレビュー機能「Copilot Code Review (CCR)」が 2 つの問題を検出し、それらを修正すべきだと判断していることがわかります。
スタックの下部で変更が求められた場合、以下の手順で対応します。
まず、そのブランチを所有するレイヤー 1 の作者(データモデル化エージェント)にフィードバックを渡してください。提案された修正は適用され、テストされ、コミットされ、プッシュされます。
feat/catalog-data ブランチへの修正が反映された後、自然な次の疑問は「これはレイヤー 2、3、4 にどのような影響があるのか?」となります。
しかし、レビューの順番を無視して feat/catalog-data ブランチがプッシュされたため、GitHub は明確に警告を表示します。「このスタック内の一部のブランチが分岐しており、リベースが必要です」というメッセージと併せて、「スタックとしてマージできません」というフラグが表示され、マージがブロックされます。
GitHub のプルリクエスト UI 上には、ワンクリックで実行できる「Rebase stack」ボタンが表示されます。ただし、このボタンを使用する前に注意すべき点があります。このボタンを使って Web ベースのリベースを実行すると、処理は GitHub サーバー上で実行されるため、コミッターがボタンをクリックしたユーザーにリセットされてしまいます。その結果生成されたコミットには署名が付与されず、ブランチ保護ルールで署名付きコミットが要求されている場合、ワンクリックの操作が静かにルール違反を引き起こすことになります。
より安全な代替手段は、ターミナルから gh stack rebase を実行することです。これにより、インタラクティブに競合を解決しながら、ローカル環境で同じカスケードリベースを実行できます。この場合は自分の Git 設定が使用されるため、署名の問題も回避されます。その後、gh stack push でプッシュします。
最後に、スタック全体に修正を伝播させる必要があります。ローカルおよび GitHub 上の残りのスタックはすべて更新される必要があり、そのための手順は gh stack sync という単一の同期コマンドを実行するだけなので、これほど簡単なことはありません。
この一連のフローは、origin からフェッチを開始し、feat/catalog-data 上のすべてのブランチを新しいコミットに対してリベースする連鎖処理から始まります。その後、リベースされたブランチをプッシュし、GitHub のプルリクエストの状態を同期します。これにより、変更が上層へ波及しますが、レイヤー 2、3、4 を手動で触る必要はありません。
GitHub に戻ると、すべてのチェックが再実行され、パスしてスタックマップは main から feat/grounded-ui までクリーンでマージ可能な状態に戻ります。
スタックプルリクエストの始め方 >
この記事「巨大な AI 生成プルリクエストをレビュー可能なスタックに変える」は、The GitHub Blog に掲載されました。
原文を表示
Think about the last big feature you shipped. Be honest. Did you cram it into one giant pull request, or did you split it into smaller scoped pull requests? For years, you have silently had to decide between watching a pull request grow so large that reviewing it becomes a nightmare or breaking it into a chain of smaller pull requests that you have to babysit, sync by hand, and untangle conflicts every time a change is introduced below.
Both options have trade-offs. One is hard to review, while the other is hard to maintain. Your decision that day leans towards the less painful option.
Now add coding agents. They are incredibly productive and are projected to drive a 50% productivity gain across every SDLC stage by 2028, according to Gartner. But, they can’t take away the choice of how you structure your pull requests. They amplify the need to make it.
In this post, follow along with an example of how you can use stacked pull requests to simplify reviews.
A closer look: Adding product search to a shopping assistant
Let’s say you issue a prompt to add product search to a shopping assistant, walk away and minutes later, literally, you come back to review, steer, and approve. But look closely at what tends to land in that single pull request:
A new data model and its seed data
An API route and its validation
The client wiring and the UI and the empty/fallback/error states
…all of this and more in one ginormous 1,000+ line diff.
For agents largely trained on how code has traditionally been written over the years, this pattern is their default way of shipping. Let’s play this out.
You want to add product search on as existing web application and your starting state is:
A mock AI Assistant showing responses from a random-line generator
Inconsistent product data hardcoded and scattered across components
No catalog module, no API, no data layer—no nothing
An issue is opened to implement the feature, and a typical flow would be to create a feature branch, assign it to a coding agent (or multiple custom agents), get a first draft of the whole implementation code and updated tests…
…you read the code (well, you maybe read the code). Then, you still need to manually verify feature behavior and make any necessary updates, push and open a pull request with its long-yet-shallow AI generated description, ensure CI checks are green, and self-review diff then request reviewers. You get started…
<reviewer's hat>
Reviewer: 1,721 lines changed!! This description isn’t very helpful. I’ll review this later.
</reviewer's hat>
And what follows is familiar:
The large pull request becomes hard to review—so it just…sits there.
Reviewers lose context and the feedback quality drops.
It becomes even slower to merge.
This kicks off a manual, messy, time-consuming process that’s prone to conflicts before the feature lands, and it eventually lands under-reviewed.
GitHub stacked pull requests
Stacked pull requests introduce a different and better structure of delivery. The principle is simple: decomposition. Instead of shooting for a single pull request that addresses the issue in its entirety, you break down the feature into logical layers and identify the dependency chain to arrive at your desired goal. This gives you, and your agents, a native way to decompose work that otherwise lands in a giant pull request into a chain of small, focused and independently reviewable layers.
That large pull request that’s hard to review becomes a stack of smaller, logically ordered pull requests, each scoped to a single concern, small enough to hold in a reviewer’s head and with just enough context naturally flowing from the previously reviewed pull request.
Let’s make it happen.
The stack structure
Let’s look at the steps involved when decomposing the problem and arranging the layered stack.
First, and importantly, set the stack base. This matters because CI checks and merge rules throughout the stack management lifecycle get evaluated against the stack base.
Then, identify the core foundational unit of work and put it closer to the base (lowest in the stack), and layer dependent work above it.
Stack Layer (L#)/Branch What to ship Depends on
L1 (feat/catalog-data) A typed catalog with seed data, validation, and a data access module main (stack base)
L2 (feat/search-api) Validated /api/products/search endpoint feat/catalog-data
L3 (feat/chat-grounding) Chat calls the API and answers from real product data feat/search-api
L4 (feat/grounded-ui) Product citation cards + state feat/chat-grounding
Now the independent concerns are clear: data, API, wiring, UX, making it possible to allocate different reviewer audiences for each. Data is reviewed by a data owner, UX by a UI owner.
GitHub’s native support for stacked pull requests can be launched from the pull request UI and extends seamlessly to the terminal with the gh stack CLI.
Install the stacked pull requests CLI extension
Run the following:
gh extension install github/gh-stack
In ancient times, you’d be set to start working. Not today though. There are agents working alongside you. These agents need to learn how stacks work and how to create and manage them on your behalf. The gh-stack skills teaches them this.
gh skill install github/gh-stack
Or, if you prefer:
npx skills add github/gh-stack
For the specific feature from the above example, your development workflow has custom agents, each with defined work streams and that follow a strict scoping discipline to achieve the goal of small, single-scoped pull requests.
Layer/branch Agent
L1 (feat/catalog-data) Data modeler agent
L2 ( feat/search-api) Backend agent
L3 ( feat/chat-grounding) Frontend agent
L4 ( feat/grounded-ui) Frontend agent
The last piece of the setup is to confirm CI exists. As mentioned earlier, each pull request will be evaluated against the stack base, and these checks will run for every layer.
Now the work begins.
Layer one: Data catalog foundation
Most agent workflows today are automated and execute autonomously in loops, but for the sake of illustration, we’ll cover each step at a time.
At this point, all agents are familiar with how stacked pull requests work, so a typical workflow at this stage would be:
Invoking the Data Modeler agent with an appropriate prompt
The agent initializes a new stack and sets the first branch—feat/catalog-data with main as its base using gh init stack
Checks out, works and runs validation
(All checks == green) ? commit the layer : Iterate
Reviewer’s note for the future: Are the types correct? Is the data validated? Is the query helper safe? Period.
Layer two: Product search API
Follow a flow similar to:
Invoking the Backend agent with an appropriate prompt
The agent adds the next layer feat/search-api on top of layer one, its base: feat/catalog-data, to import the completed data access module with gh stack add
Checks out, works and runs validation
Developer tests the API manually
(API works && All checks == green) ? commit the layer : Iterate
Reviewer’s note for the future: Is input validated? Is the response contract stable? Are error/empty states handled here or pushed downstream? Period.
Layer three: Wire chat to the API
In this next layer, you:
Invoke the Frontend agent with an appropriate prompt
The agent adds the next layer feat/chat-grounding on top of layer two. Its base: feat/search-api, which will branch off with both the data access module and validated API.
Checks out, works and runs browser tests with Playwright
(All checks == green) ? commit the layer : Iterate
Reviewer’s note for the future: Is every answer tracing back to a real API response? What happens when the API fails or returns nothing? Period.
Layer four: Grounded UI and citations
You’ll notice that layer three and layer four, despite having the same author, (Frontend agent), are layered distinctively. This is deliberate. The UI owner should not have to check the underlying data flow and vice versa, and this structure allows for that independence.
So, the frontend agent:
Adds the next layer feat/grounded-ui on top of layer three, its base: feat/chat-grounding
Checks out, works and runs browser tests with Playwright
(All checks == green) ? commit the layer : Iterate
Reviewer’s note for the future: Does every citation link back to a real product? Are loading, empty and error states all covered? Period.
Submit the stack
The four local stacked branches are ready. Next is to push them to remote with gh stack push, then create pull requests linking them on GitHub with gh stack submit.
The stack map and CI on each layer
Switching over to GitHub, all four pull requests are open and at the top of each one, you see a stack map, which is a one-click navigation system between pull requests in the stack.
Reviewing and updating the stack
Time to switch hats and look at a reviewer’s journey through stacked pull requests.
<reviewer’s hat on>
The stack map is a reviewer’s compass – a navigation aid between the top of the stack and its bottom, heading towards a successful merge. The movement is directional: read top-down, review bottom-up.
Read top-down, for context. This gives you the end goal at the very beginning of the review process, so you can set a bearing. “Oh, so we want to display product cards on the chat interface.”
Review bottom-up to build on the predetermined checkpoints. The implementation on each layer only makes sense once the preceding layer is understood.
You are no longer looking at a single 1,720+ line-sized pull request to be reviewed in one sitting, as we saw in our example, but instead, the review can be distributed in small, self-contained targets in a stack.
As the assigned human in the loop reviewer, you come in and look at layer one, the pull request at the bottom of the stack, and see that the automatic Copilot Code Review (CCR) caught two issues which you agree should be fixed.
<developer's hat back on>
Changes are requested at the bottom of the stack, so you:
Hand the feedback to the layer one author, data modeler agent that owns the branch
Suggestions are applied, tested, committed and pushed
Once the fix lands on feat/catalog-data, the natural next question is: what does this mean for layers two, three, and four?
Since branch feat/catalog-data was pushed out of turn after the review, GitHub flags it plainly: “Some branches in this stack have diverged and must be rebased” paired with “Unable to merge as a stack” flag and that blocks the merge.
Back on the pull request UI on GitHub, a one-click Rebase stack button appears. Before using the button, there is something important worth noting. Triggering a web-based rebase using this button runs it on GitHub’s servers, which means it resets the committer to whoever clicked the button, the resulting commits aren’t signed, and if branch protection expects signed commits, that one click quietly breaks.
The safer, equivalent move from the terminal would be gh stack rebase to perform that same cascading rebase locally as you interactively resolve conflicts, but this time using your own Git configuration, then gh stack push.
Finally, you’ll propagate through the stack. The rest of the stack, both local and on GitHub, now needs to catch up, and it couldn’t be easier than a single sync command gh stack sync.
An all-in-one flow starts with fetching from origin, cascading a rebase of every branch above feat/catalog-data onto the new commit, pushes the rebased branches and syncs pull request state from GitHub. This way, the change ripples upward without anyone touching layers two, three, or four by hand.
Back on GitHub, all checks re-run, pass and the stack map settles back into a clean, mergeable line from main to feat/grounded-ui.
Get started with stacked pull requests >
The post Turn one giant AI-generated pull request to a reviewable stack appeared first on The GitHub Blog.
今日のまとめ
AIデイリーブリーフで今日の重要ニュースをまとめ読み